

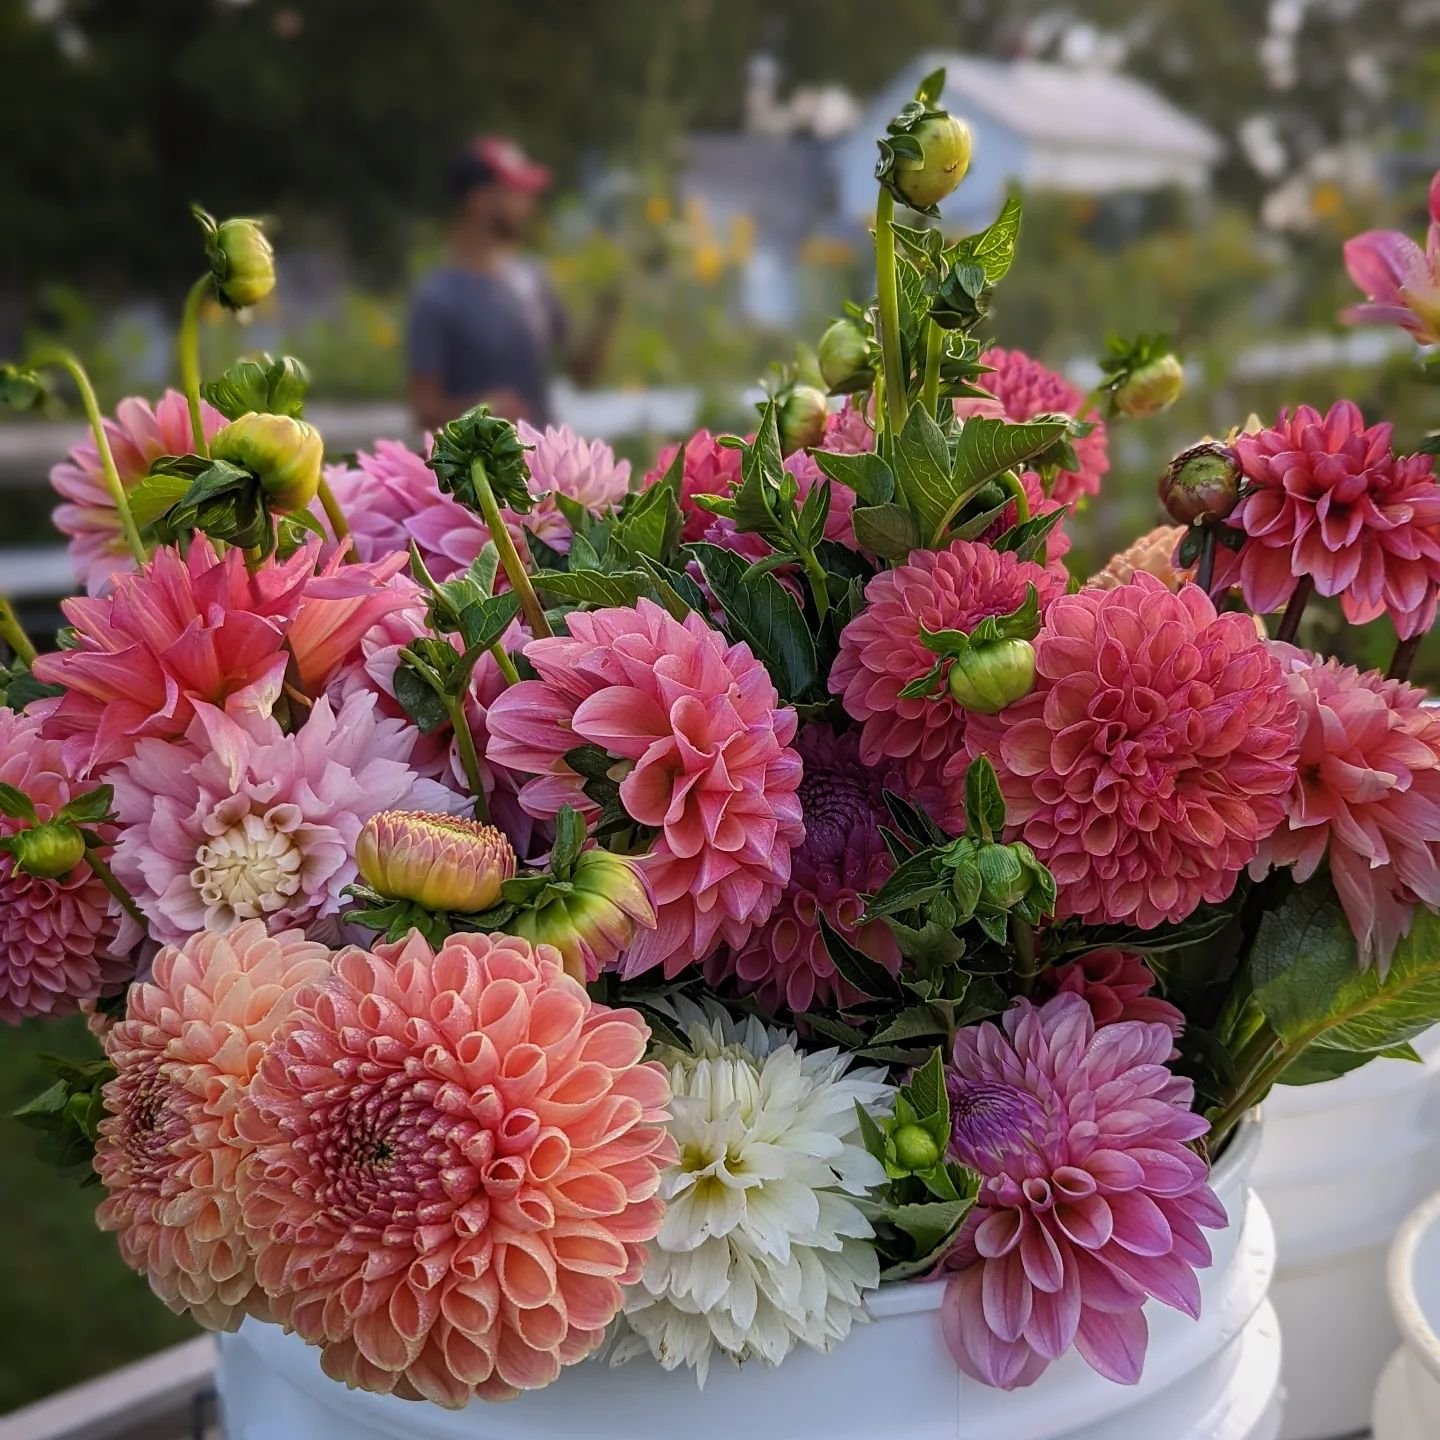
Apple Cider Doughnut Cake
Yeah, you read that right. A DOUGHNUT CAKE. And yeah, you're going to want to make this.
Apple Cider Doughnut Cake Recipe
Friend, stop what you are doing right now and go buy some apple cider so you can make this cake. You won’t regret it.
The first time I shared a photo of this cake on social media 7 years ago, I was immediately inundated with requests for the recipe... so here you go!
Now you can stop drooling and make it yourself. ;)
Oh, and while you’re at it… freeze a couple cups of apple cider in 1 cup portions, so you can make this mid winter, when apple cider is out of season. You’re going to feel like a GENIUS. Trust me.
![IMG_20171208_160758_099[1].jpg](https://images.squarespace-cdn.com/content/v1/582b872529687fd6acb7423d/1512769806951-CTDZ2V1LGK589SVJGHBO/IMG_20171208_160758_099%5B1%5D.jpg)
Apple Cider Doughnut Cake
* Adapted from "A New Way to Bake" by the Editors of Martha Stewart Living
2 tbsp unsalted butter, melted, plus more for the pan
2 cups all purpose flour, plus more for pan
1 cup whole-wheat flour
1 1/2 tsp baking powder
2 tsp ground cinnamon
1/2 tsp baking soda
3/4 tsp salt
1 1/2 cups natural cane sugar, + 3 tbsp
1 cup apple cider
3/4 cup extra virgin olive oil (you can try using a different oil, if desired)
3/4 cup unsweetened applesauce
2 tsp vanilla extract
3 large eggs, at room temperature
Method
1. Preheat oven to 350 degrees. Butter and flour a 12 cup Bundt pan. Be generous with the butter and flour so the cake doesn't stick.
2. In a large bowl, combine both flours, baking powder, 1 1/2 tsp of the cinnamon, the baking soda and the salt.
3. In another bowl, whisk together 1 1/2 cups sugar, the apple cider, olive oil, applesauce, vanilla and eggs.
4. Add wet mixture to the dry the mixture and whisk until combined. Pour into the prepared Bundt pan.
5. Bake for about 45-50 minutes, rotating the pan halfway through, until a tester comes out clean.
6. Transfer pan to a wire rack and allow to cool for 15 minutes.
7. Meanwhile, melt the butter (if you haven't already) and combine the remaining 3 tbsp of sugar with 1/2 tsp of cinnamon. Turn out cake onto a rack with a plate underneath (to catch the spills). Brush cake with melted butter, then sprinkle liberally with cinnamon-sugar.
8. Let cool completely before serving (yeah right!!!). Cake can be kept, covered, at room temperature for 2 days.
Did you try it?
Let me know what you think! I kind of have a thing for Apple Cider Doughnuts... Of course, this is not quite the same as deep fried doughnut, but my family agrees it's a pretty good substitute.
Enjoy!

How to Dig and Store Your Dahlia Tubers
Not sure how to dig, divide and store your dahlias? Relax! Here’s everything you need to know to successfully overwinter your dahlia tubers!
How to Dig and Store Your Dahlia Tubers
This time of year, I receive countless questions about digging and storing dahlia tubers. There is so much conflicting advice and uncertainly. Some people start to panic!
I get it. Tubers are a big investment and of course, you want to do everything you can to ensure your tubers survive over the winter.
I’m going to walk you through the process we use for digging and storing our dahlia tubers. After reading and watching the videos, you should feel more confident and ready to try it on your own!
Before we dive in, I want you to know 2 things:
1. There are several different methods that can be used to store dahlia tubers. When you hear “seemingly contradicting” advice, just know that different methods work for different storage situations. The way WE store them might not be best for YOU, since we don’t have the exact same storage spots.
2. If you are new to storing dahlia tubers, I highly recommend you try a few different storage methods and locations. This will help you discover the ideal methods for YOU. It’s never a great idea to “put all your eggs in one basket”. This way, if one method is a flop, you have a back up supply of tubers.
Got it? Good.
So, first… here’s a quick video that shows you what dahlia tubers clumps should look like AFTER you dig them up. Notice the big clump of tubers and the short stem.
Ok, now that you know what you’re going for and what the tubers look like, let’s get digging!
Digging and Storing Your Dahlia Tubers.
Step 1: Wait for Your First Frost
Dahlias are very sensitive to frost. You’ll know you’ve had a frost because one day your plants will look beautiful… and the next day they will be black and dead (see before and after photos below). Flower farmers call the First Killing Frost of the Season “Frostmas”. ;)
Feel free to go out by your dead dahlias and cry a little bit. No judgement here. Goodbye, my loves…
Frost covered dahlias are gorgeous, but they only look pretty for about an hour and then they turn to mush. Get out there and take photos! It only happens once a year!
You don’t HAVE to wait for the frost to kill the Dahlias in order to dig them up. However, it’s best to allow them to grow for at least 135 days (four and half months)… which naturally coincides with many grower’s frost dates, which is why frost is usually the signal to start digging!

Happy Frostmas! “Black Satin” after the first frost.

BEFORE: Dahlia field the day before the 1st frost.

AFTER: Dahlia field the day after the 1st frost. These photos were taken within 24 hours of each other!
Step 2: Cut Back the Plants… and Wait
Once the frost has killed the plants, go through with a heavy clippers or loppers and cut back the main stem and all the foliage, leaving a “stem handle” sticking up out of the ground about 4-6” long.
Once you have cut back the plants, it’s time to WAIT. You can relax for a week or two. Simply leave the tuber clumps in the ground, undisturbed.
Cutting back like this signals the tubers below the ground to set “eye” (sprouts) on the tubers. This is helpful because you need to be able to see the eyes if you plan on dividing your tuber clumps right away.
Cutting back also signals the tubers to cure and toughen up, which helps them store better over the winter.
Don’t have to time to leave them in the ground? Sometimes the weather or your life commitments are not conducive to waiting. No problem, friend. You can cut and dig on the same day. It just might be a little trickier to see the eyes when you dig them up.
If you have not received a killing frost by November 1, you can start cutting back plants anyway. You want to leave yourself enough time to get them out of the ground before the ground freezes. Yup, I’ve been out there digging the last of the tubers out in the snow in December. ;)

We made “Cut Back the Plants” day into a work party and cut back the whole field in 1 hour!
Step 3: Time to Dig!
After 1 -2 weeks of curing in the ground (or less, if you need to dig right away), you can begin digging.
Using a pitchfork, CAREFULLY loosen the soil on all sides of the tuber clump. Take care to NOT break the tubers. They are EXTREMELY fragile.
Do NOT yank up the tuber clump by the “stem handle.” Instead, place one hand on the handle and use the other hand to pry up the clump with the pitchfork.
Gently remove excess soil from around the tubers with a pencil, stick or paint brush. Clip off “root hairs” and any broken tubers.
Using a loppers or heavy clippers, cut off the “stem handle” near the base of the clump, leaving about 1-2 inches. Do NOT cut too low or you will cut off the “eyes”!
Place the clump in a bag or crate with the dahlia variety name clearly marked on it.
Bring the bags/crates to a cool, dry location out of direct sunlight (like a garage or covered porch) and allow them to dry to the touch. This may take a few hours or a few days, depending on weather conditions and temperature. BUT MAKE SURE THEY DO NOT FREEZE DURING THIS TIME!!! Unfortunately, we know this from experience. :(
Do NOT set tubers directly on concrete to dry. It will dry them out. Place them on tables, counters, pallets, crates, etc.

A nice looking dahlia tuber clump!
Step 4: To Divide… Or Not to Divide
Once your tubers have dried for about a week, you need to decide:
Will you divide your clumps now or in the spring?
We usually divide in the spring (we simply don’t have time to deal with them in the fall!), so we store our tubers in clumps. We feel keeping the clumps whole as long as possible helps the tubers to store better… but obviously, it takes up waaaaaay more room than storing individual tubers.
If you do decide to divide in the fall, you will need to do a little more babysitting over the winter.
*Please note: We HIGHLY recommend you sanitize your snips/knife/tools between tuber to clumps to prevent the possible spread of disease between plants.
IF YOU DIVIDE IN THE FALL:
Wash clumps and allow them to dry overnight… or simply brush off excess dirt with a paintbrush (this works best for light sandy soil. If you grow in heavy clay, you will need to wash them).
Divide the clumps into individual tubers (watch the video below to learn how). Allow cut ends on tubers to dry and cure, about 1-2 days. Remember: ONLY tubers with “eyes” are viable!
Store tubers in bins/boxes filled with vermiculite, peat moss, or wood shavings. Be sure that they are not touching each other! Fill the bin with about 1-2 inches of storage material and carefully place the tubers so they are not touching. Sprinkle another 2 inches of storage material on top and add another layer of tubers, and so on. They can also be wrapped in newspaper to prevent touching.
Store at 40-45 degrees Fahrenheit, with about 80-90% humidity.

“Eyes” on a tuber.
IF YOU ARE LEAVING THE CLUMPS WHOLE:
Leave clumps unwashed. Brush off as much dirt as possible.
Store in boxes/plastic or paper bags/crates at 40-45 degrees Fahrenheit, with about 80-90% humidity. If you are storing in a dry place, plastic bags may work best. If you are storing in a damp place, paper bags may work best.

Tubers in a paper bag ready for winter storage.
Step 5: Long Term Storage
THIS IS THE TRICKIEST PART OF GROWING DAHLIAS. Dahlias are relatively easy to grow, but proper winter storage can be a struggle!
Here are a few tips for storing your tubers over the winter, regardless if they are divided or not.
Store at 40-45 degrees Fahrenheit. If the tubers freeze, they will turn to mush when they thaw. If they get too warm, they could rot.
Humidity at about 80-90%. Ensure that the tubers are not too dry (they will shrivel) and not too wet (they will rot). If your space is dry, you can control this by storing in plastic bins/bags and occasionally spritzing with water. If your space is damp, try storing in paper bags/cardboard boxes that will help absorb moisture. Peat moss, wood shavings and vermiculite will also help regulate humidity. You may need to run a dehumidifier OR a humidifier, depending on your needs.
Check on your tubers every few weeks. Remove any rotted, mushy tubers. Mush is no good. If the tubers looks shriveled and dry, don’t toss them - move them to a more humid location. I’ve seen the most terrible dead-looking tubers come back to life in the spring.
Sometimes the tubers develop small amount of mold. Don’t panic. It means your spot is too humid. Move them to a drier spot and simply brush off or wipe off the mold.
FOR BEST RESULTS, we recommend trying a few different storage methods and locations. Keep notes and make observations. Until you discover what works for you, it’s wise to not “put your eggs in one basket.”
People are always asking me:
“How do you store YOUR Dahlia tubers?”
I’m reluctant to talk about our storage method, because it’s nearly impossible to replicate our method. If you want to see how we do it, you can read about it HERE.
BOTTOM LINE: You will have to do your own experimenting/trialing to figure out the best place and method for YOU to store YOUR Dahlias tubers. What works for someone else could be disastrous for you.
I wish there was a “one-size-fits-all” solution. I really do!!! But there isn’t, because every single Dahlia grower in the world has a slightly different storage solution. Nobody has the exact same storage area or conditions.
Concluding Remarks
Thanks for taking the time to read this. I know, it’s a lot of overwhelming information and some of you are wondering if it’s worth all the time and effort. And maybe now you understand why dahlia blooms cost more than most other flowers! They are a real labor of love!
You don’t HAVE to dig up your tubers every fall. Some people simply decide to purchase new tubers every spring and that is fine! If you are on our email list, you’ll be the first to know when we have dahlia tubers available in the late winter/early spring.
You also can try experimenting with “overwintering” you tubers in the ground, depending on where you live. Here in Zone 5b in the Great White North (Michigan), dahlias will not survive over the winter, but… let me tell you what happened to us last year!
We had several “Blizzard” variety dahlias that we did not need to dig up (because each plant produces about 20+ new tubers!) so we left them in the ground. Our neighbors gave us huge loads of maple leaves and they ended up in a giant heap (2-3 feet deep) over the dahlias. We meant to move them but didn’t get around to it before the snow came.
Come spring, I lifted up that thick layer of leaves… and found a dozen healthy dahlia plants sprouting! We transplanted them and they did GREAT this season. So, it IS possible to overwinter them, but it might have been a fluke.
It’s worth experimenting with though, if you have large amounts of leaves you can mulch with…
That’s it, folks.
Have fun digging your tubers!
-Lori
Top 10 Fall Flower Farm/Garden Tasks to Start Today
Finish strong! Fall is the best time to accomplish these important farm/garden tasks.
Top 10 Fall Flower Farm/Garden Tasks to Start Today
Fall may be here but there’s still lots of work to be done in the field and garden!
In fact, fall is the most labor intensive season on the farm. After a long growing season, we’re bone deep tired. My husband and I often yell out to each other “Finish strong!” as we stumble our way toward the finish line (Thanksgiving is unofficial “end date” for field work). Ha!
Here’s my list of some of the most important “Fall Tasks” to tackle before the snow arrives.
1. Take Notes and Make Evaluations
Over the growing season, I take a farm walk each Sunday morning and write notes to my Future Self to help me make better growing decisions in the future. It takes me about 10 minutes, but it’s incredibly valuable.
At the end of the season, I allow myself a couple hours to do a longer farm walk and reflect on the entire year as a whole.
What worked? What didn’t? What did I love? What have I outgrown? What felt right? What do I actually want to grow?
It’s a simple notebook and it’s literally just scribbled notes like:
“Don’t grow as much Amaranth next year”
“Snow Maiden Scabiosa is a pain in the butt to harvest. I don’t ever want to do this again.”
“Plant 4 successions of Tender Annuals next year instead of 3”
When I start making my crop plans and seed order lists in the winter, I pull out these notes and thank my Past Self for being so honest and truthful. Because let’s face it, in the winter we all want to grow ALL THE THINGS… but my Past Self reminds me of what I actually need to grow. ;) Stick with the plan!
2. Submit a soil test
Fall is the best time to take and submit a soil test. Any soil test at any time of year is better than no soil test… but fall is ideal.
When taking and submitting a soil test, be sure to follow the instructions on the test EXACTLY.
Once your soil test has been mailed in and analyzed, you’ll receive recommendations on what you can do to improve your soil.
I suggest adding the soil amendments in the fall, rather than the spring. Why? Soil amending is a slow process and the sooner you can start, the better. Adding the amendments in the fall allows them to slowly incorporate into the soil over the winter, so that your soil is ready to go in the spring.
Do not skip this task. I know it can feel confusing, but HEALTHY SOIL = HEALTHY PLANTS. Improving the health of your soil is the absolute best thing you can do to reduce pest/disease issues and increase the productivity of your plants.
3. Cut back summer crops and repare your planting beds/areas for early spring planting.
If you want to plant “Hardy Annuals”, you’ll need to prepare your beds in the fall. Hardy Annuals are cool weather crops that grow best in the fall or spring. In order to grow them properly, you’ll likely need to plant them or sow the seeds in the fall, late winter or early spring.
If you live in a cold climate like mine, the soil is frozen most of the winter. As soon as the top inch of soil thaws out in early spring (March), it’s time to plant Hardy Annuals. Trust me - you don’t want to be trying to prepare beds in cold, muddy March.
Prepare your beds now and your March self will be so grateful.

4. Shop for and plant Perennials
Early Fall is the BEST time to plant Perennials, shrubs and trees. The cooler weather and increased rainfall is perfect for establishing these deeper rooted plants (instead of planting in the spring when the heat and drought of summer can stunt new plantings). Be sure to water them in well and apply a nice thick layer of mulch at the base to protect them from temperature extremes.
This is also when we plant bare root Peonies. The first season, we mulch them well to prevent frost heaving, but in subsequent years they don’t need mulch.
Many plant nurseries will still have a great selection of Perennials in the fall, so get out there and give your local plant nursery some love. Help them end their season strong!

5. Divide Perennials
If you already have lots of Perennials and they need to be split or divided, now is the time to do it. Here are some of my favorite Perennials for cut flower use.
6. Plant Spring blooming bulbs
As soon as the weather and the soil begins to cool down, it’s time to begin planting spring bulbs, like Tulips, Daffodils, Alliums, etc. Here in Michigan (Zone 5), we usually plant our Tulips in October or early November. Want to learn how we plant our Tulips that we grow for cut flowers? Learn more in this blog post.

7. Dig Dahlia tubers
In our climate, it’s too cold to overwinter Dahlias, so we must cut back the plants, dig up the tubers and store them over the winter to be replanted the following spring.
To learn more about digging and storing Dahlia tubers, read this blog post.

8. Preserve the harvest
As we cut back all the flowers (we cut each plant at the ground and leave the roots in the soil to increase organic matter), we reserve any blooms that can be dried for making dried flower arrangements. These dried flowers allow us to have “farm fresh, locally grown” flowers in our house all year long. Learn more about dried flowers in this blog post.

9. Wash and sanitize seed trays
If you grow your own seedlings, it’s ideal to wash everything at the end of the season so you have clean trays ready for next spring. A warm fall day is great for this.
Bring your supplies outside, turn on the hose and scrub your trays with soapy water. After rinsing the trays, spray them with equal parts vinegar and water. Allow to sit for about 10 minutes, then rinse. Allow the trays to dry in the sun before stacking them.
Doing this outdoors in the fall is much easier than trying to wash all your trays in the bathtub in January. Ask me how I know this ;)
10. Collect fallen leaves
Leaf compost is a wonderful soil amendment, full of nutrients and beneficial bacteria. Best of all, it’s free!
We collect as many leaves as we can and create a giant leaf pile. We allow the leaves to break down for about a year, turning them occasionally to help them break down into small pieces. This massive pile eventually turns into a small pile of soft, crumbly, earthy smelling compost that plants love.
You can use this compost to top dress your planting beds or Perennials.
NOTE: Do not use Black Walnut tree leaves, as they contain a compound called juglone that can stunt the growth of other plants. Thankfully, Black Walnuts lose their leaves earlier than most other trees, so it’s easy to avoid mixing them with other leaves.
There you have it. Finish strong, friend!

Crisp Cucumber Salsa Recipe
A delicious way to use up fresh produce from the garden!
Crisp Cucumber Salsa Recipe
When August rolls around, it seems like the garden explodes overnight. Every day, I bring in loads of tomatoes, peppers, cucumbers, herbs and more.
I feel rich and wealthy beyond measure! There is something deeply satisfying about growing and eating your own food - your labors of love coming to fruition!
In August, I'm always looking for ways to use up our produce.
My friend Alicia shared this AMAZING recipe that takes advantage of all the good things growing in the garden in mid summer.
I think you'll like this recipe as much as we do! I went ahead and doubled the original recipe for you... because, trust me. You'll want a double batch.

Crisp Cucumber Salsa
Ingredients
4 cups finely chopped seeded, peeled cucumbers (Note: I'm much too lazy to peel cukes... so I don't and it still tastes/looks great)
1 cup finely chopped seeded tomato
1/2 cup finely chopped red onion
2 jalapenos, seeded and finely chopped
2 cloves garlic, minced
4 tbsp finely chopped fresh parsley
2 tbsp finely chopped fresh cilantro
1/2 cup sour cream
1 tbsp lemon juice
1 tbsp lime juice
1/2 tsp cumin powder
1/2 - 3/4 tsp kosher or sea salt

Method:
1. Seed and finely chop the cukes, tomatos and jalapenos. Then finely chop/mince the red onion, garlic, parsley and cilantro. Add to a bowl.
2. Gently stir in the sour cream, lemon juice, lime juice, cumin and salt.
3. Best served chilled on a hot summer day. :) I love to sprinkle a little lime on my tortilla chips and scoop up loads of this salsa... or just eat it by the bowlful.

What are your favorite summer time recipes for using up your garden fresh produce? I'd love to hear them!
-Lori

How to Revive Floppy Flowers
Drooping flowers? Don’t throw them out! Try this quick, simple fix first!
How to Revive Floppy Flowers
You've had it happen before.
The bloom looked perfect on the plant but within minutes of cutting, the whole stem is looking a little droopy. In fact, it looks downright sad!
What is going on?!?
Usually it's one of 3 things:
1. The flower was cut at the wrong time of the day.
Many flowers will immediately wilt if cut during the heat of the day.
Here’s why. Flowers are the most hydrated and firm in the morning, when the stems are filled with water.
As the day progresses and the heat rises , the water flows down the stems into the base of the plants and the flowers begin to dehydrate, which means the stems can get floppy and wilty.
Flowers that are harvested in the heat of the day are wilty, floppy and expire faster.
This is why we ONLY harvest flowers in the cool of the day, either early in the morning or late in the evening. On our farm, we start cutting as soon as it's light enough (around 6:00 am) and stop as soon as the sun is up over the tree line and it starts to heat up (about 10:00 am).
If the day is cool or cloudy, we can get away with cutting later in the day... but if the sun is out, forget about cutting in the middle of the day.
Evening is another good option for cutting. Start when the sun is far on the horizon and the day has cooled.
2. The plant was harvested at the wrong stage.
Every single flower has it’s own “Ideal Stage of Harvest”, which refers to how open or mature the bloom should be for optimal vase life.
Some flowers need to mature a bit more before being cut or they will flop. Really, the best way to figure this out is simply experimenting.
If the stem feels floppy on the plant before you even cut it, that is likely a clue that the stem needs to mature a few more days. Wait until the stem feels more rigid.
For example, Zinnias are easy to test. Simply grasp the stem about 9 inches below the bloom and give it a shake. If the stem flops or bends, it's not mature enough. If the stem is stiff, it's ready.
3. The plant DOESN’T hydrate easily.
Some plants simply do not respond well to being cut and have a hard time "rehydrating" and getting water flowing in the stems.
If you can manage to get these stems “drinking” water again, they will make a great cut flower and last for days. If not, they are basically worthless.
A Simple Trick for Reviving Wilted Stems
In my reading and research about post-harvest care for flowers, I came across something called the "Boiling Water Method" for reviving wilted stems.
I was truly skeptical because the idea of placing stems in boiling water seems insane. In my experiments, I was attempting the opposite - recutting the stems and placing them into cold water. It didn't work.
I decided to give the "Boiling Water Method" a shot on some stems that I was about to throw out. I had cut the stems early in the morning, but they still wilted immediately... and a day later, even after being stored in my floral cooler overnight, they still looked terrible.
![20180720_154342[1].jpg](https://images.squarespace-cdn.com/content/v1/582b872529687fd6acb7423d/1533153748180-HR5FLUZTXWSKPVBAWZ4N/20180720_154342%5B1%5D.jpg)
Time to try the "Boiling Water Method". This is what I did:
1. Boiled water on the stove and poured it into a jar.
2. Re-cut the stems at an angle with clean, sharp flower clippers.
3. Immediately plunged the stem end into the boiling water, angling the blooms out the jar to avoid "steaming" the blooms.
4. Set a timer for 1 hour and walked away (I wanted to watch, but I had work to do!)
*NOTE: This was my first attempt. I learned that it's probably best to fill the jar with about 1 inch of water, so only a small part of the stem is "cooked". That part of the stem can be cut off later.
Also, one hour is probably unnecessary - I was headed out to work and wasn't able to check back earlier.
If you are concerned about "cooking" the stems, try dipping for 10 seconds for soft stemmed flowers and up to a few minutes for "woody" stemmed flowers like hydrangeas. After "searing" in the boiling water, place the stems in cool water.
When I returned, the water was cool and this is what the stems looked like:
![20180720_173433[1].jpg](https://images.squarespace-cdn.com/content/v1/582b872529687fd6acb7423d/1533154042034-LO3T16VSTU6L95BLEXEO/20180720_173433%5B1%5D.jpg)
AMAZING. I was in shock. 2 minutes of work and these flowers were back in business!
I removed the stems from the jar and added them to an arrangement in my dining room. 6 days later, the stems were still looking GREAT.
Now obviously, if your blooms are 5-7 days old and they start wilting, you need to simply accept that they are dying a natural death. Flowers don't last forever.
However, if your blooms are freshly cut and wilting, then you can certainly give the "Boiling Water Method" a try. What do you have to lose? It's better than your other option - throwing them out.
Flowers/Foliage That Might Need a Little Help
Here are a few flower/foliage varieties that respond well to this hydration method:
Artemisia
Basil
Chinese Forget-Me-Not
Dahlias
Dusty Miller
Hollyhock
Honeywort
Hydrangea
Lilac
Mint
Scented Geranium
Shiso/Perilla
Obviously, flowers are not "one size fits all", so this method will not work on all flower varieties.
I highly encourage you to do your own experiments. Have fun with it and set up your own control group and experimental groups.
For example, label several jars - one is the control (you do nothing), one is a stem seared for 10 seconds, one is a stem seared for 2 minutes, 10 minutes, etc. Be sure to analyze and compare your results. This is the best way to learn!
If you consistently have an issue with a flower wilting, first you should make sure you are harvesting at the correct time of day and the correct stage of harvest.
If this does not help (or if you simply cannot cut that early in the day), the "Boiling Water Method" is a good option to try out.
I hope this information is helpful. Give it a try next time you encounter a floppy, sad looking stem... and let me know how it worked!