

“Everlasting Flowers”: How to Dry Flowers
How to dry flowers… so you can enjoy them year round!
Ahhhh, summer.... some days I wish I could hold onto you forever. But alas, I've discovered it's your fleeting nature that makes you oh so sweet.
I must confess. I adore winter and look forward to that time of quiet restoration after the insanity of summer.
But I miss my flowers.
Imagine my delight when I discovered that some of the flowers we grow are considered "Everlasting" flowers.
"Everlasting" flowers are a category of cut flowers that are easy to dry and will last for years with proper handling.
Drying flowers is a fun project to do with kids... and a great way to create a year round reminder of summer fun.
Last fall, I dried bunches and bunches of flowers, then used them to decorate my home during the long winter months.

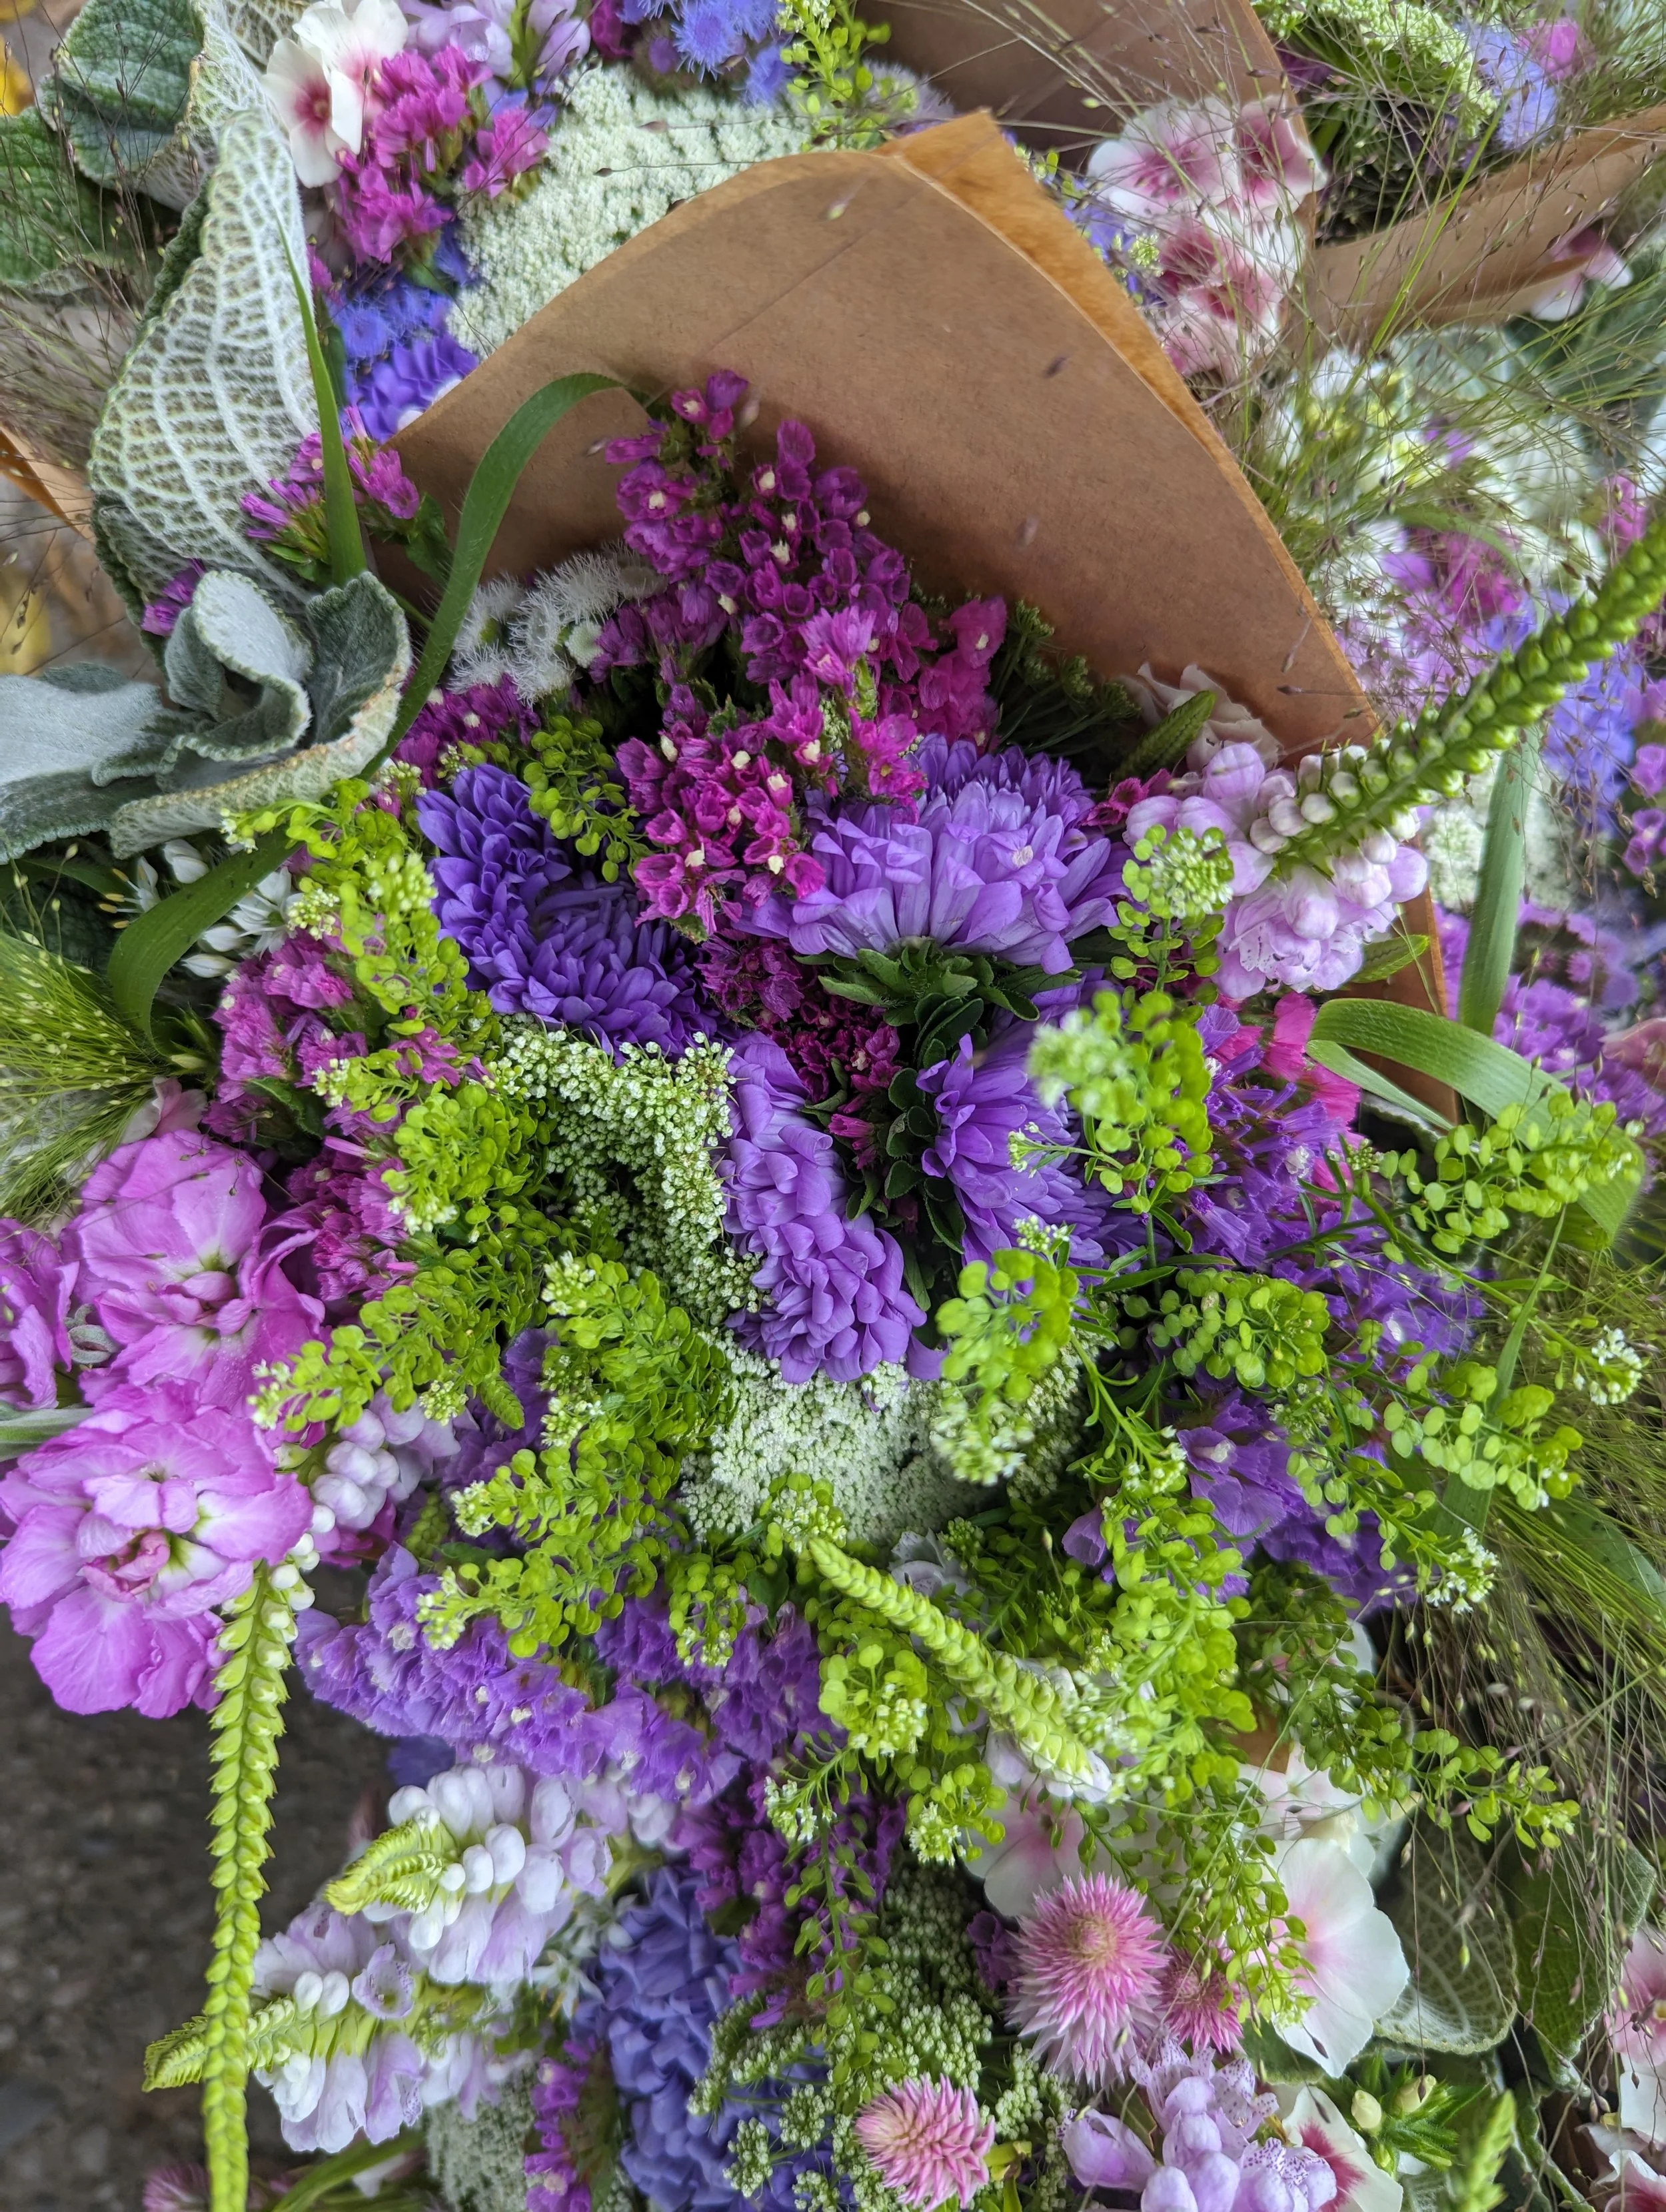
“Everlasting Bouquets” of flowers for drying: Celosia, Eucalyptus, Globe Amaranth, Green Drops Grass, Statice, Strawflower
How to Dry Flowers
It's a simple, easy process!
1. Cut flowers in the morning, after the dew has dried but before the day is too hot (usually before 11am).
*Each flower has it's own unique "ideal stage of harvest", which can make things tricky... but as a general rule, cut the flowers early while they are still opening up, not completely in bloom. You may have to do some experimenting to determine the "ideal stage of harvest".
2. Strip the foliage off the stem. (Note: Strawflower stems are notoriously fragile. It's recommended that the flower heads are gently popped off the stem and replaced with a piece of floral wire instead).
3. Create bundles of about 10-12 stems and secure the stem ends with a rubber band or string.
4. Hang the bundles upside down (flowers facing the floor) in a dry, dark place, out of direct sunlight (sun makes the colors fade). An attic or closet would be good. A basement probably too damp. I've had good luck drying in our garage and kitchen pantry.
5. In 2-3 weeks, the flowers should be fully dry and ready to use in Everlasting arrangements.
![20180813_112449[1].jpg](https://images.squarespace-cdn.com/content/v1/582b872529687fd6acb7423d/1534278199691-6I9QVX7APYHSJOFZAIGS/20180813_112449%5B1%5D.jpg)
Statice “QIS Apricot”
Alternative Method for Drying Flowers
This method works best for: Bells of Ireland, Celosia, Hydrangea and Yarrow
1. Place flowers with stems in a jar filled halfway with water.
2. Place jar in a warm, dry, dark place (a kitchen pantry or attic would be ideal).
3. Allow water to evaporate naturally. Once water is completely gone, the flowers should be dry and ready to use.
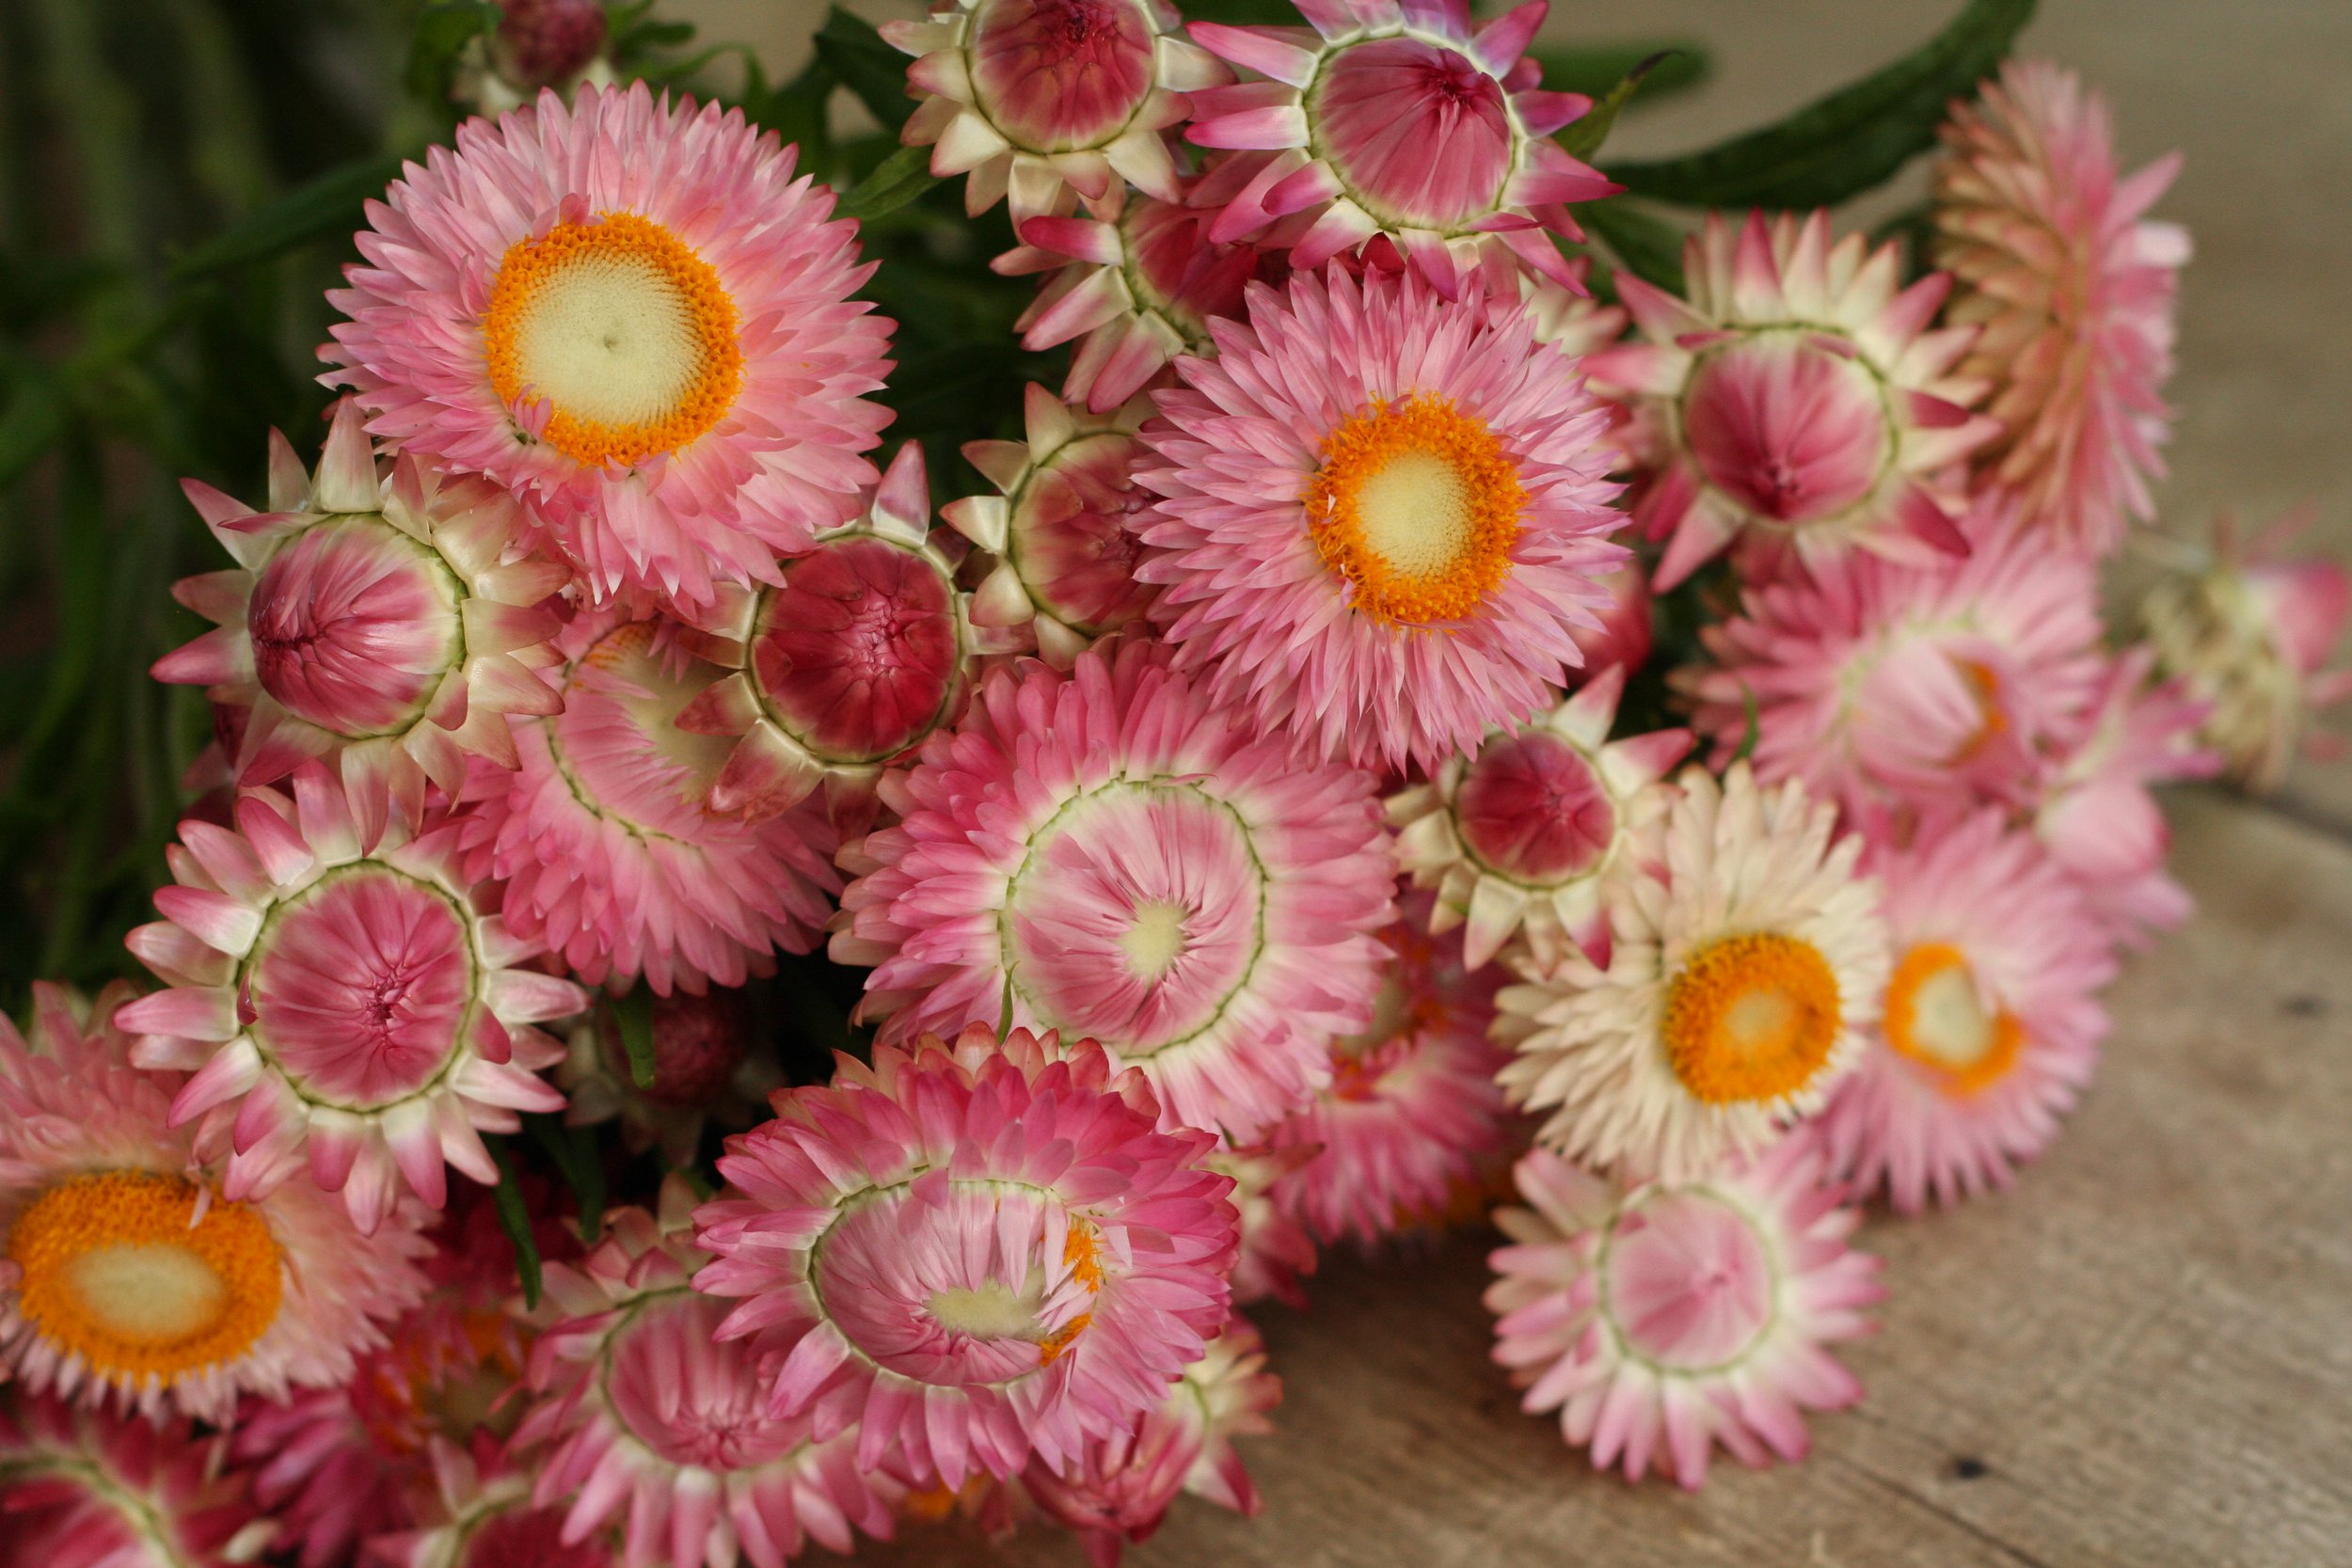
Strawflower “Bright Rose”
Flowers Suitable for Drying
Almost every flowers CAN be dried... but not all of them will actually look nice. Ha!
When in doubt, you can always try it out... but as a general rule, look for flowers/foliage that feel "papery" or stiff.
Here are a few that are good candidates for drying. Of course, this is by no means an exhaustive list!
Amaranth
Artemisia
Baby's Breath
Bells of Ireland
Celosia
Craspedia (Drumstick Flower, Billy Buttons)
Dusty Miller
Eryngium (Sea Holly)
Grasses - Pods/Seed heads
Gomphrena (Globe Amaranth)
Hydrangea
Lavender
Money Plant (Lunaria)
Nigella (Love in a Mist) - Pods
Poppy - Pods
Queen Anne's Lace (Ammi or Daucus)
Starflower (Scabiosa) - Pods
Statice
Strawflower
Wheat
Yarrow
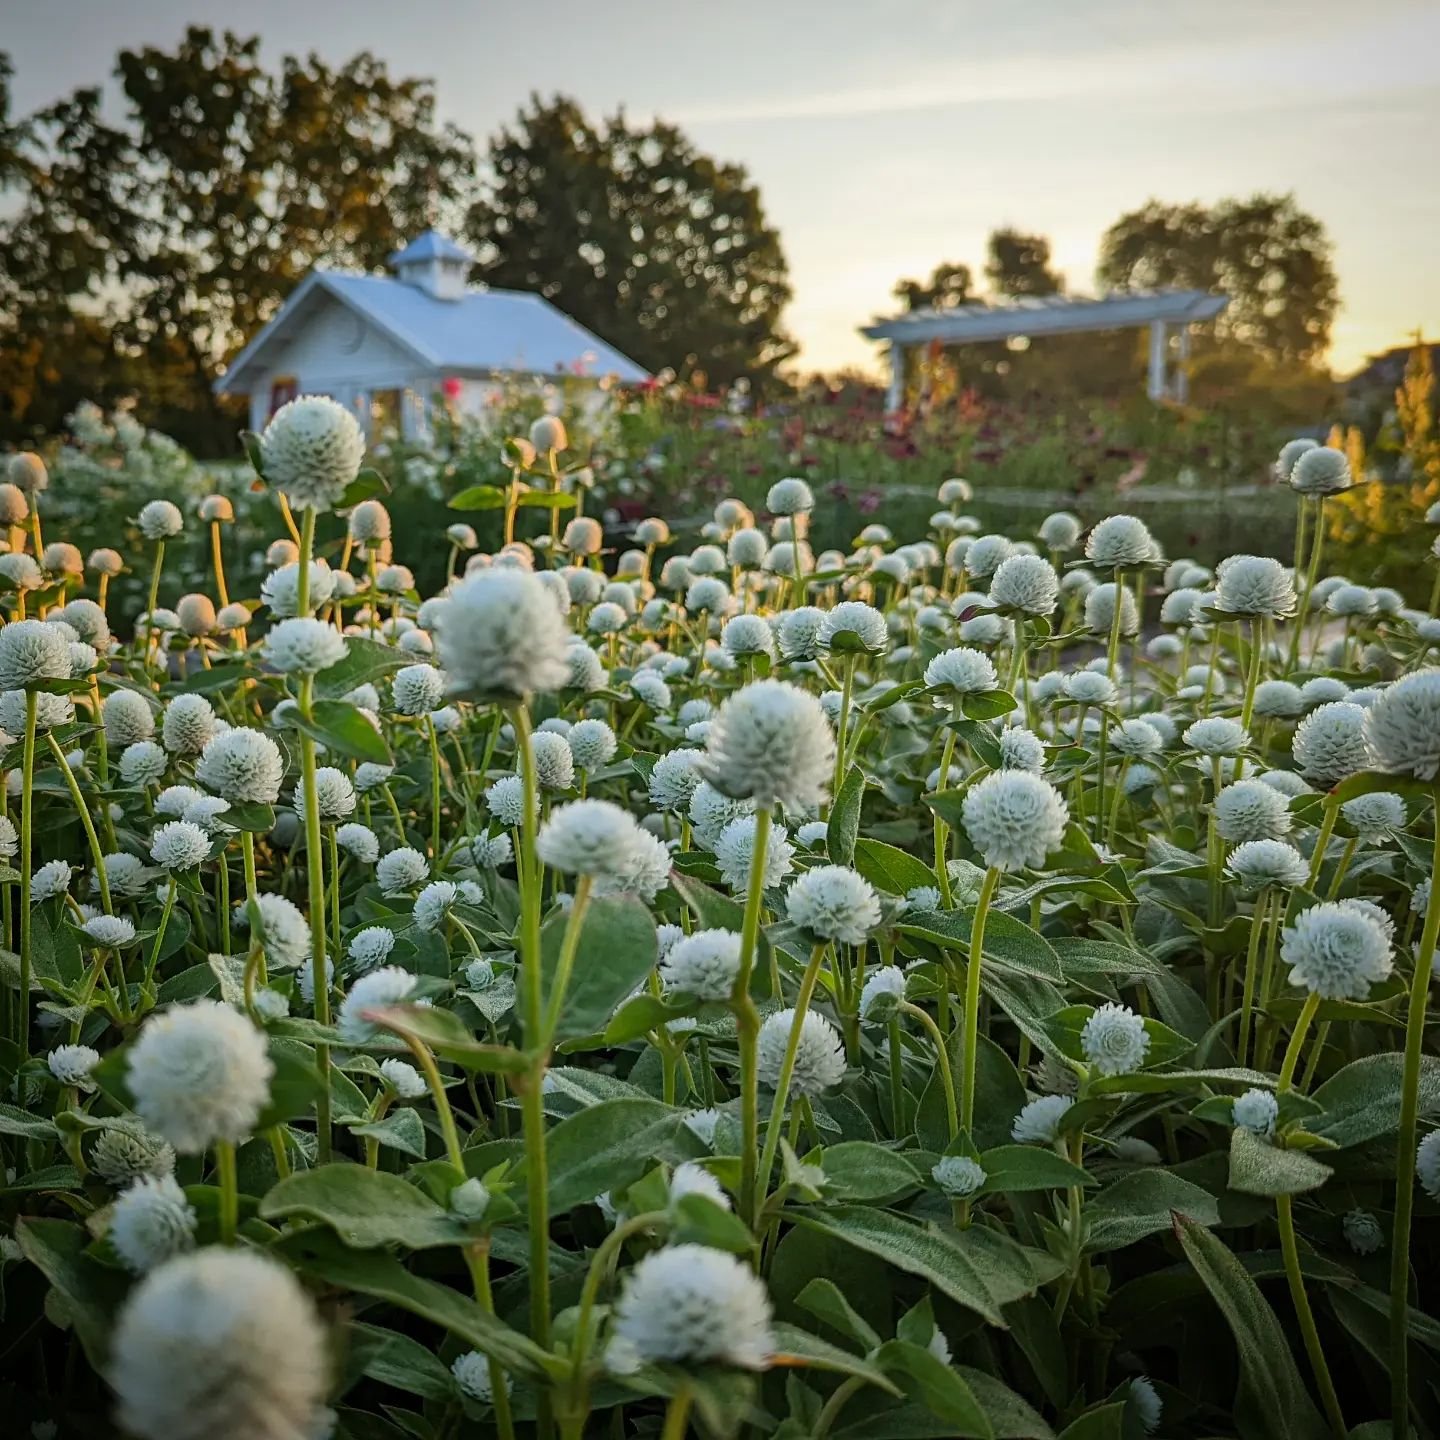
Globe Amaranth “Audray White”
Right now is a GREAT time to start drying flowers for your fall and winter decorating.
Please be sure to comment or share with me if you try this fun project. Enjoy these last few weeks of summer :)
-Lori
READY FOR MORE?
If you’re serious about growing the garden of your dreams this year, and want me to answer all your burning questions, register for my online course, “Backyard Cutting Garden 101”.
You’ll find everything you need to plan, grow, harvest and arrange your stunning blooms. I can’t WAIT to help you grow! Click on the button below for all the details.

Tears in the Garden
A Good Friday meditation about the garden.
Tears in the Garden
*I wrote this essay in 2013. Praying and planting seeds has become part of my Good Friday ritual since that time. I highly recommend getting out in your garden if possible. God has so many powerful revelations to teach us through His creation.
Here in Michigan, when I plant peas on Good Friday, they ripen right around the Summer Solstice, the first day of Summer. Remembering the sorrow of the planting day makes the sweetness of the peas on a summer day that much more precious.
Easter Sunday is coming, friends.
But first, we have to live through Good Friday.
The older I become, the more emotional I am on Good Friday. The older I become, the more overwhelmed I am by ultimate sacrifice of Jesus. The older I become, the more significance I find in simple things. Like gardening.
Today, I went out to the garden to plant the first seeds of the season and talk to God (we have our best conversations in the garden). After a bitter, cold spring, the ground finally thawed enough for me to plant peas. It seemed fitting to me that today would be a good day to plant, a good day to bury seeds that appeared to be dead and dormant, but would soon burst forth with new life.
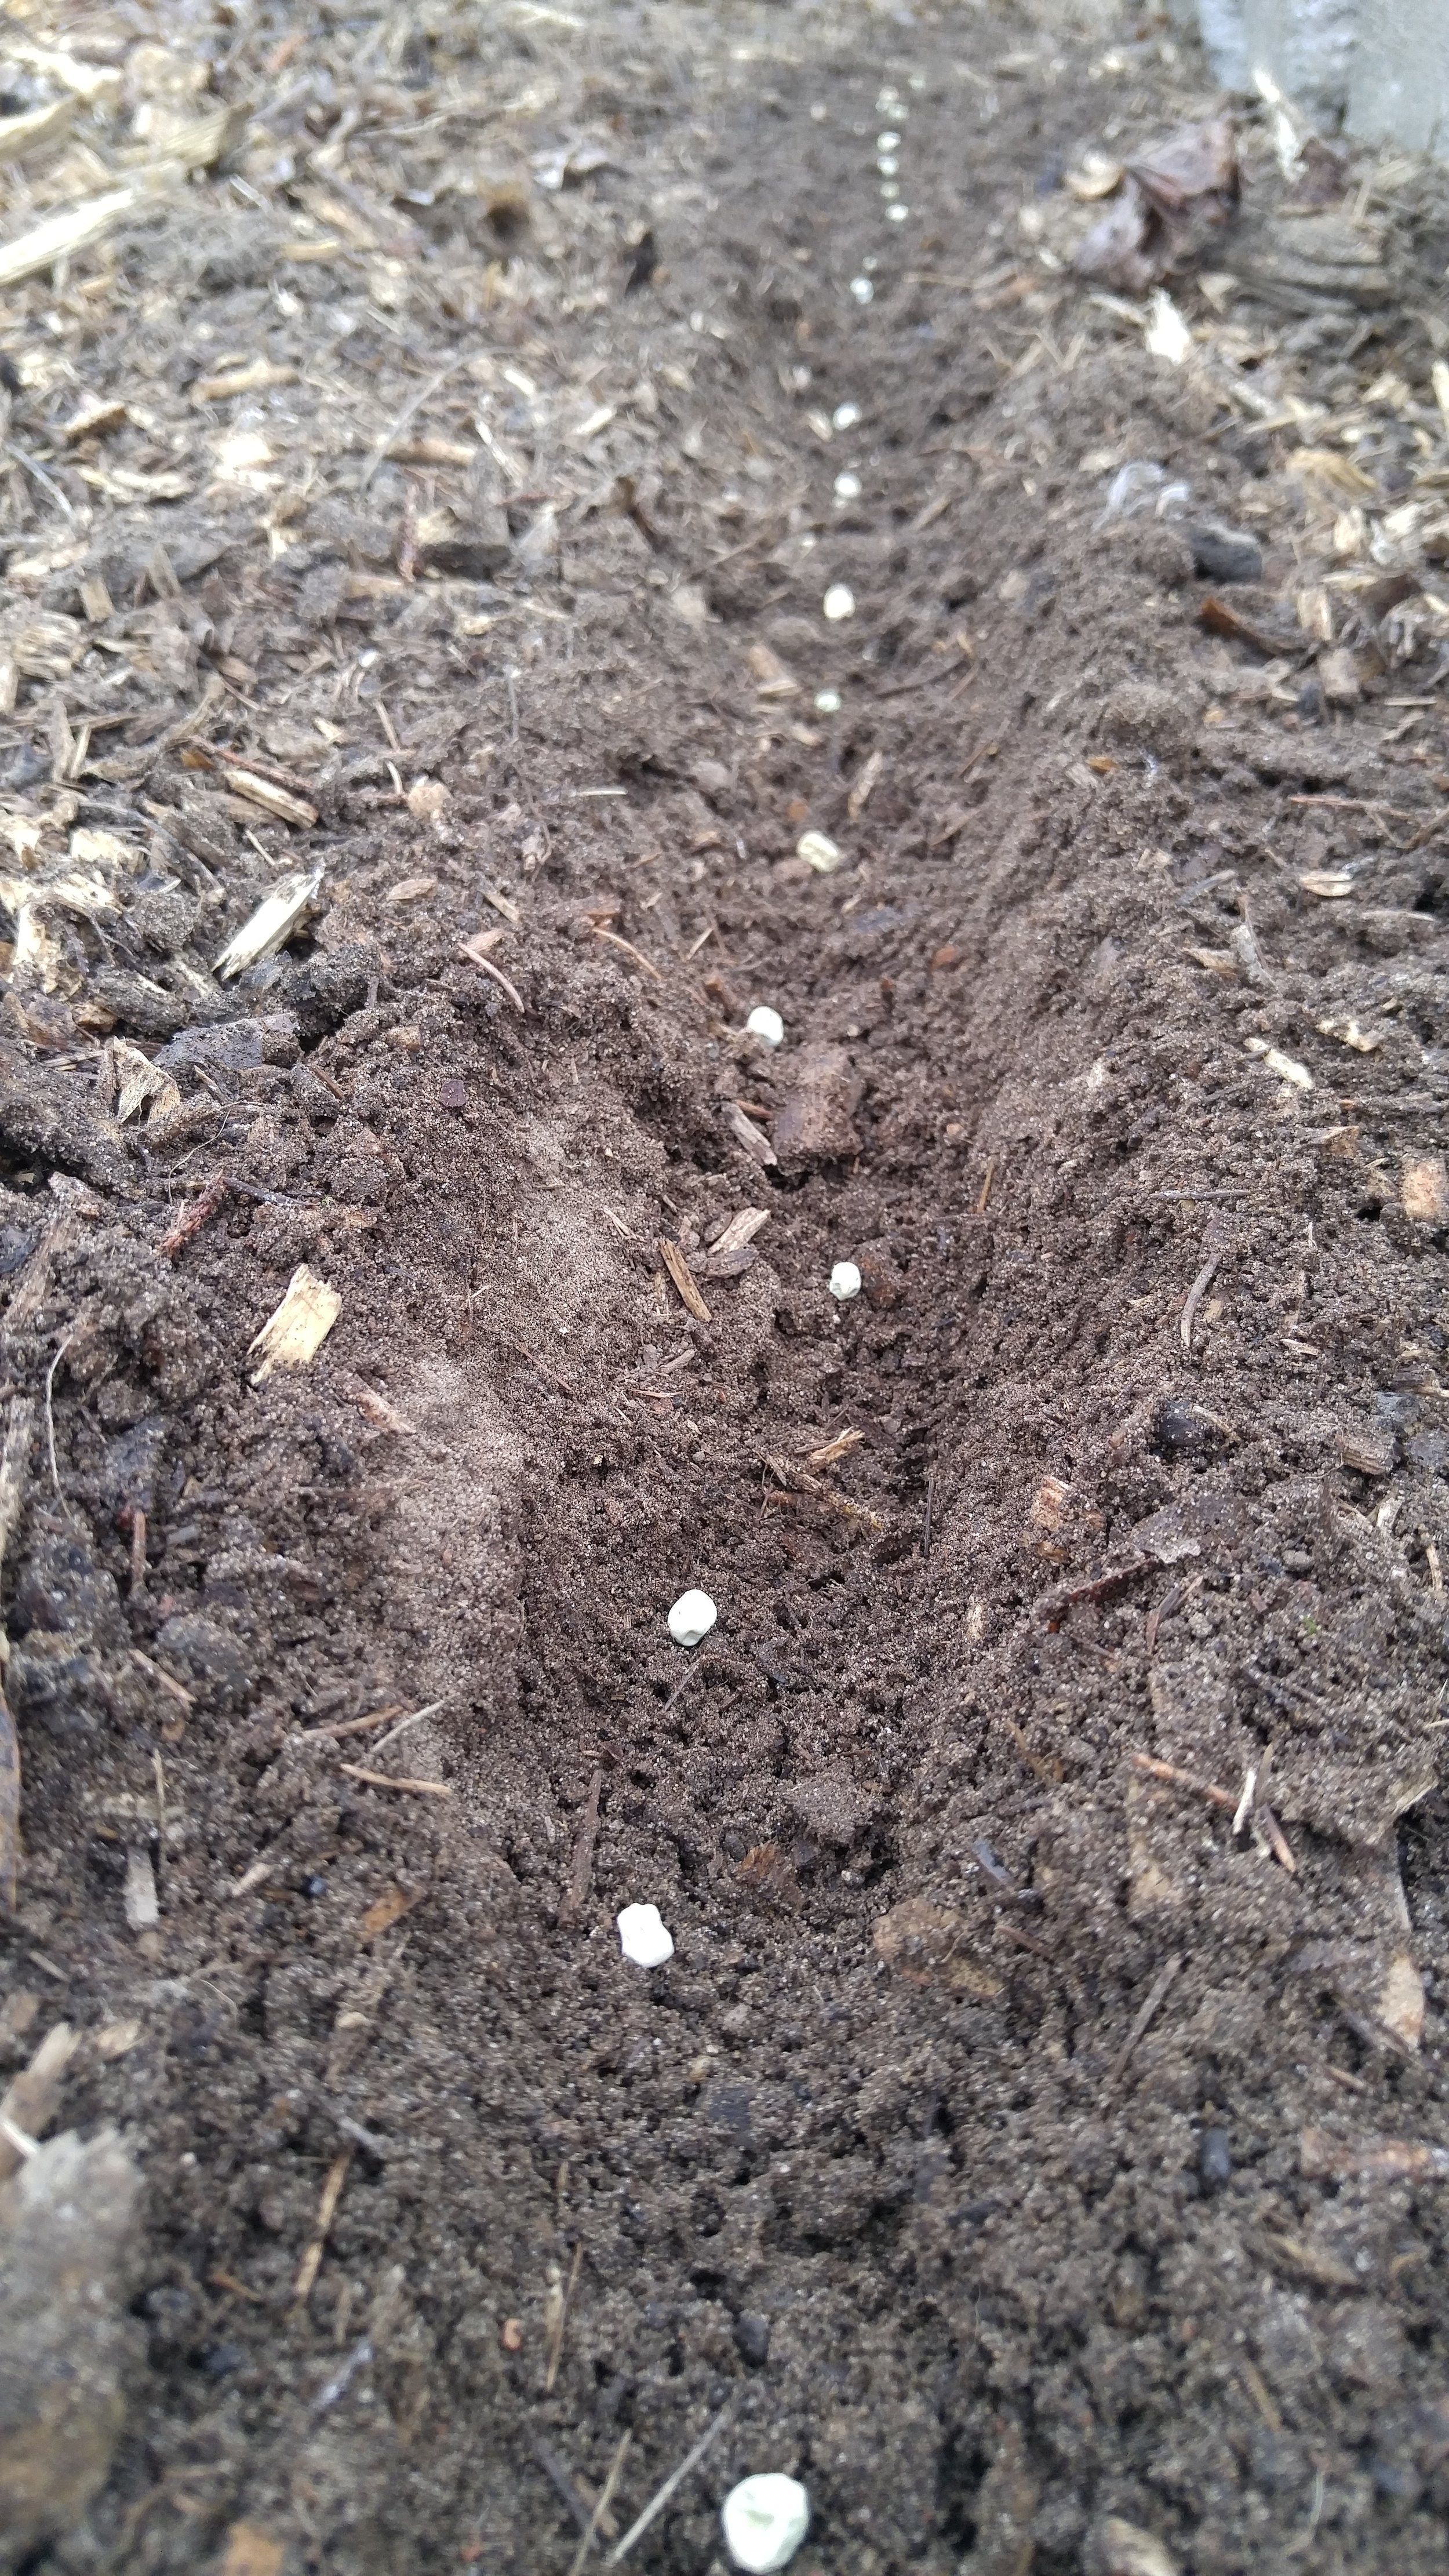
![20170413_083434_HDR[1].jpg](https://images.squarespace-cdn.com/content/v1/582b872529687fd6acb7423d/1492088605762-4U83ZNMFLC5FH5DQUOPU/20170413_083434_HDR%5B1%5D.jpg)
The garden beds were ready and waiting, prepared last fall. After a bit of raking to smooth the soil, I dug shallow furrows and painstakingly began to place the seeds.
And that's when I suddenly found myself with tears streaming down my face, drenching the soil near my hands. Overwhelmed with grief and sorrow.
Each seed I placed in the soil represented my sins. Too many to count. I gave those sins names as I placed them in the furrow. Pride. Judgement. Hatred. Complacency. Lies. Gossip. Conceit. Bitterness. Unjustified anger. Covetous Thoughts. Vanity. Contempt. Selfishness. Lack of concern for my neighbor.
The list went on and on. I felt broken, dirty, ruined. Despicable.
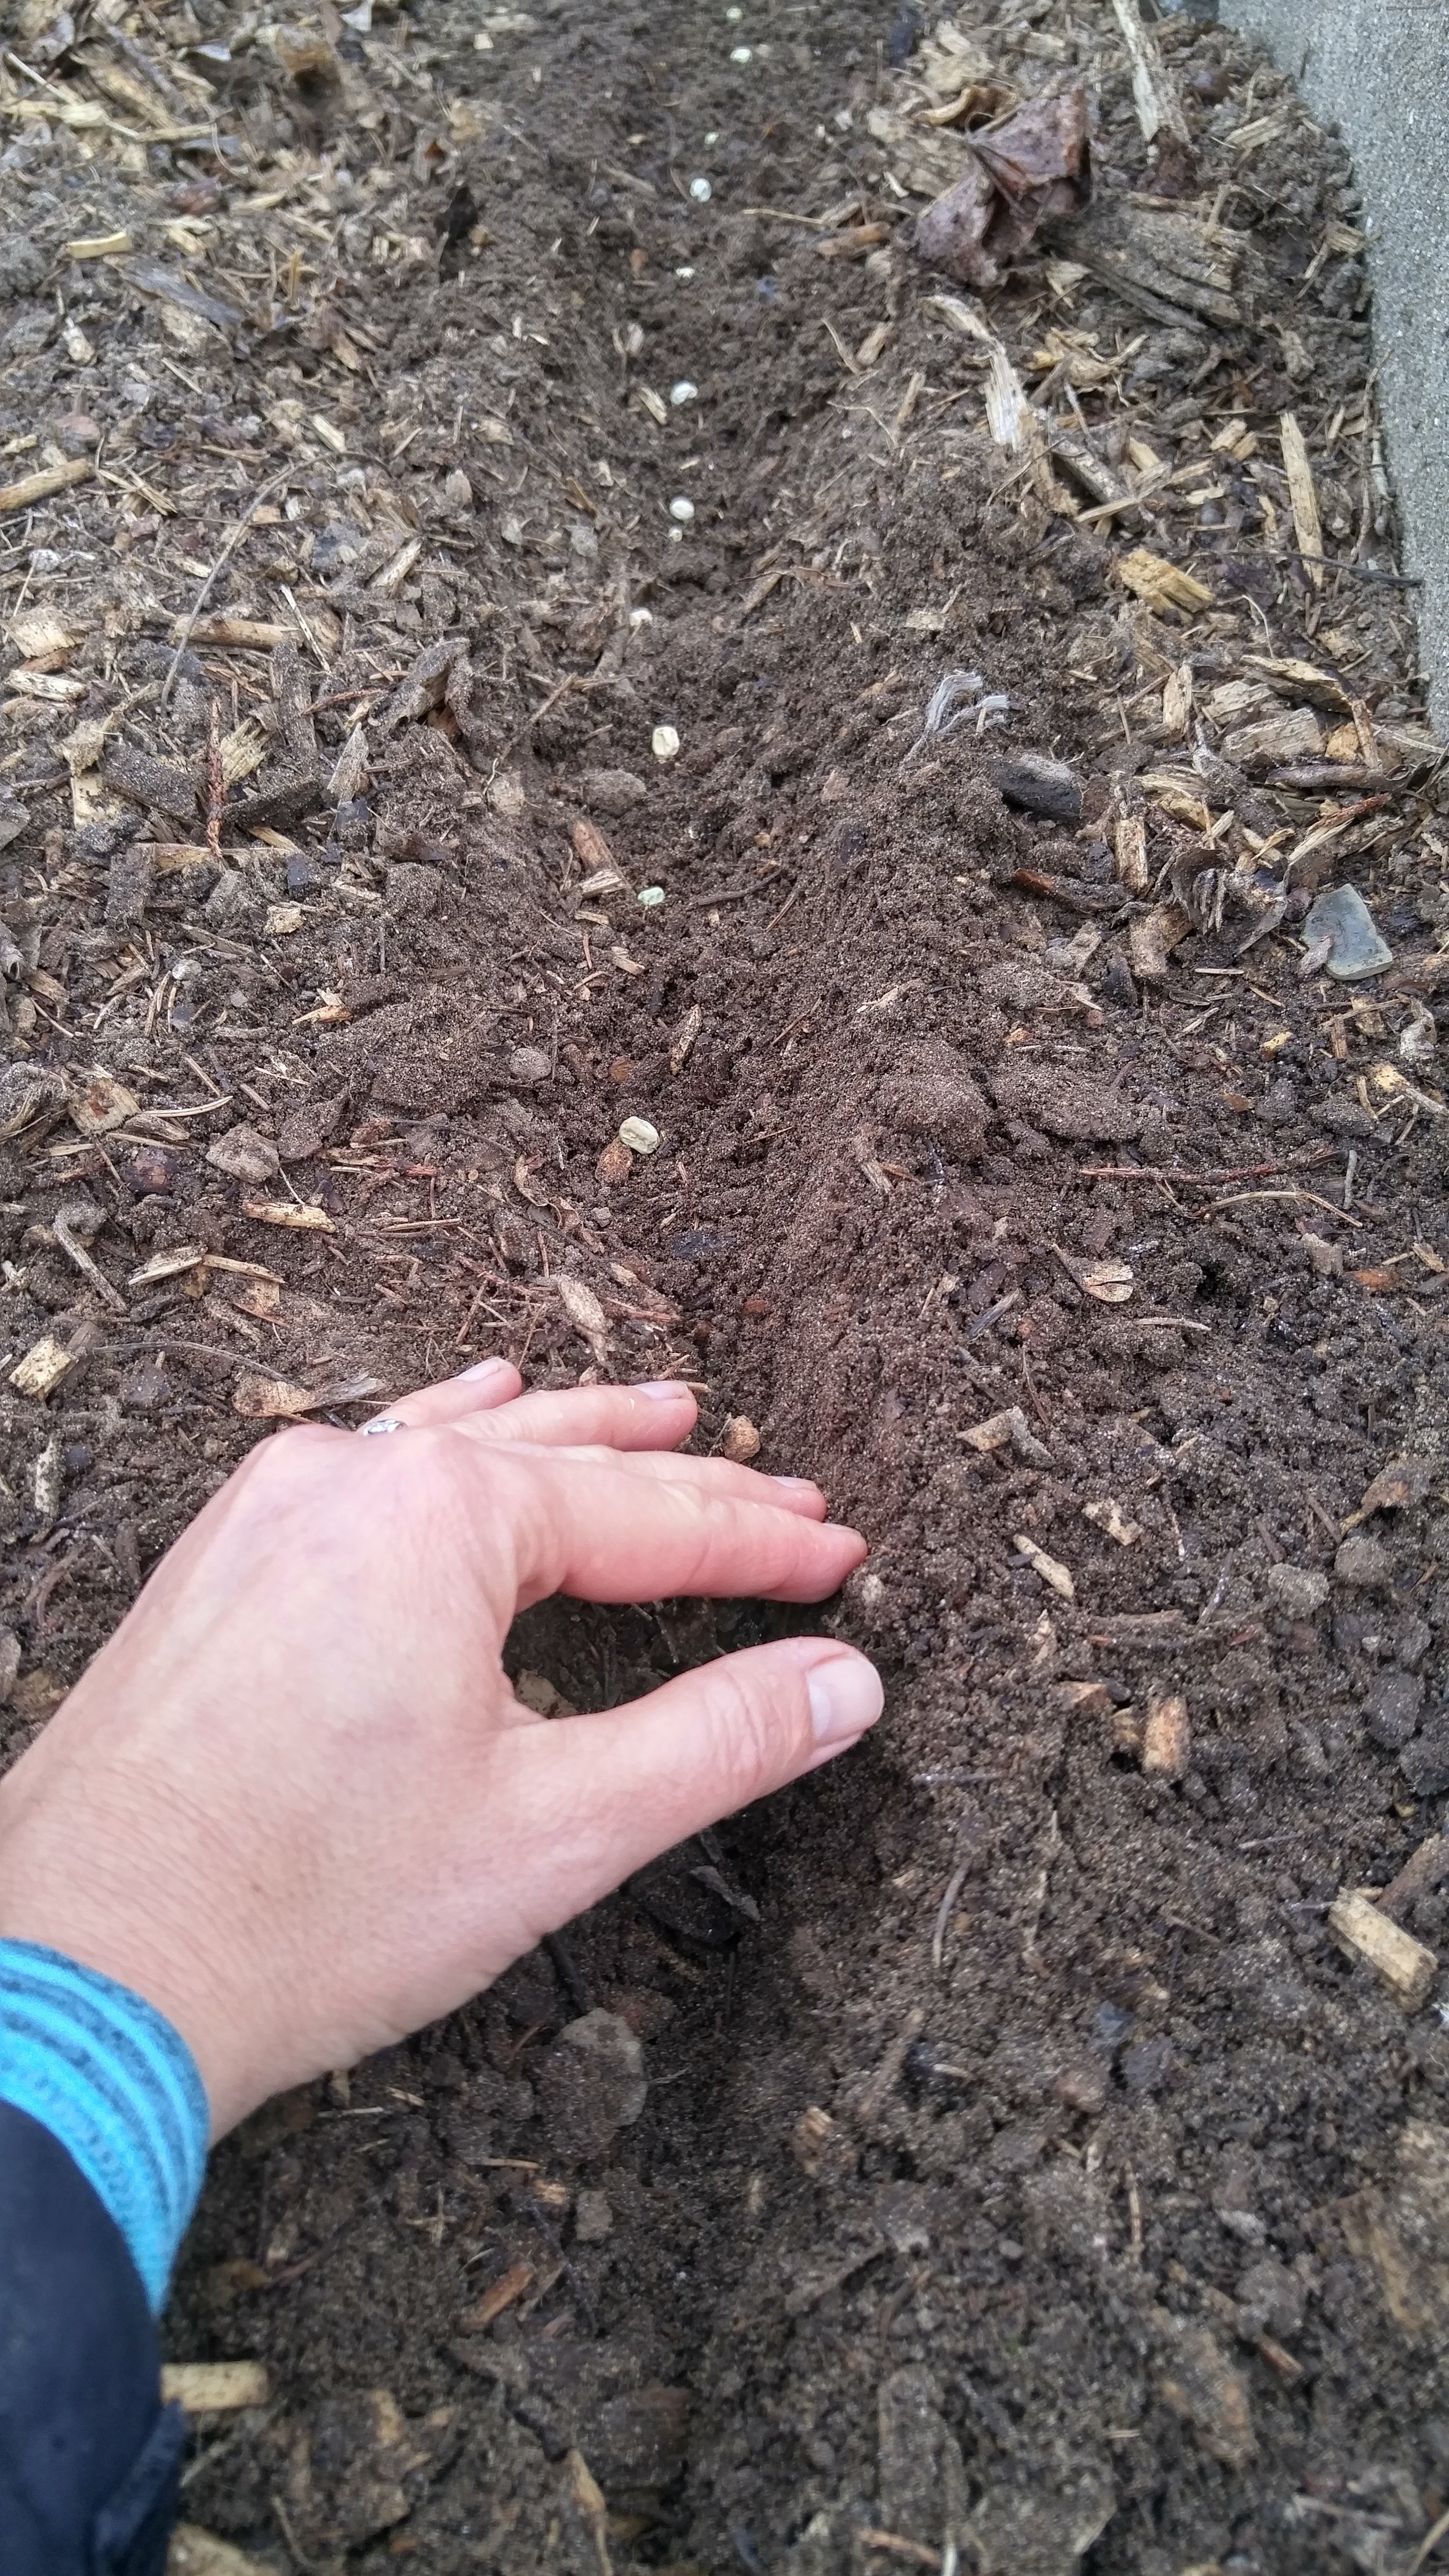
After all the seeds were place, I began to bury them. With each swipe of my hand, the seeds were covered by the soil, no longer visible... just as Jesus came to earth and sacrificed Himself on the cross so He could cover up all my sins.
My sins. Not just the sins on the whole world. He did it for me. He would have suffered in the same way, even if I was the only human on earth. And He would have done the same thing for you.
This ugly, wrinkled, insignificant, dead-looking seed will grow. It will thrive and grow strong, beyond my wildest dreams. It will produce food that will nourish and bring health to my family.
And it's just the same with my life. Jesus takes my sin, my ugliness, my weakness when I confess those things and hand them over to Him. He covers them up.
He transforms me into someone who is whole and has purpose. Someone who brings hope and healing to the world. He does the same for you, friend. Only He can take something so wretched looking and make it beautiful.
As I knelt in the garden, naming and confessing my sins, Jesus covered up all my sins and I left the garden with a clean heart, a clean mind, a clean soul.... ready to grow and thrive for Him, so that I can nourish and feed the souls and bodies of His children.
I discovered transformation in the garden is not just for plants, but people as well.
Today I shared tears in the garden with my Savior. Tear of grief, tears of regret, tears of shame. Tears that He had to suffer for me. Tears that He had to weep in a garden too...
Sunday is coming. Today is a day to mourn, friends, but in two days my heart will be bursting forth with joy and praise. I hope you'll join me.

How to Grow Peppergrass
How to Grow Peppergrass
How to Grow: Peppergrass (Lepidium ruderale)
INTRODUCTION
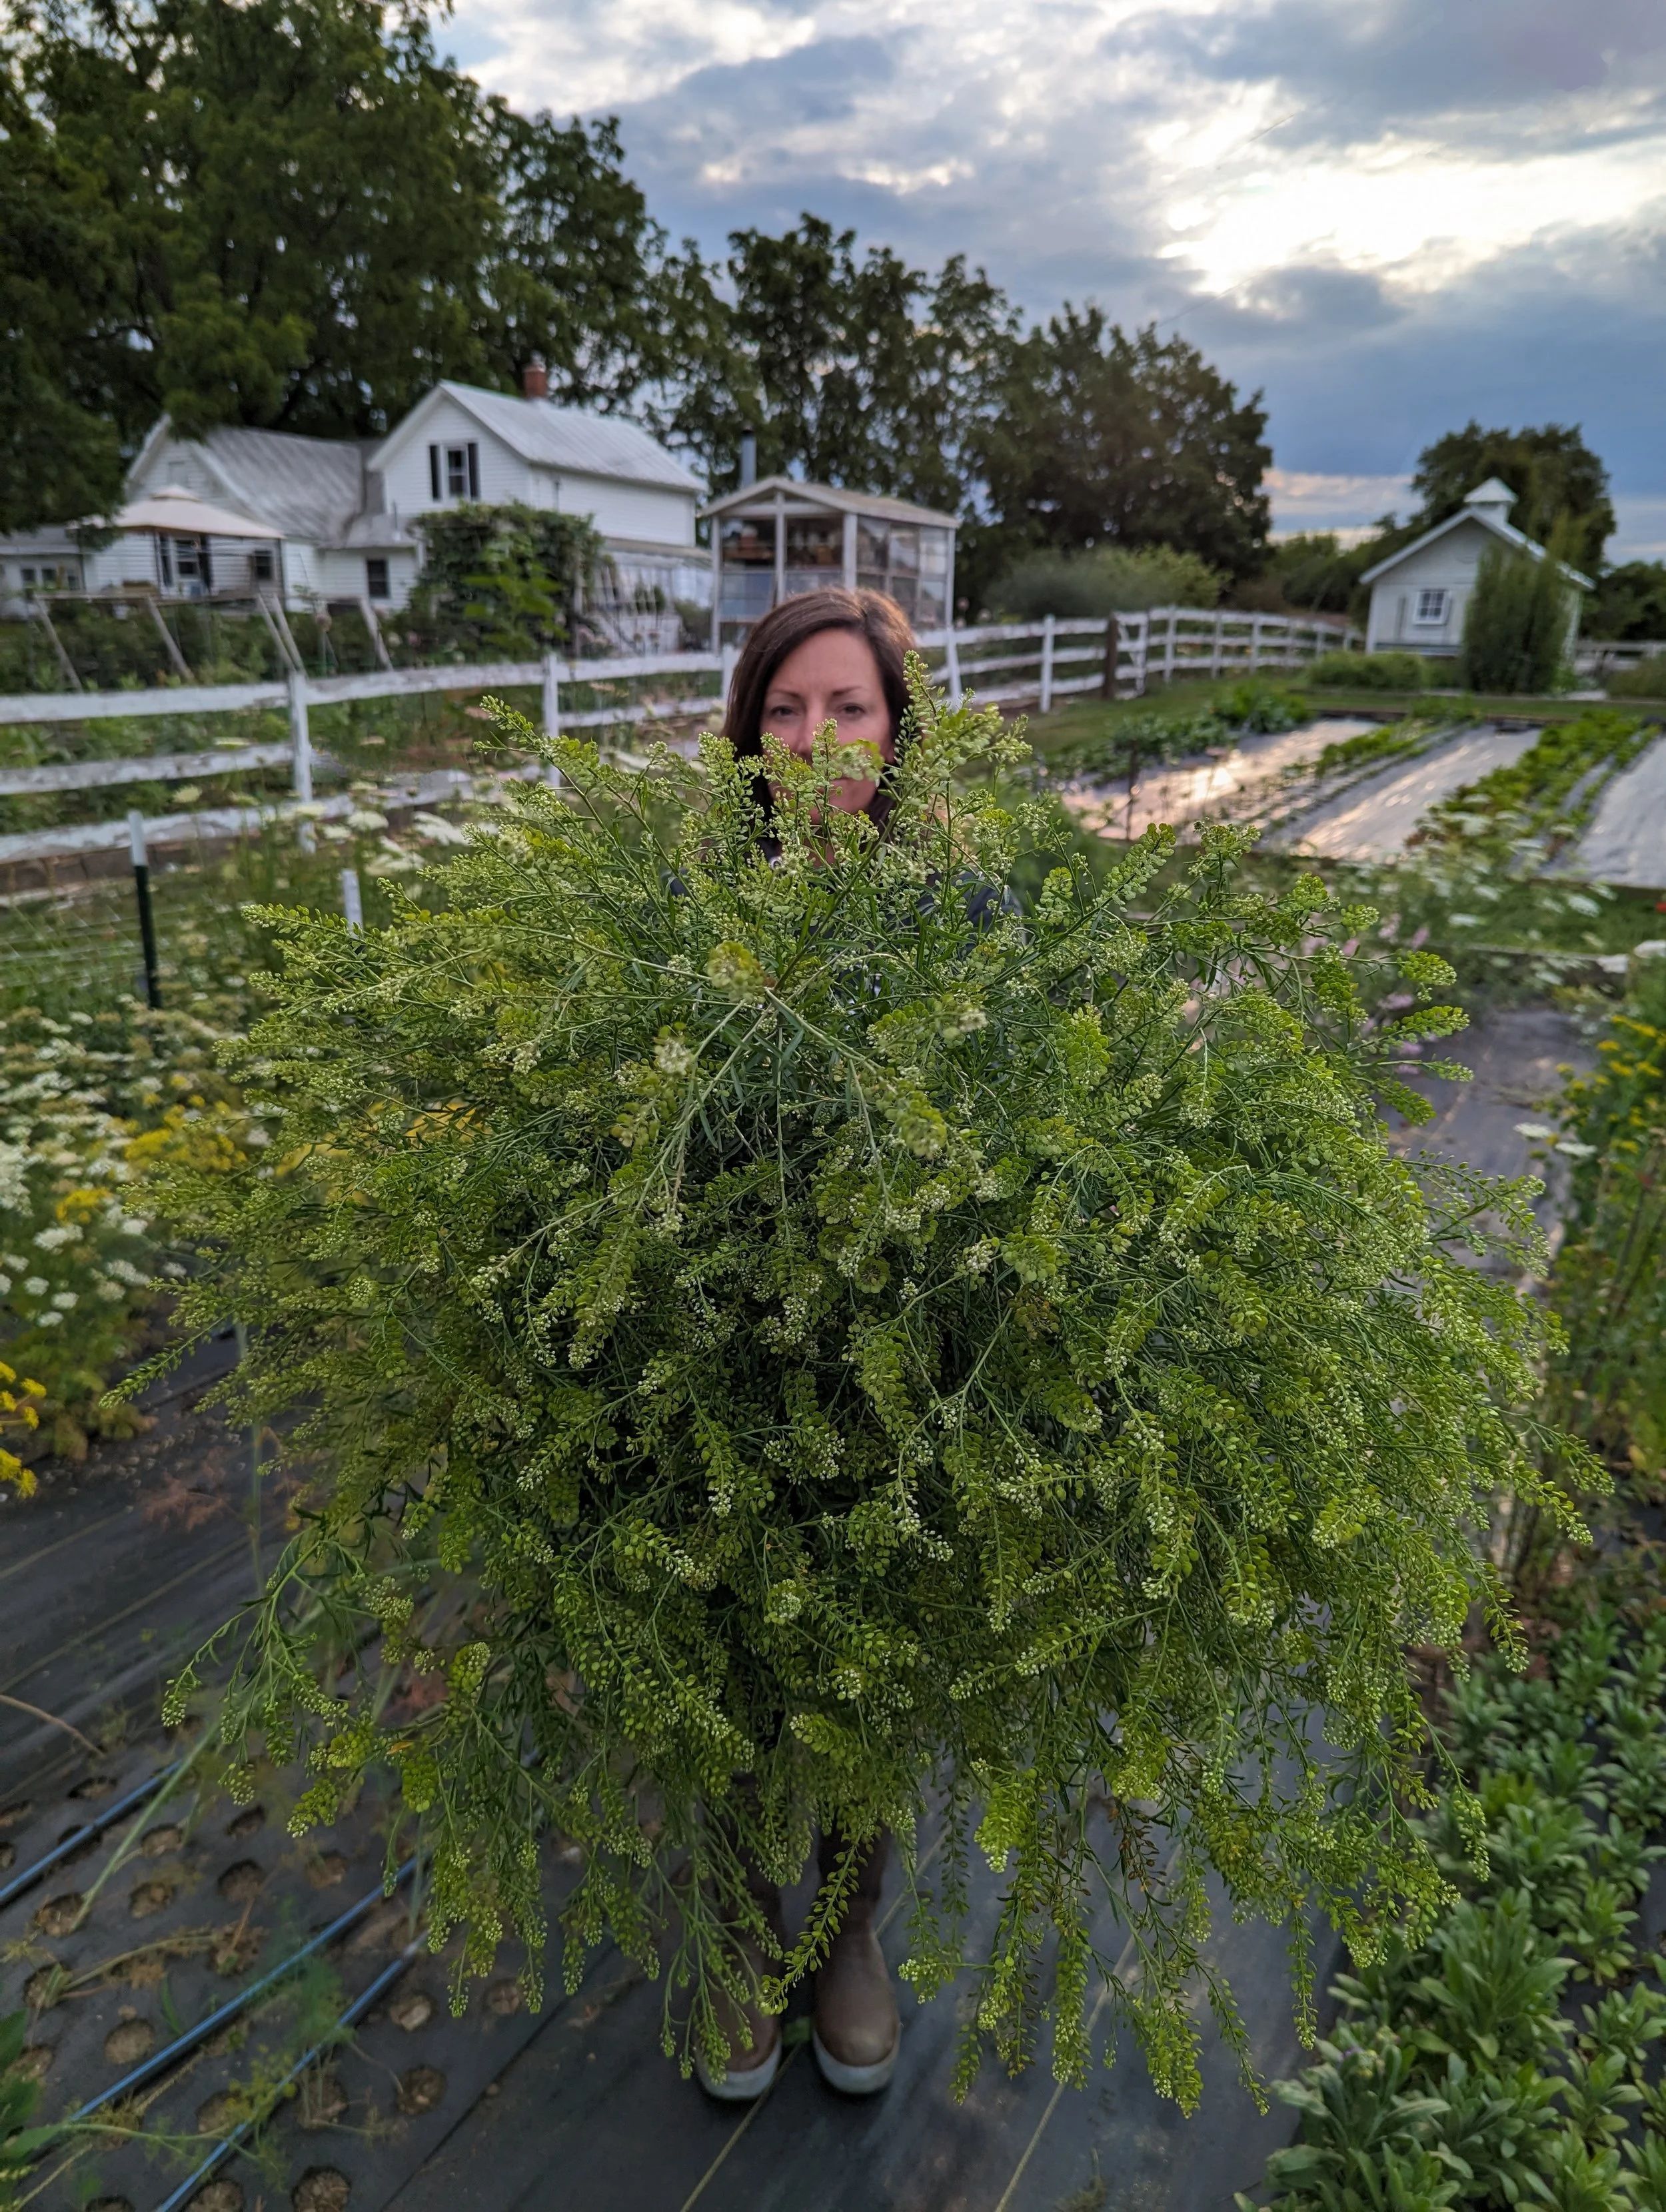
Of all the plants we grow on the farm, Peppergrass might be my absolute favorite.
Just a few stems in a bouquet add sparkle, texture and delight.

The emerald-colored “beads” (seed pods) work in a wide variety of arrangements, from fun and playful to elegant and sophisticated.
Peppergrass is the common name for this lovely plant in the Cress (Lepidium) family.
Several similar-looking plants are useful for floral design, including:
Persian Cress (Lepidium sativum),
Pennycress (Thlaspi arvense) and
Peppergrass (Lepidium rulerale).
I find Peppergrass to be the most versatile of these three plants.

Peppergrass is useful at 3 different stages:
Fresh, bright green
Fresh, ripened to rose gold
Dried
Peppergrass performs best as a Hardy Annual, planted in the cool weather of spring. We’ve experimented with succession planting it every 2-3 weeks to have a continuous supply, but it does not grow well in the heat of summer (plants grow short and stunted).
This year, we experimented with direct sowing seeds in July for a fall harvest (October). It was somewhat successful, but we need to do more trials before I can recommend it.

Peppergrass, ripening to rose gold
Let’s look at the Pros and Cons of growing Peppergrass for cut flower use.
PROS
It’s one of the best textural filler/foliage you can grow. We use every stem we can grow.
The plants have a long harvest window, which means you have a 7-14 day opportunity to harvest them (unlike some flowers that have a harvest window of a few hours!).
They are tough and durable.
They are long-lasting in the vase.
They have a sturdy stem with a branching habit. One stem can have up to 12-15 branches.
Did I mention that texture?!? They make your bouquets absolutely sparkle!
CONS
They are a “one and done” crop. Once the stem has been harvested, it’s done.
They don’t grow well in hot summer weather. Oh, how I wish I could get Peppergrass to grow all season long!
They can be a bit tedious to harvest. I recommend removing as many of the leaves as possible, as they expire quickly. The stems and “beads” will stay good for weeks.

HOW TO SOW
Some types of plants respond best to the S.T.U.N. growing technique. Peppergrass, along with many Hardy Annual plants, is one of them.
S.T.U.N. is a method I read about in the book “Restoration Agriculture” by Mark Shepherd.
It stands for:
S - Sheer
T - Total
U - Utter
N - Neglect
Ha! Isn’t that the BEST growing technique you’ve ever heard of?
Yup. Some plants THRIVE on neglect. The harder you TRY to grow them, the more they die. These plants do not like to be fussed over.
So here is how I grow Peppergrass.
I fill a seed tray with moist seed starting mix. I casually drop 1-2 seeds per cell, then casually sprinkle a bit of vermiculite on top. It’s important to do this casually - if you’re too careful, the plants will sense it and not grow. Ok, I’m kind of joking… but kind of not ;)
Give the seed trays a quick sprinkle of water to help activate the germination process and then (this is important!), tuck the seed tray in a cool dark place for a week and COMPLETELY IGNORE IT.
No heat mat, no grow lights, no fussing. Just leave it alone.
Set a note on your phone or calendar to check on the tray in about a week.
If they haven’t germinated yet, sprinkle again and check back in a few days.
Once they have germinated, you can remove the trays from the cool dark place and put them in a bright location. Grow the seedlings for about 4-6 weeks before hardening them off and transplanting.
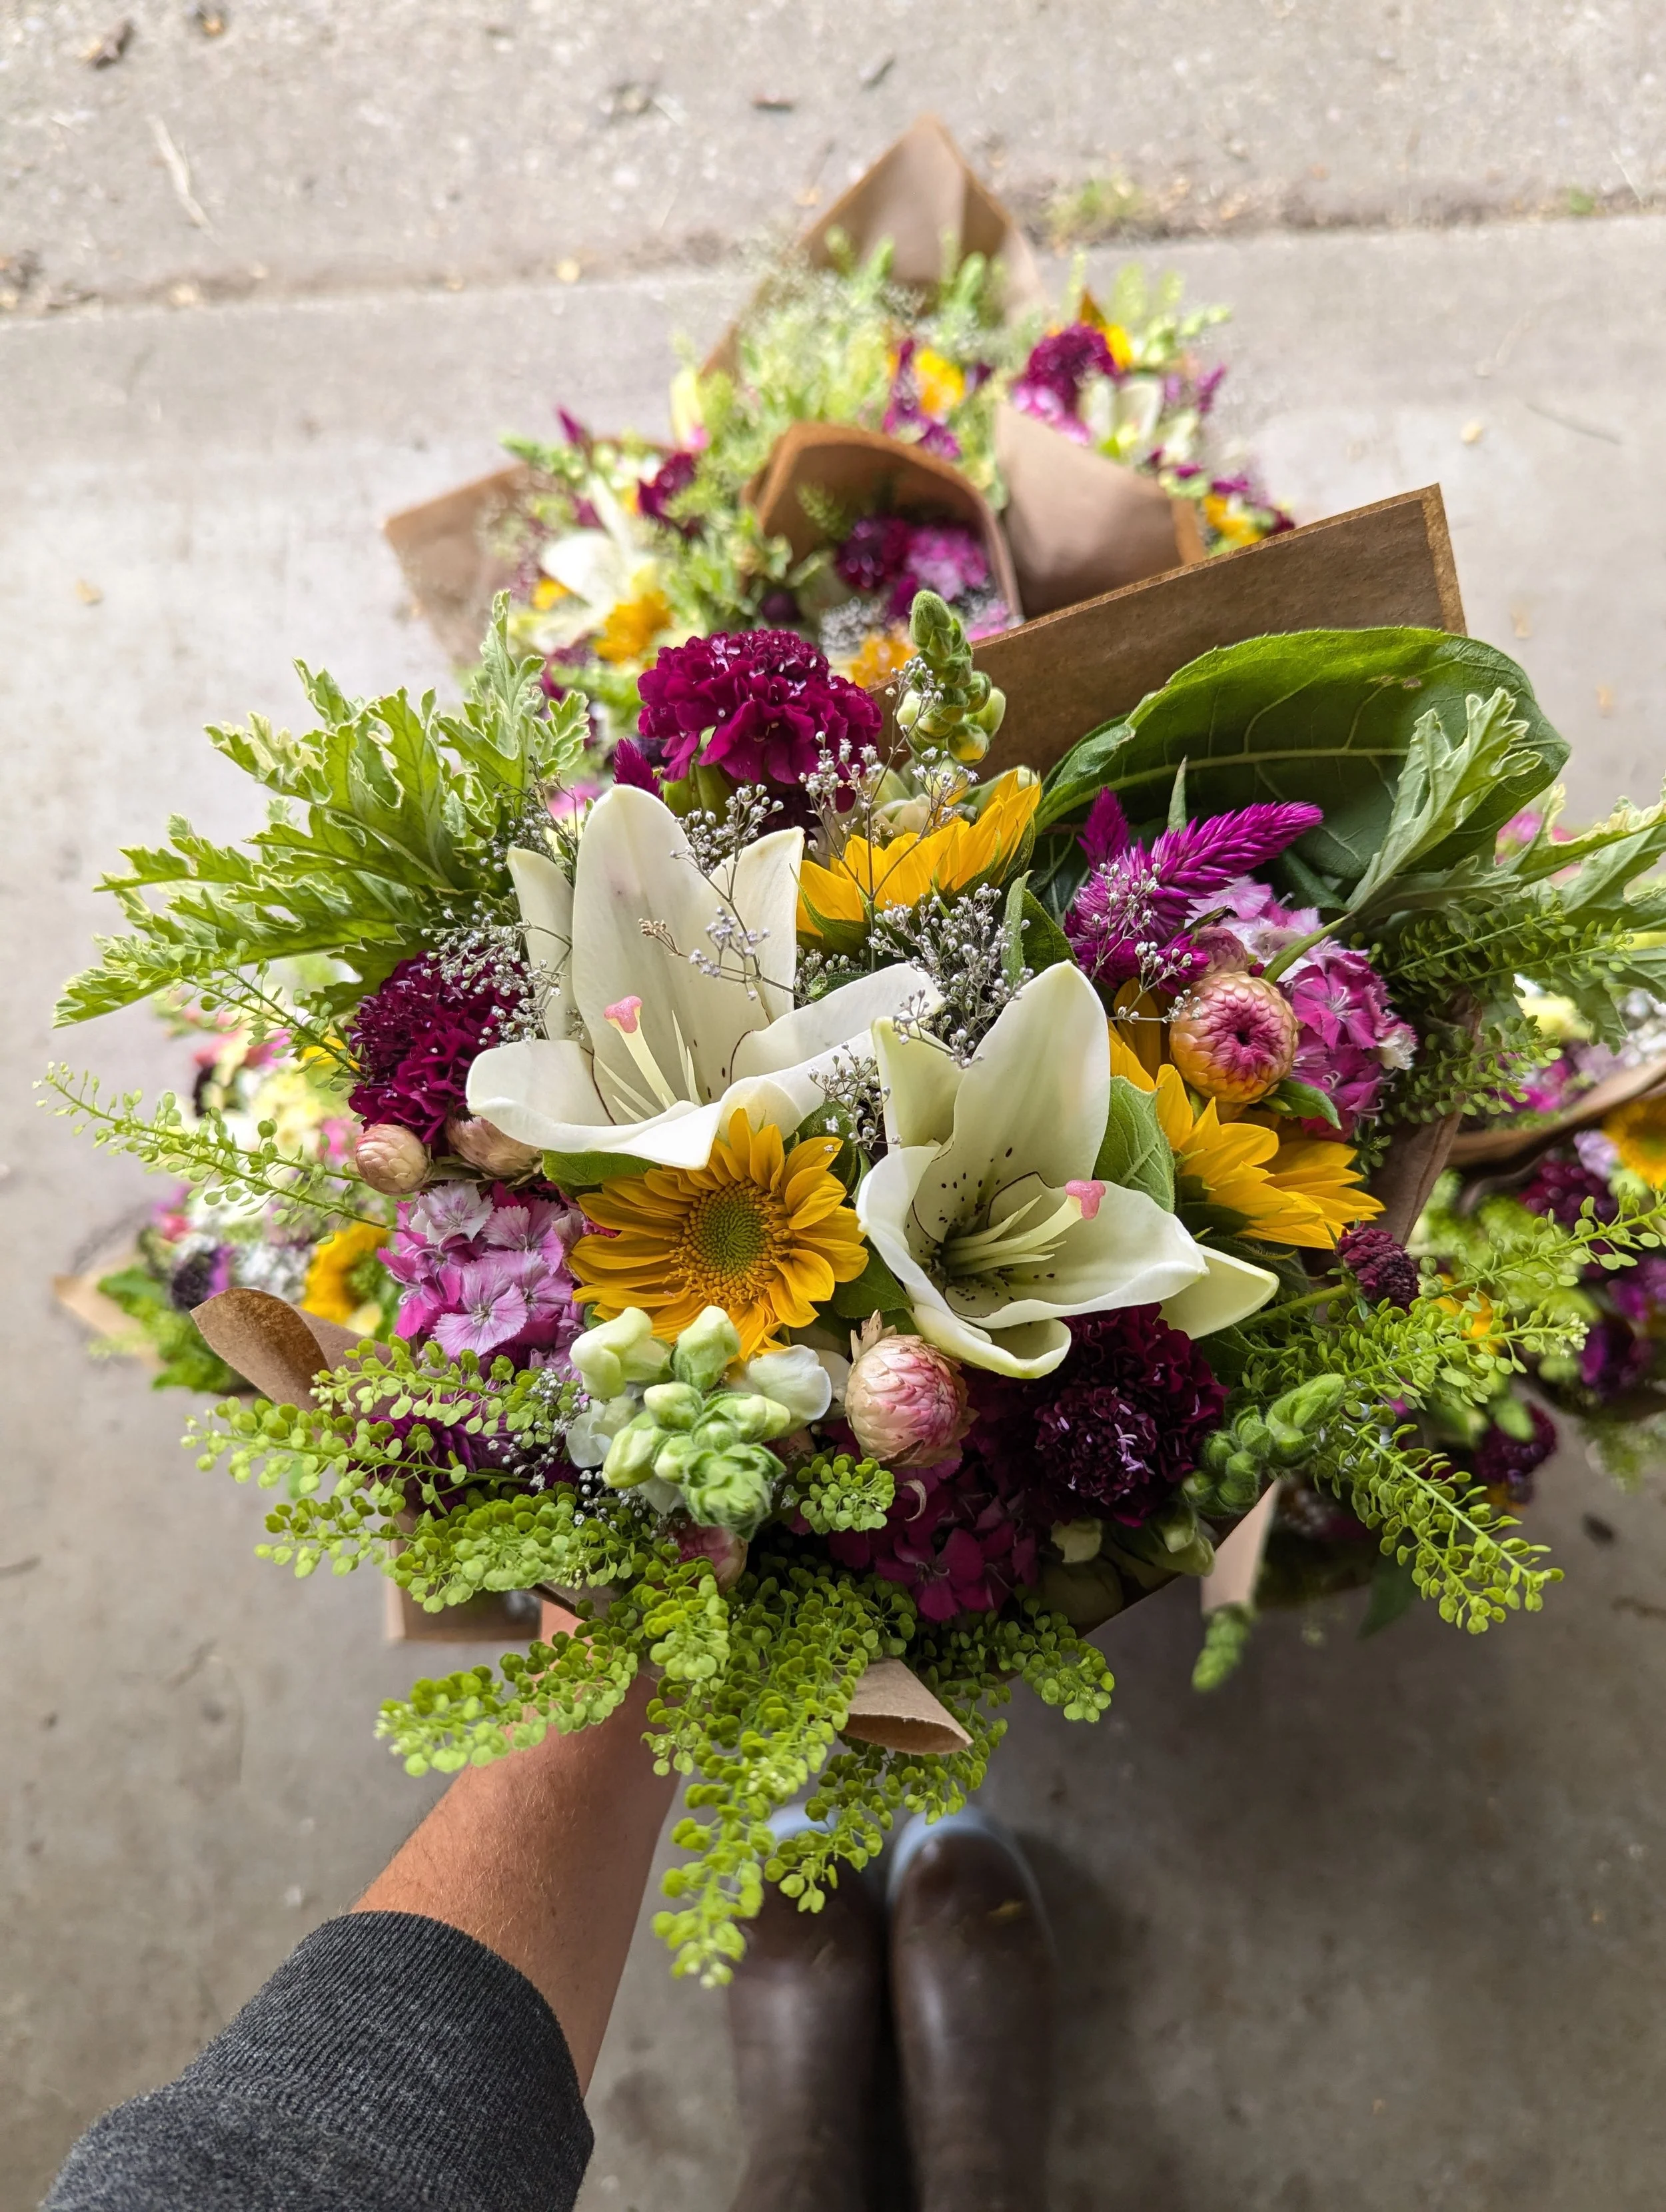
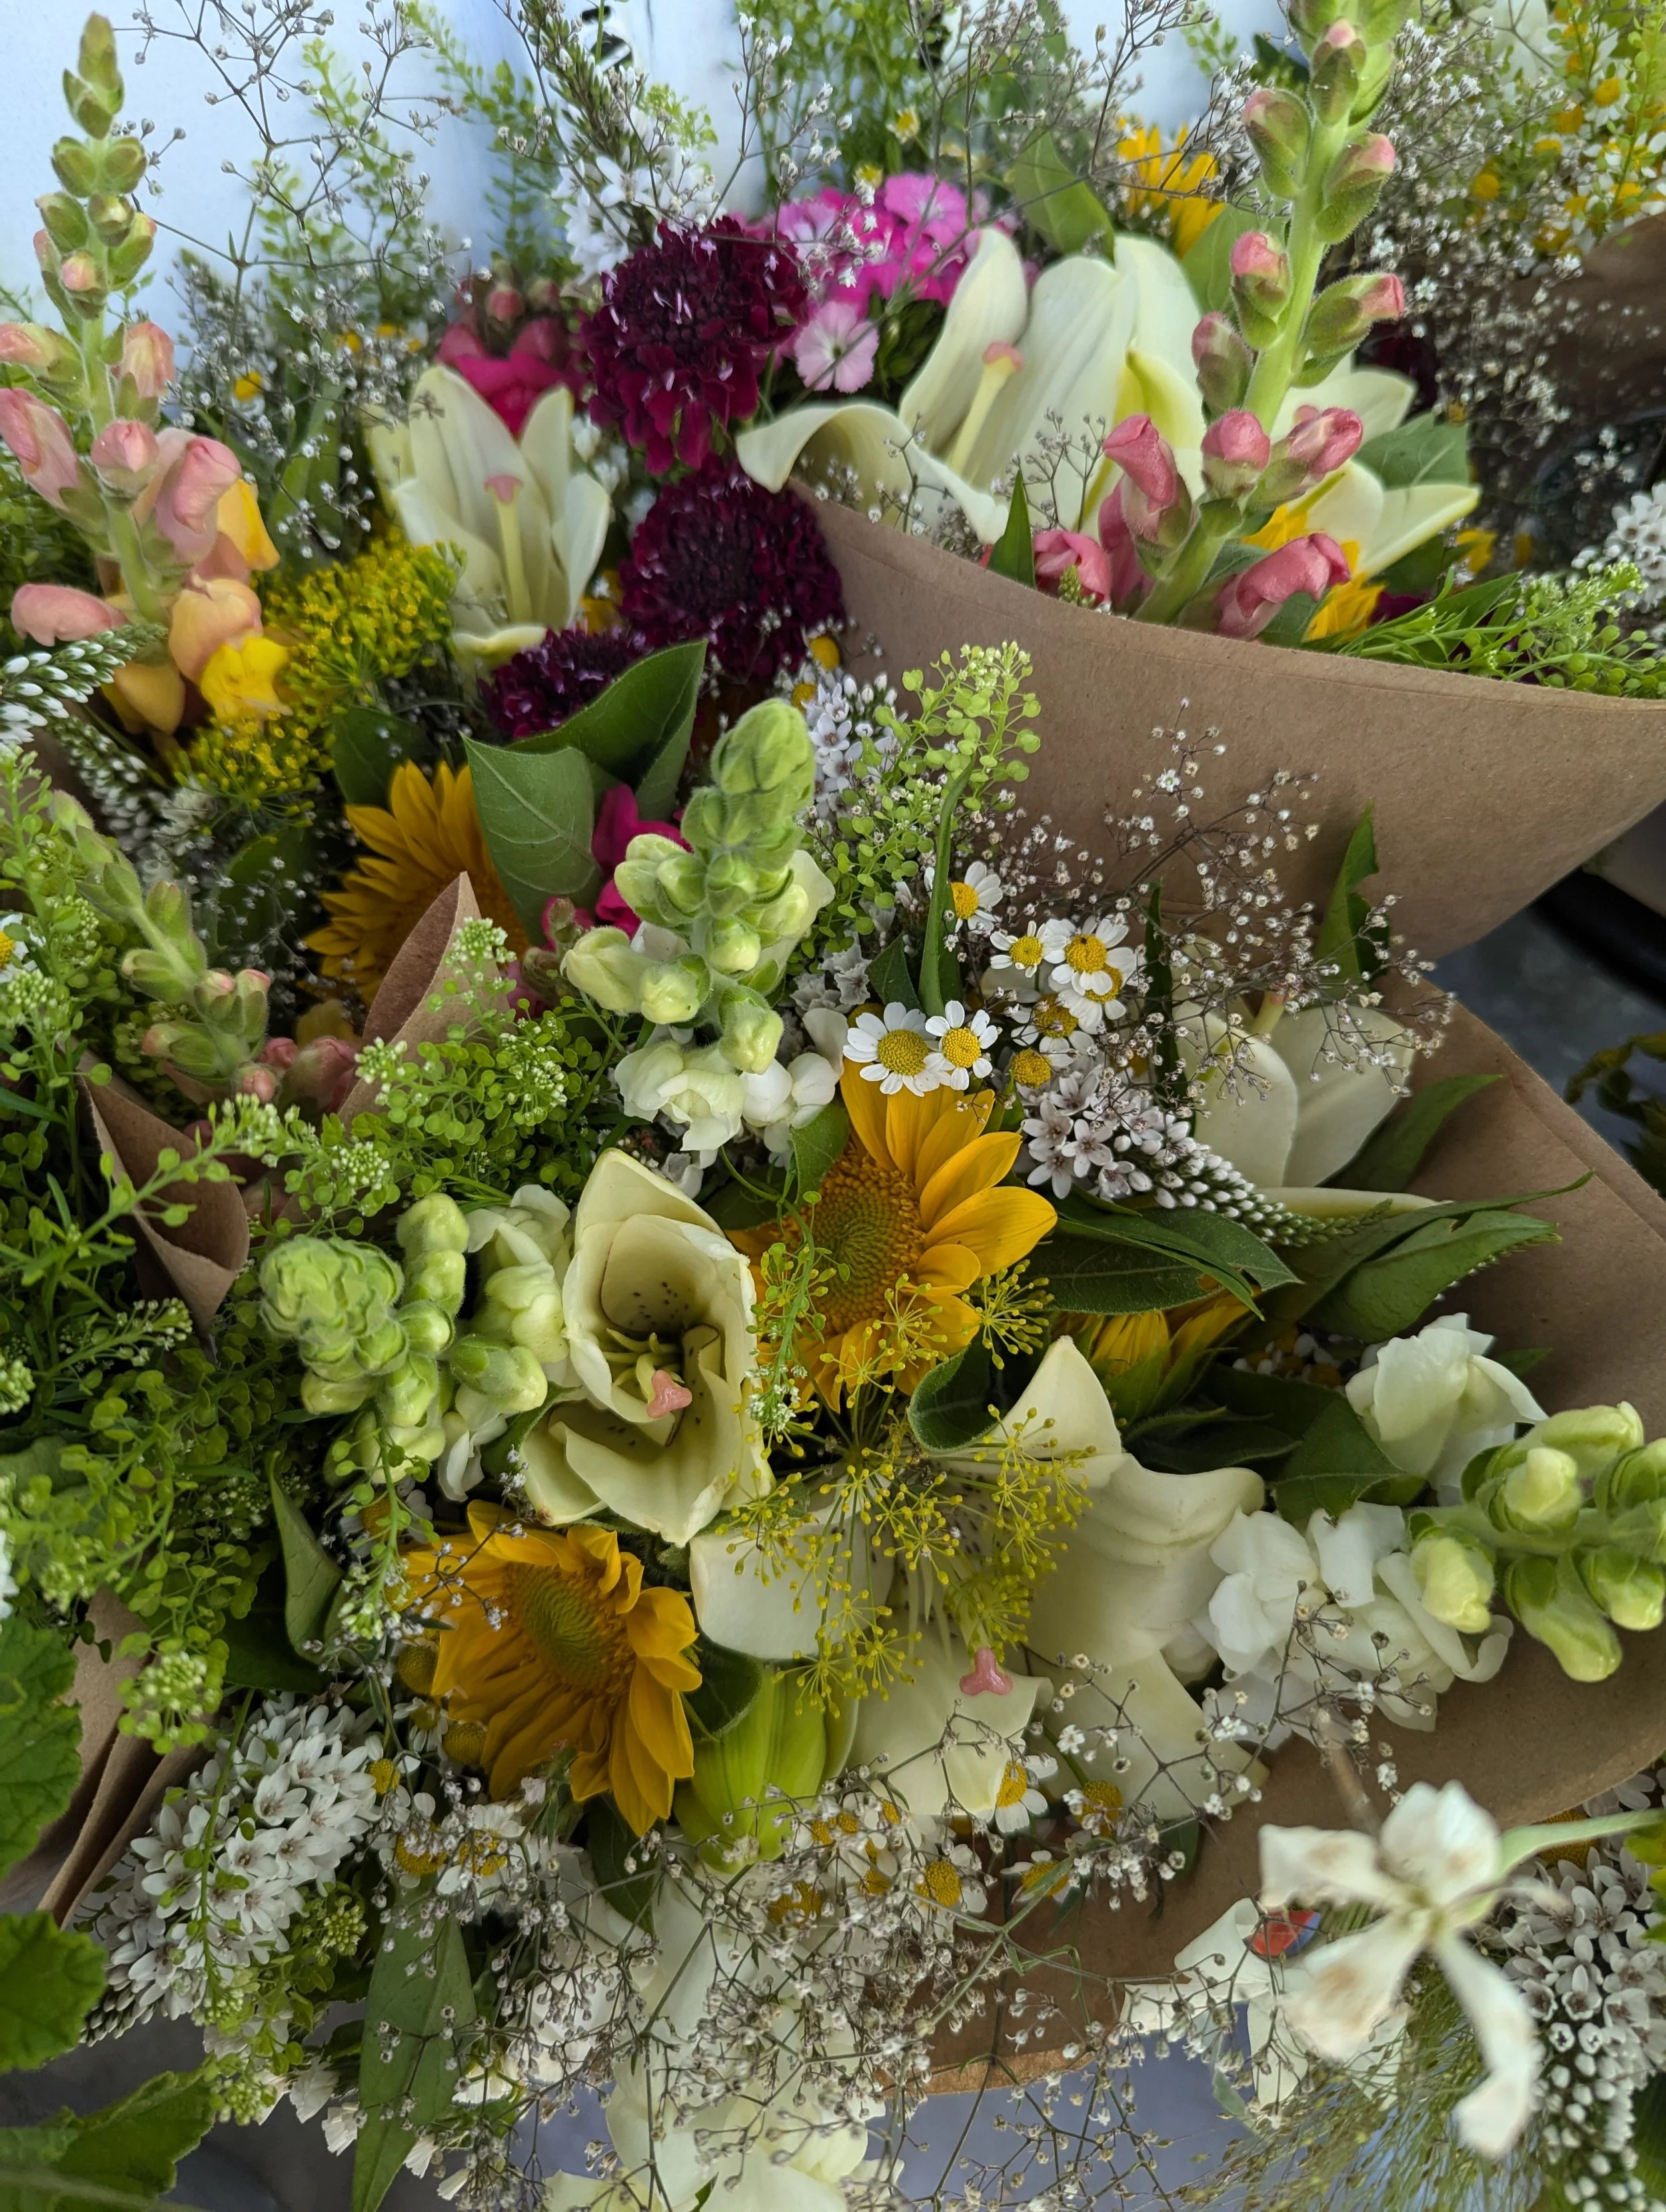
Peppergrass in bouquets
Transplants or Direct Sow?
Peppergrass can be transplanted or directly sown. I recommend transplants since the Peppergrass seedlings resemble weeds and it may be difficult to distinguish them from weed seedlings.
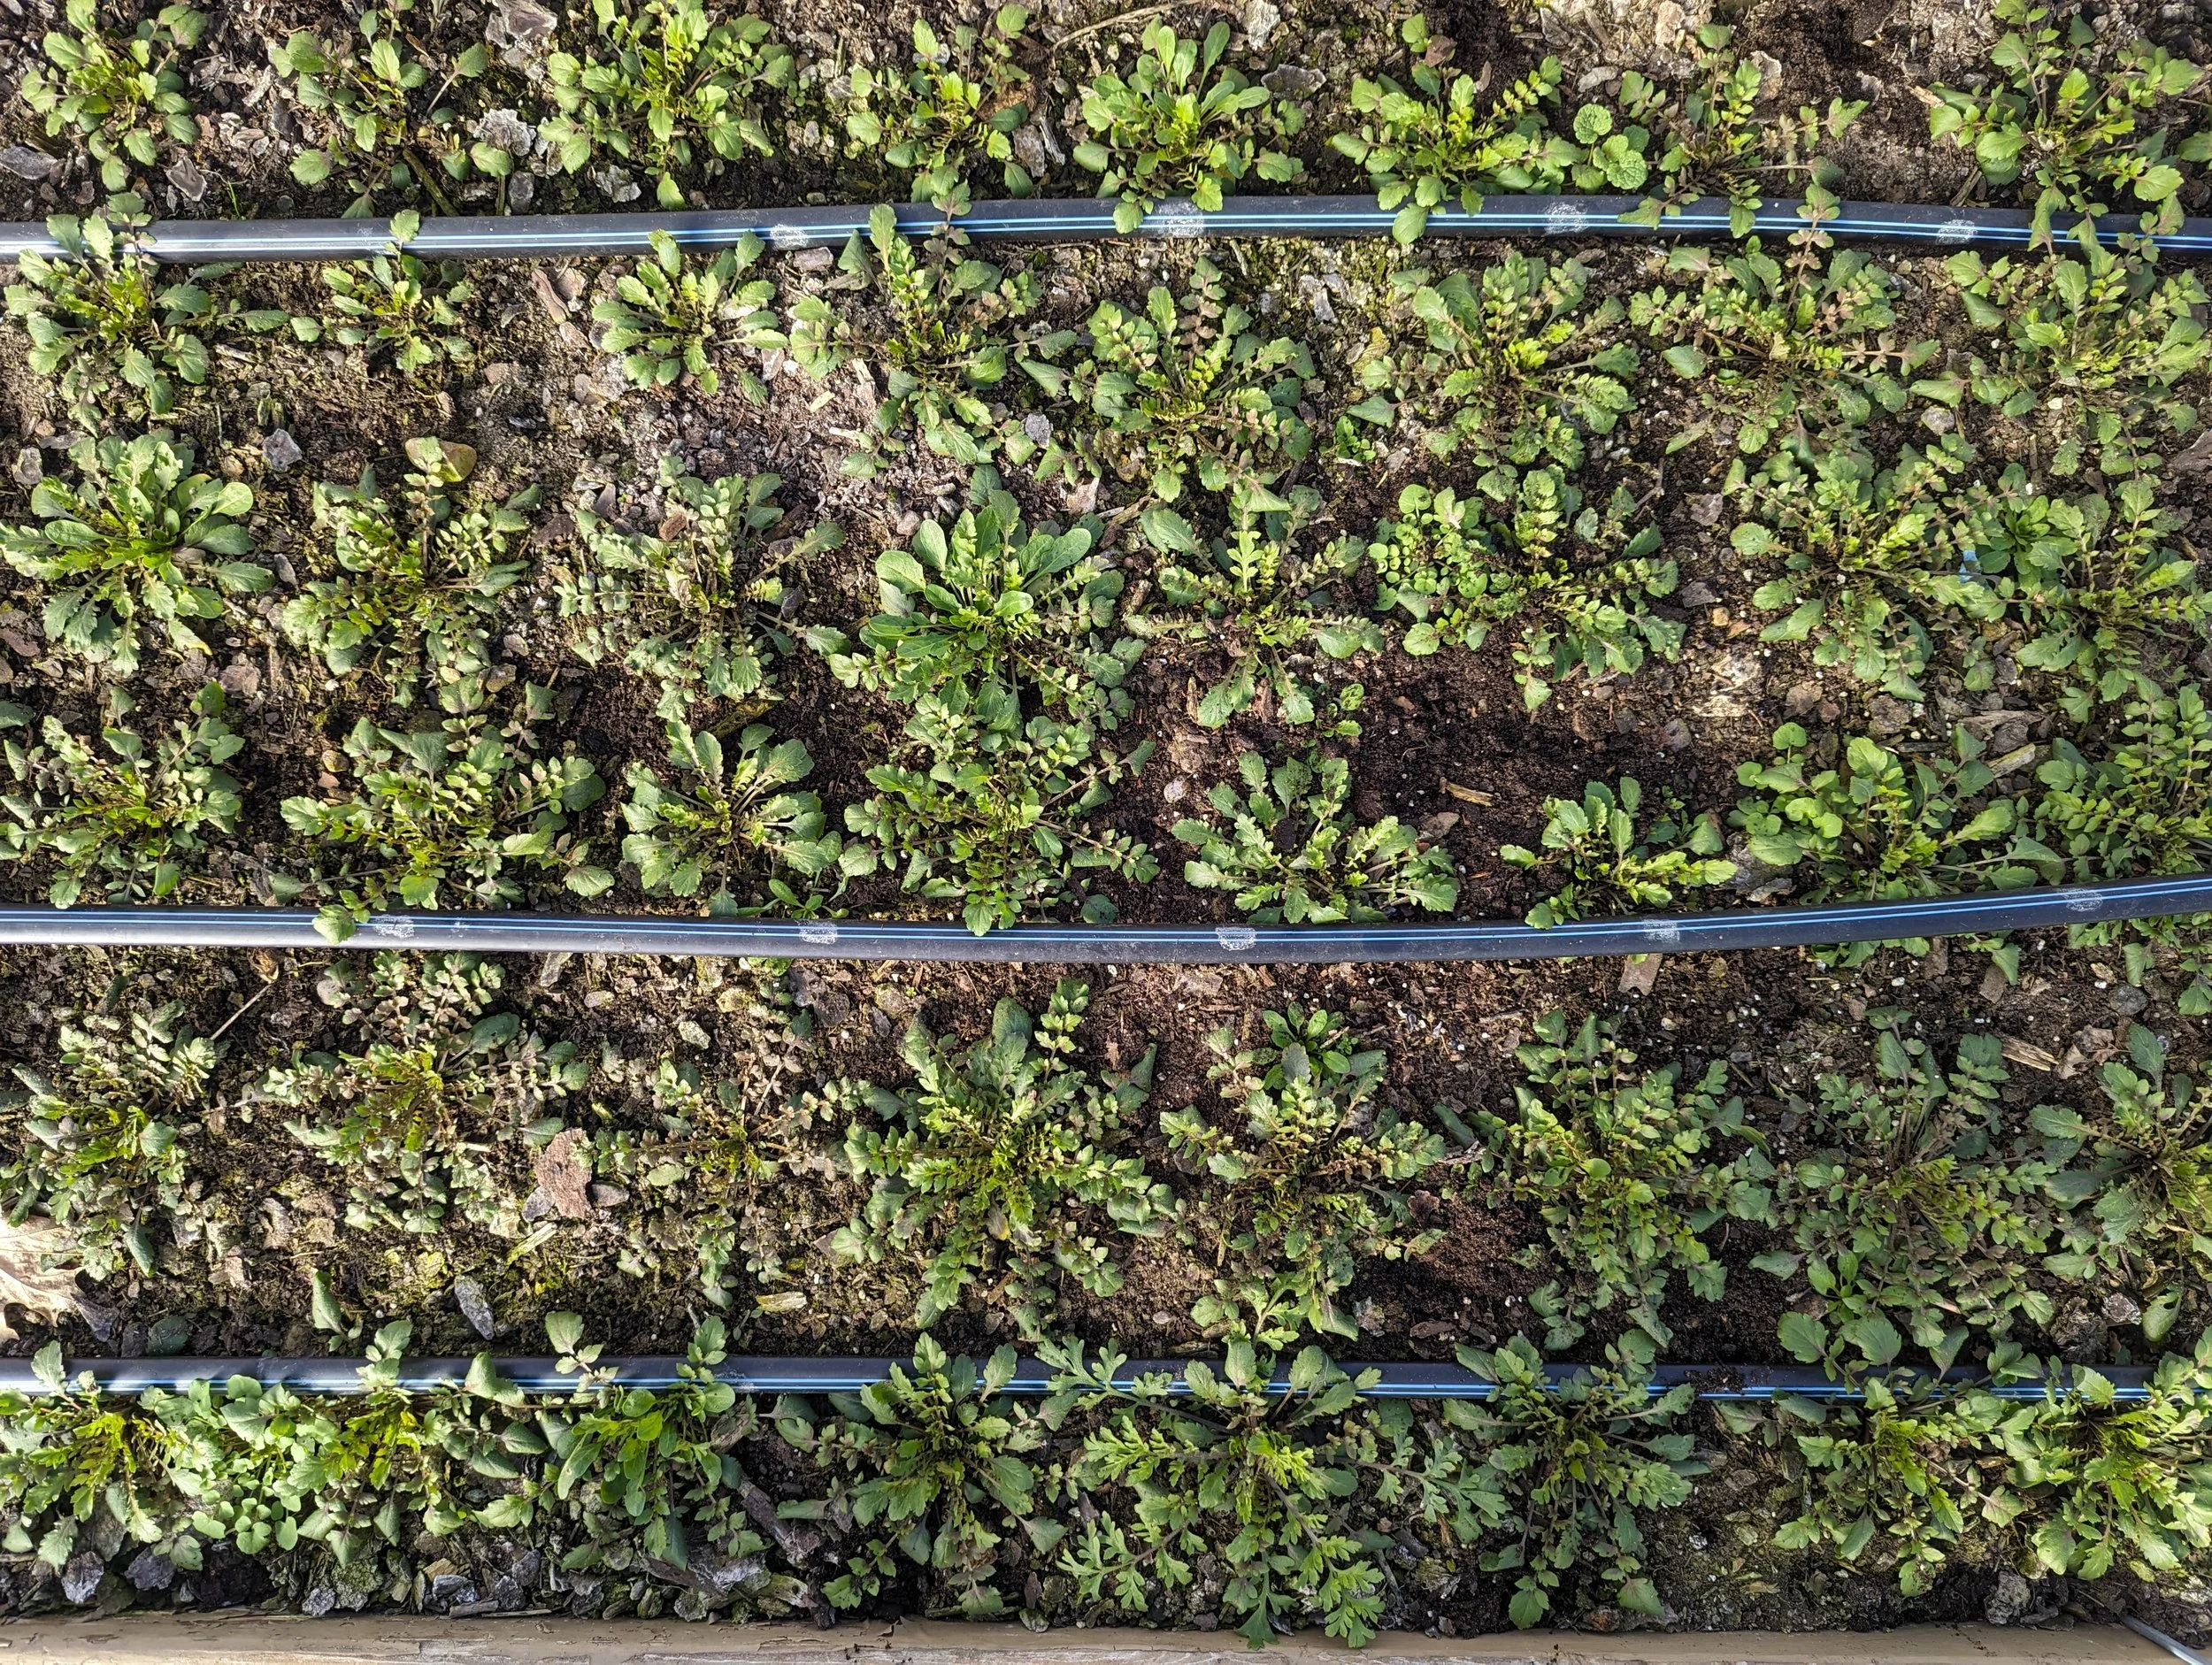
Peppergrass seedlings
As mentioned earlier, we’ve experimented with succession planting Peppergrass 2-3 times in the spring, as well as direct sowing in mid-summer for a fall harvest. The earliest sown succession always performs best. Subsequent successions are shorter and stunted.
Depending on where you live, you may have the best success sowing the seeds in the fall, 4-6 weeks before your Average First Fall Frost Date. The plants are tough and will “overwinter” in the garden, then bloom the following spring. This option may be best for people growing in hot climates.
P.S. If you have a hoophouse or caterpillar tunnel, you can plant Peppergrass in the fall and overwinter it for an early spring harvest. Don’t forget to also plant seeds in early spring too. This will give you a second succession after the hoophouse crop is finished.
PLANT SPACING
3-6 inch spacing is best. This will encourage the plants to grow taller, longer, straighter stems.
GROWING ON
Peppergrass has average fertility and water needs. Avoid overhead watering as it can cause mildew on the leaves.
Plants naturally branch and do not need to be pinched.
Netting or support is recommended but not completely necessary.
STAGE OF HARVEST
Harvest when the small white flowers have completely shed. Peppergrass is grown for its seed pods, not its flowers. You can harvest the stems when they are bright green or you can wait for them to fade to rose gold.
Harvest the entire stem at the base of the plant. You can use the entire stem in a bouquet or break the branches off from the main stem.
POST-HARVEST CARE
Remove as many leaves from the stem as possible. The leaves expire and rot quickly, but the stems and beads will last for weeks.
Peppergrass is a wonderful dried flower as well. Simply hang bunches upside down in a warm dry place for about 3 weeks until brown and dry.


Peppergrass hanging to dry in our barn

Dried Peppergrass lasts for years
QUESTIONS?
Ask them here and I’ll get back to you!
Ready for more?
If you’re serious about growing the garden of your dreams this year, register for my online course, “Backyard Cutting Garden 101”. You’ll find everything you need to plan, grow, harvest and arrange your stunning blooms. I can’t WAIT to help you grow! Click on the button below for all the details.

How to Grow Phlox
How to Grow Phlox
How to Grow: Phlox (Phlox drummondii)
Pronunciation: flaaks
INTRODUCTION
Many people are familiar with the Perennial “Garden Phlox” (Phlox paniculata), but in this blog post, we’ll be discussing Annual Phlox (Phlox drummondii). Both can be used as a cut flower, but I find the Annual Phlox to be much more useful in bouquets (especially as Garden Phlox can be susceptible to Powdery Mildew).
Annual Phlox can be a lovely addition to the cutting garden. Personally, I find harvesting them to be a bit cumbersome and I often mutter and complain the whole time… but once I weave the stems into mixed bouquets, I remember why I love them.
As a bonus, most Annual Phlox varieties have a delightful, delicate scent. Many cut flowers do not have a scent, so I’m always looking for beautiful sweetly scented flowers to mix into my bouquets.

Grandiflora Tapestry Mix
Let’s look at the Pros and Cons of growing Phlox for cut flower use.
PROS
They come in a wide variety of colors, from muted tones to bright hues.
They have a sweet scent.
They fill out a bouquet beautifully.
They are quick to flower, taking only 60-65 days.
They are very productive and abundant.
They have a good vase life of 7 days when harvested at the proper stage.
CONS
They tend to bloom early on stems that are too short for bouquets. The plants may require multiple “pinches” (pruning) before they begin blooming on longer stems. Pinching is not difficult, however, you have to remember to do it! I often pinch them 3x before they finally begin sending up 18-inch stems.
The stems can become tangled and difficult to harvest.

Cherry Carmel
CHOOSING SEEDS
When choosing seeds, the most important consideration is height. Look for varieties that will reach 18 inches.
Here are a few of my favorite Phlox to grow for cut flower use:
“Cherry Carmel”
“Creme Brulee”
“Sugar Stars”

Grandiflora Tapestry Mix
HOW TO SOW
Phlox can be a little fussy to start from seed. The trick is darkness - once sown, the seeds need to be kept in the dark until they germinate.
You’ve got a few options:
Sow seeds in trays and stick the trays somewhere dark and warm.
Cover the seeds completely with soil or vermiculite.
Cover the seed tray with another tray on top of it.
Once the seeds have germinated, you can move them into a bright location (under grow lights or a greenhouse). Seeds should germinate in about 5-10 days.
Transplants or Direct Sow?
Phlox can be direct sown or transplanted. I recommend transplanting since germination can be a bit tricky.
Start Phlox from seed indoors about 6 weeks before your Average Last Spring Frost.
Seedlings can be transplanted after the frost date. If the seedlings are starting to bloom in the trays, simply pinch off the blooms.
If you want blooms all summer, consider planting 2-3 successions of Phlox, about 3 weeks apart.
Phlox is considered an Annual, but I consider them a “Hardy Annual” since they can tolerate frost when the plants are mature. Annual Phlox is often one of the last flowers standing in the field after frost arrives.

Blushing Bride
Speaking of frost…
Side note: My neighbor hired a photographer to take photos of her beloved dog on our flower farm in early October. The night before the photo shoot, our farm was hit by a killing frost and all the flowers turned brown and dead… except for the Phlox! The Phlox was unscathed by the frost and the photographer managed to capture some beautiful images of the dog surrounded by the Phlox!

Phlox after a frost!
PLANT SPACING
Plants can be spaced 6-9 inches apart. I recommend close spacing to encourage the plants to grow taller.
GROWING ON
Phlox has average water and fertilizer requirements. Drip irrigation or soaker hoses are recommended as too much water on the plants can cause disease issues.
Now let's talk about pinching (pruning or cutting back the plant).
Phlox has a very odd, rambling growth habit and without some pinching, the plants be quite unruly.
They often try to start blooming when they are only 2-3 inches tall. While these are cute, they are not usable in bouquets, where I need 18” stems.

Needs to be pinched!
The solution? I simply go in with a pair of snips, cut off the blooms and tell the plant “Nice try, but I know you can do better. Let’s try again.”
After 2-3 rounds of this treatment, the plants start sending up lovely 18” long stems.
I don’t recommend netting Phlox, because the stems would be a tangled mess in the netting.

Blushing Bride - Long stems after being pinched a few times!
STAGE OF HARVEST
Harvest the stems when about ½ of the blooms on the stem are open. The remaining blooms will slowly open up in the vase. If all of the blooms are fully open (fully ripe or over ripe), the flowers will not last as long in the vase.

Grandiflora Tapestry Mix
POST-HARVEST CARE
Phlox requires no special post-harvest care.
QUESTIONS?
Ask them here and I’ll get back to you!
Ready for more?
If you’re serious about growing the garden of your dreams this year, register for my online course, “Backyard Cutting Garden 101”. You’ll find everything you need to plan, grow, harvest and arrange your stunning blooms. I can’t WAIT to help you grow! Click on the button below for all the details.
How to Grow: Poppies
Delicate. Swoon-worthy. Delightful. You’ll want to grow some!
How to Grow: Poppies
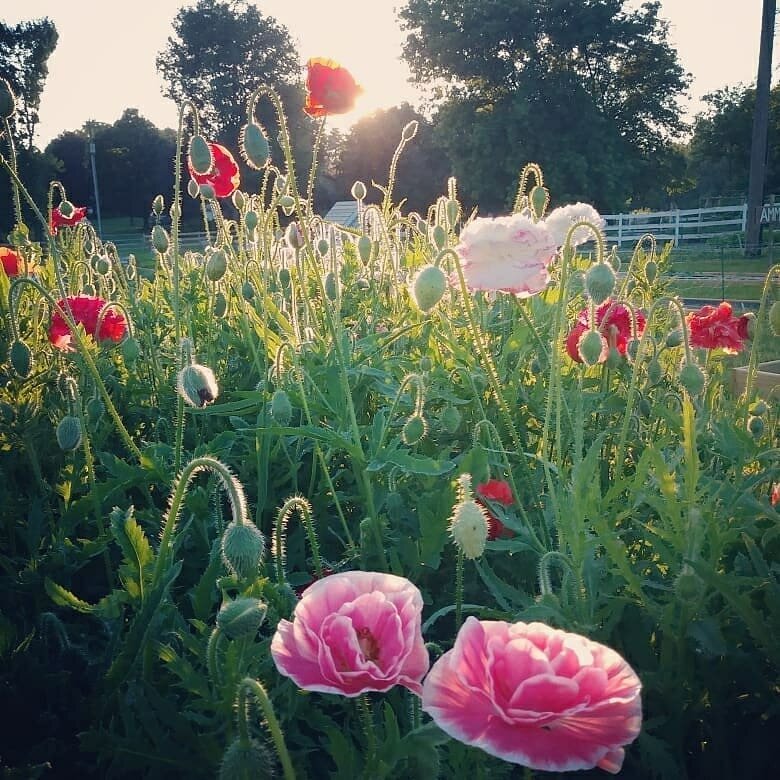
Poppies might be the most swoon-worthy flower ever. Their delicate blooms unfurl each morning and bring delight to all who encounter them.
Pollinators also love poppies. In the morning, I like to sneak out to the garden right before sunrise and wait by the poppy patch. As the sun peeks over the horizon, the flowers pop out of their casings and the honeybees begin to crawl all over the blooms. It’s humbling, fascinating and quite possibly the best way to start the day.
Most Poppies are easy to grow and I think everyone should try growing a few.
But let’s get this out in the open: Most types of poppies are NOT good cut flowers. At best, they will last 2 days in the vase… but they are so beautiful, I don’t care!
Let’s look at the Pros and Cons of growing Poppies for cut flower use.
PROS
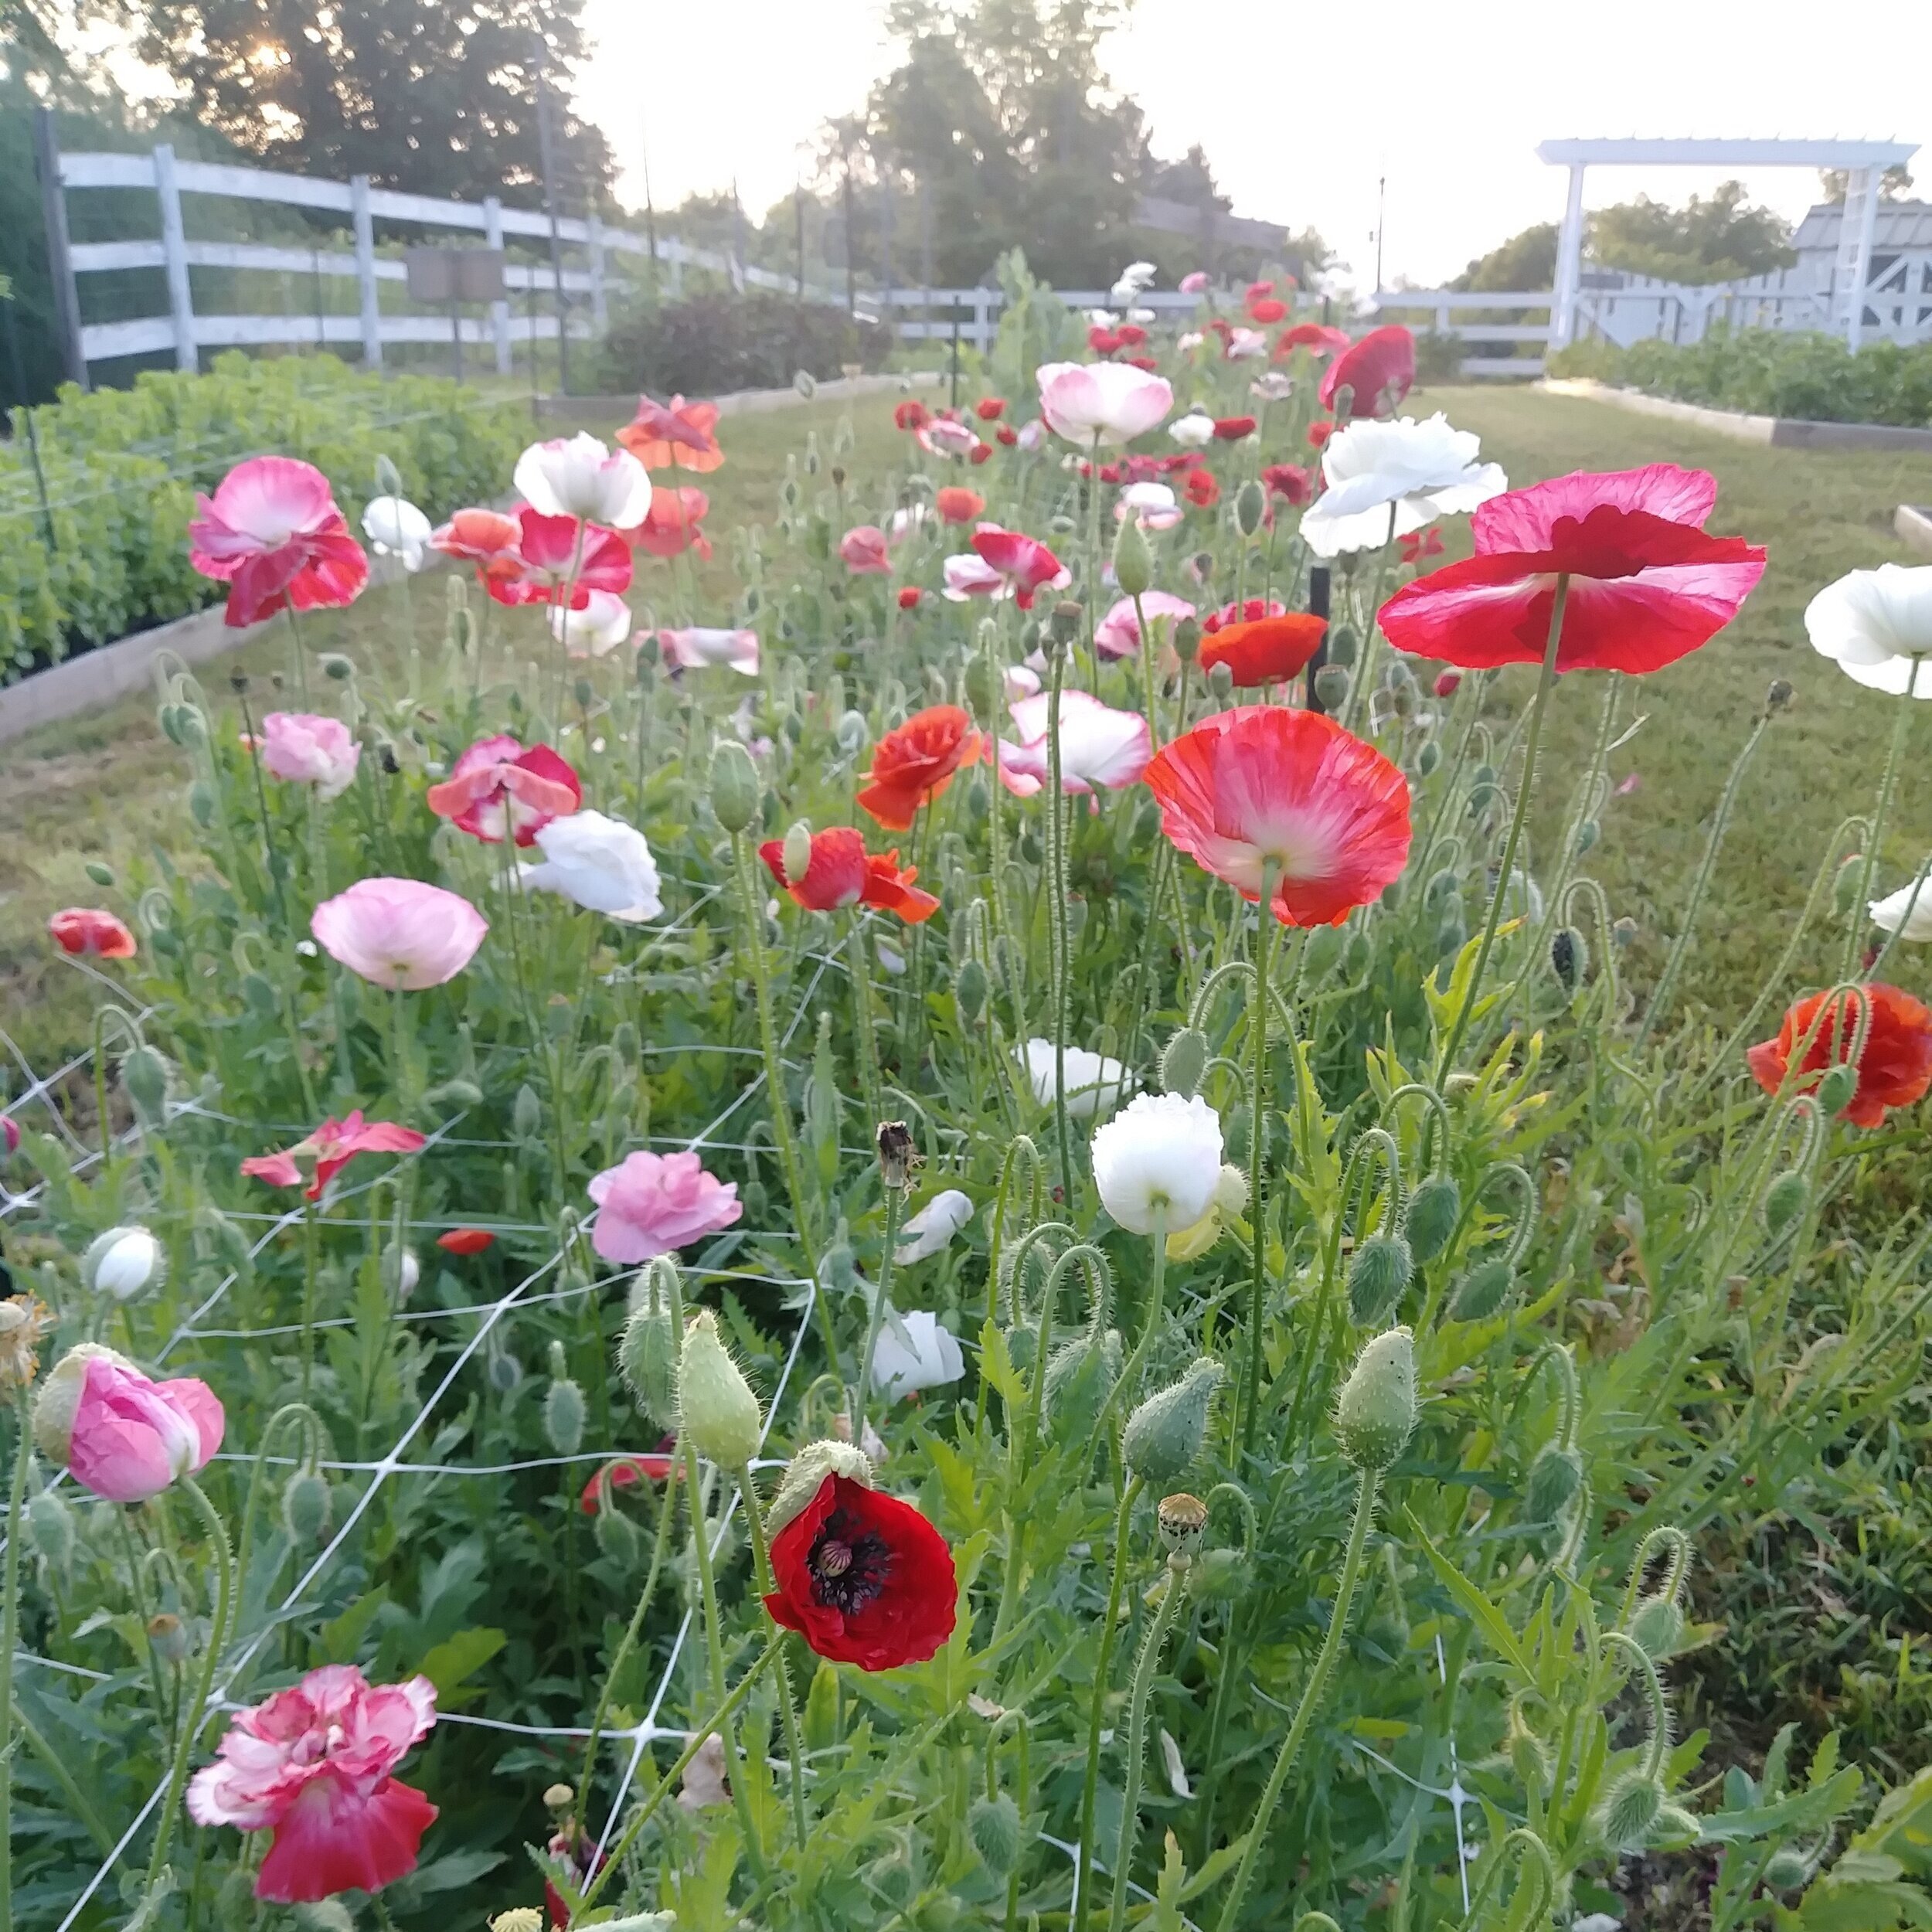
They come in a multitude of colors.
They are fairly easy to grow (most types).
They are loved by pollinators.
CONS
They prefer cool weather (days below 60 degrees Fahrenheit) and can be difficult to grow in climates with big temperature swings.
They stop blooming in hot summers.
They can be tricky to start from seed (I’m looking at you, Iceland Poppies!).
They are not long lasting.
They need to be harvested at precisely the right time and it can be difficult to do this.
They need special post-harvest treatment to prolong vase life (Iceland Poppies).
CHOOSING SEEDS
As I mentioned above, most poppies are not a good cut flower. However, they are so irresistible that people insist on cutting them anyway.
It’s helpful to think of Poppies as an “Event” flower, not a “Bouquet” flower. They are perfect for an event, like a dinner party or wedding, where they only need to last a day or two. They are not generally not a good choice for a bouquet intended for display for a week or more.
Poppies are divided into 4 main categories:
1. Shirley Poppies (Papaver rhoeas): Also called Field Poppy, Corn Poppy or Common Poppy. Grown as an Annual. These are easy to grow, but not long lasting. Expect about 2-3 days maximum. 1 day is more realistic.

“Shirley Double” Poppy
2. Breadseed Poppies (Papaver somniferum): Grown as an annual. These are mainly grown for their interesting seed pods, not as a cut flower. Allow the flower to bloom and die, then harvest the pods for dried arrangements.

“Peony Double” Breadseed Poppy
3. Oriental Poppies (Papaver orientale): A perennial type of poppy that is popular for landscape use. Usually not used as a cut flower, but also has interesting pods.
4. Iceland Poppies (Pavaver nudicaule): The best type of poppy for cut flower use. Technically a perennial, but short lived and doesn’t like heat, so it’s usually grown as an annual or biennial. Of all the poppies, Iceland Poppies have the longest vase life of about 5 days if harvested at the correct stage and treated to prolong vase life (more about that later).

“Nudicaule Blend” Iceland Poppy
In my experience, Iceland Poppies are more temperamental to start from seed than other poppies. If you are a beginner, I recommend sticking to Shirley Poppies and Breadseed Poppies until your skill level increases.
Here are a few of my favorite Poppies to grow for cut flower use:
“Shirley Double” (Shirley)
“Angel’s Choir” (Shirley)
“Falling in Love” (Shirley)
“Mother of Pearl” (Shirley)
“Pandora” (Shirley)
“Peony Double” (Breadseed)
“Lauren’s Grape” (Breadseed)
“Champagne Bubbles” (Iceland)
“Nudicaule Blend” (Iceland)
HOW TO SOW
There are few flowers that seem to respond best to the S.T.U.N. growing technique.
S.T.U.N. stands for “Sheer, Total, Utter Neglect”. Ha! Poppies tend to fall into this category.
I swear, the harder you try to grow them, the worse they do. But toss the seeds in the air out of frustration and they will take off like crazy! Seems like don’t like to be fussed with.
Poppies are a great candidate for the “hands off” growing method of Winter Sowing. I’ve had much success with growing Poppies this way. You can find out more about it HERE.

Transplants or Direct Sow?
Poppies are not a big fan of being transplanted and prefer to be direct sown.
However, they can be grown as transplants. If you are growing them as transplants in trays, be sure to “bottom water” the tray by setting it in a pan of water. Overhead watering can wash away the tiny seeds.
They may be slow growing, especially Iceland Poppies, so be patient.
You can plant them using the “toothpick method” (pour seeds into a bowl/jar, lick the toothpick and dip it into the seeds. Transfer seeds to your prepared trays) or you can evenly sprinkle the seeds over the tray.

Direct Sowing is the easiest method. The seeds are tiny, so just stand over the spot you want them to grow and sprinkle them like fairy dust.
Where you live determines how you direct sow poppies. If you live in Zone 6 or warmer, you might have the best luck preparing your growing area in the fall and sprinkling the seeds. They will lay dormant over the winter and germinate in the early spring.
If you live in Zone 5 or colder, you can sprinkle the seeds in the soil as soon as it’s thawed out in the spring (March, for most of us). They can handle frost and even some snow.
PLANT SPACING
Poppies can be spaced at 6” or less.
Obviously, when you sprinkle seeds over an area, it’s difficult to control the spacing. I’ve found my Poppies don’t seem to mind VERY crowded conditions and don’t bother thinning them out.

GROWING ON
If flowers are harvested and spent blooms are “deadheaded” (removed), the plants will continue to bloom until it gets too hot (mid July, around here). Of course, you can always leave them and allow the seed heads to form.
STAGE OF HARVEST
For the longest lasting blooms, Poppies need to be harvested at the correct stage. They move from “not quite ready” to “too late!” very quickly… and by quickly, I mean minutes, not hours!
Poppies should be harvested at the “cracked bud” stage. This is right before the flowers “pop” out of their casings. You’ll be able to see the color of the bloom through the crack in the casing.
The bloom will open up in the vase and you’ll get the longest vase life possible this way.
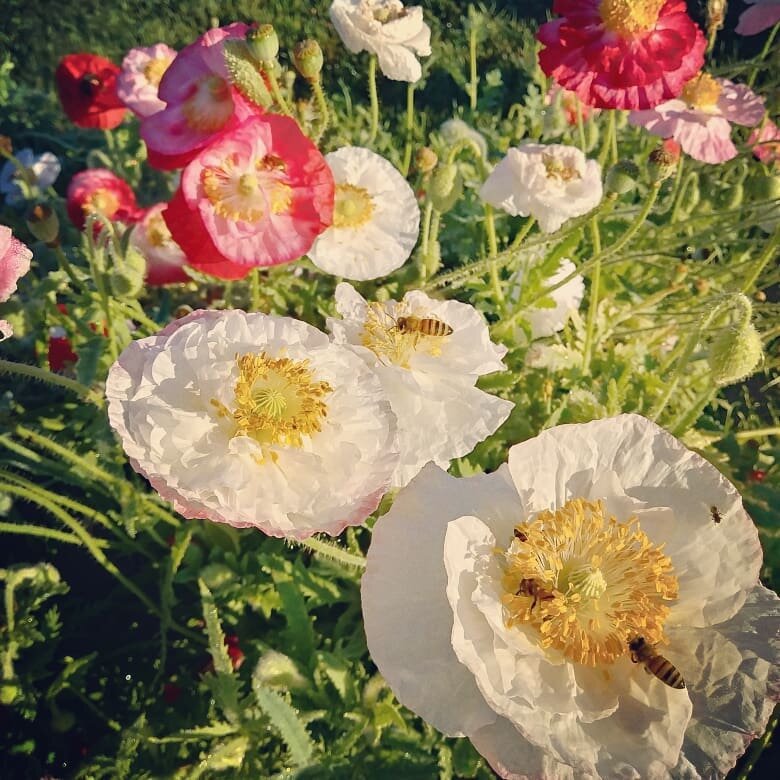
As soon as they pop out of their casing, Poppies are covered in pollinators…. And unfortunately, once they have been pollinated, they are basically useless as a cut flower. If the Poppy is fully open, don’t bother harvesting it. Leave it for the bees instead.
Be sure to cut deeply right into the base of the plant. Deep cuts signal the plants to produce MORE flowers to replace the one you just cut.

POST HARVEST CARE
Immediately after harvest, sear the stem ends of the poppies. The stem ends drip sap. Searing seals them and makes them last longer in the vase. You sear them out in the field as you harvest or do it as soon as you get back to your house.
You can do this with:
Boiling Water: Bring water to boil and dip stem ends in the water for about 10 seconds.
Flame: Use your gas stove, a lighter or a propane torch (the most fun! Ha!) to burn the stem ends for about 10 seconds.
After searing, place in cool water and keep them in a cool, dark place until ready to arrange.
QUESTIONS?
Ask them here and I’ll get back to you!
Ready for more?
If you’re serious about growing the garden of your dreams this year, register for my online course, “Backyard Cutting Garden 101”. You’ll find everything you need to plan, grow, harvest and arrange your stunning blooms. I can’t WAIT to help you grow! Click on the button below for all the details.