

50 Family Friendly Advent Activities
50 Ideas to get you started with your own Advent Activity Calendar.
50 Family Friendly Advent Activities
I LOVE traditions, don't you?
In fact, traditions are my favorite part about the holidays! Each year our family scales back a bit on the whole "gift giving" part to focus our attention on creating memories and engaging in traditions.
Years ago, I was reading a book about family life and the importance of traditions. The author suggested sitting down and listing all the traditions you grew up with, which ones you liked and why. Then she challenged the reader to come up with their own new traditions.
My kids were very young when I read this and the time was ripe to start our own traditions, but even if your kids are older (or if your kids are out of the house!), it's never too late to start something new!
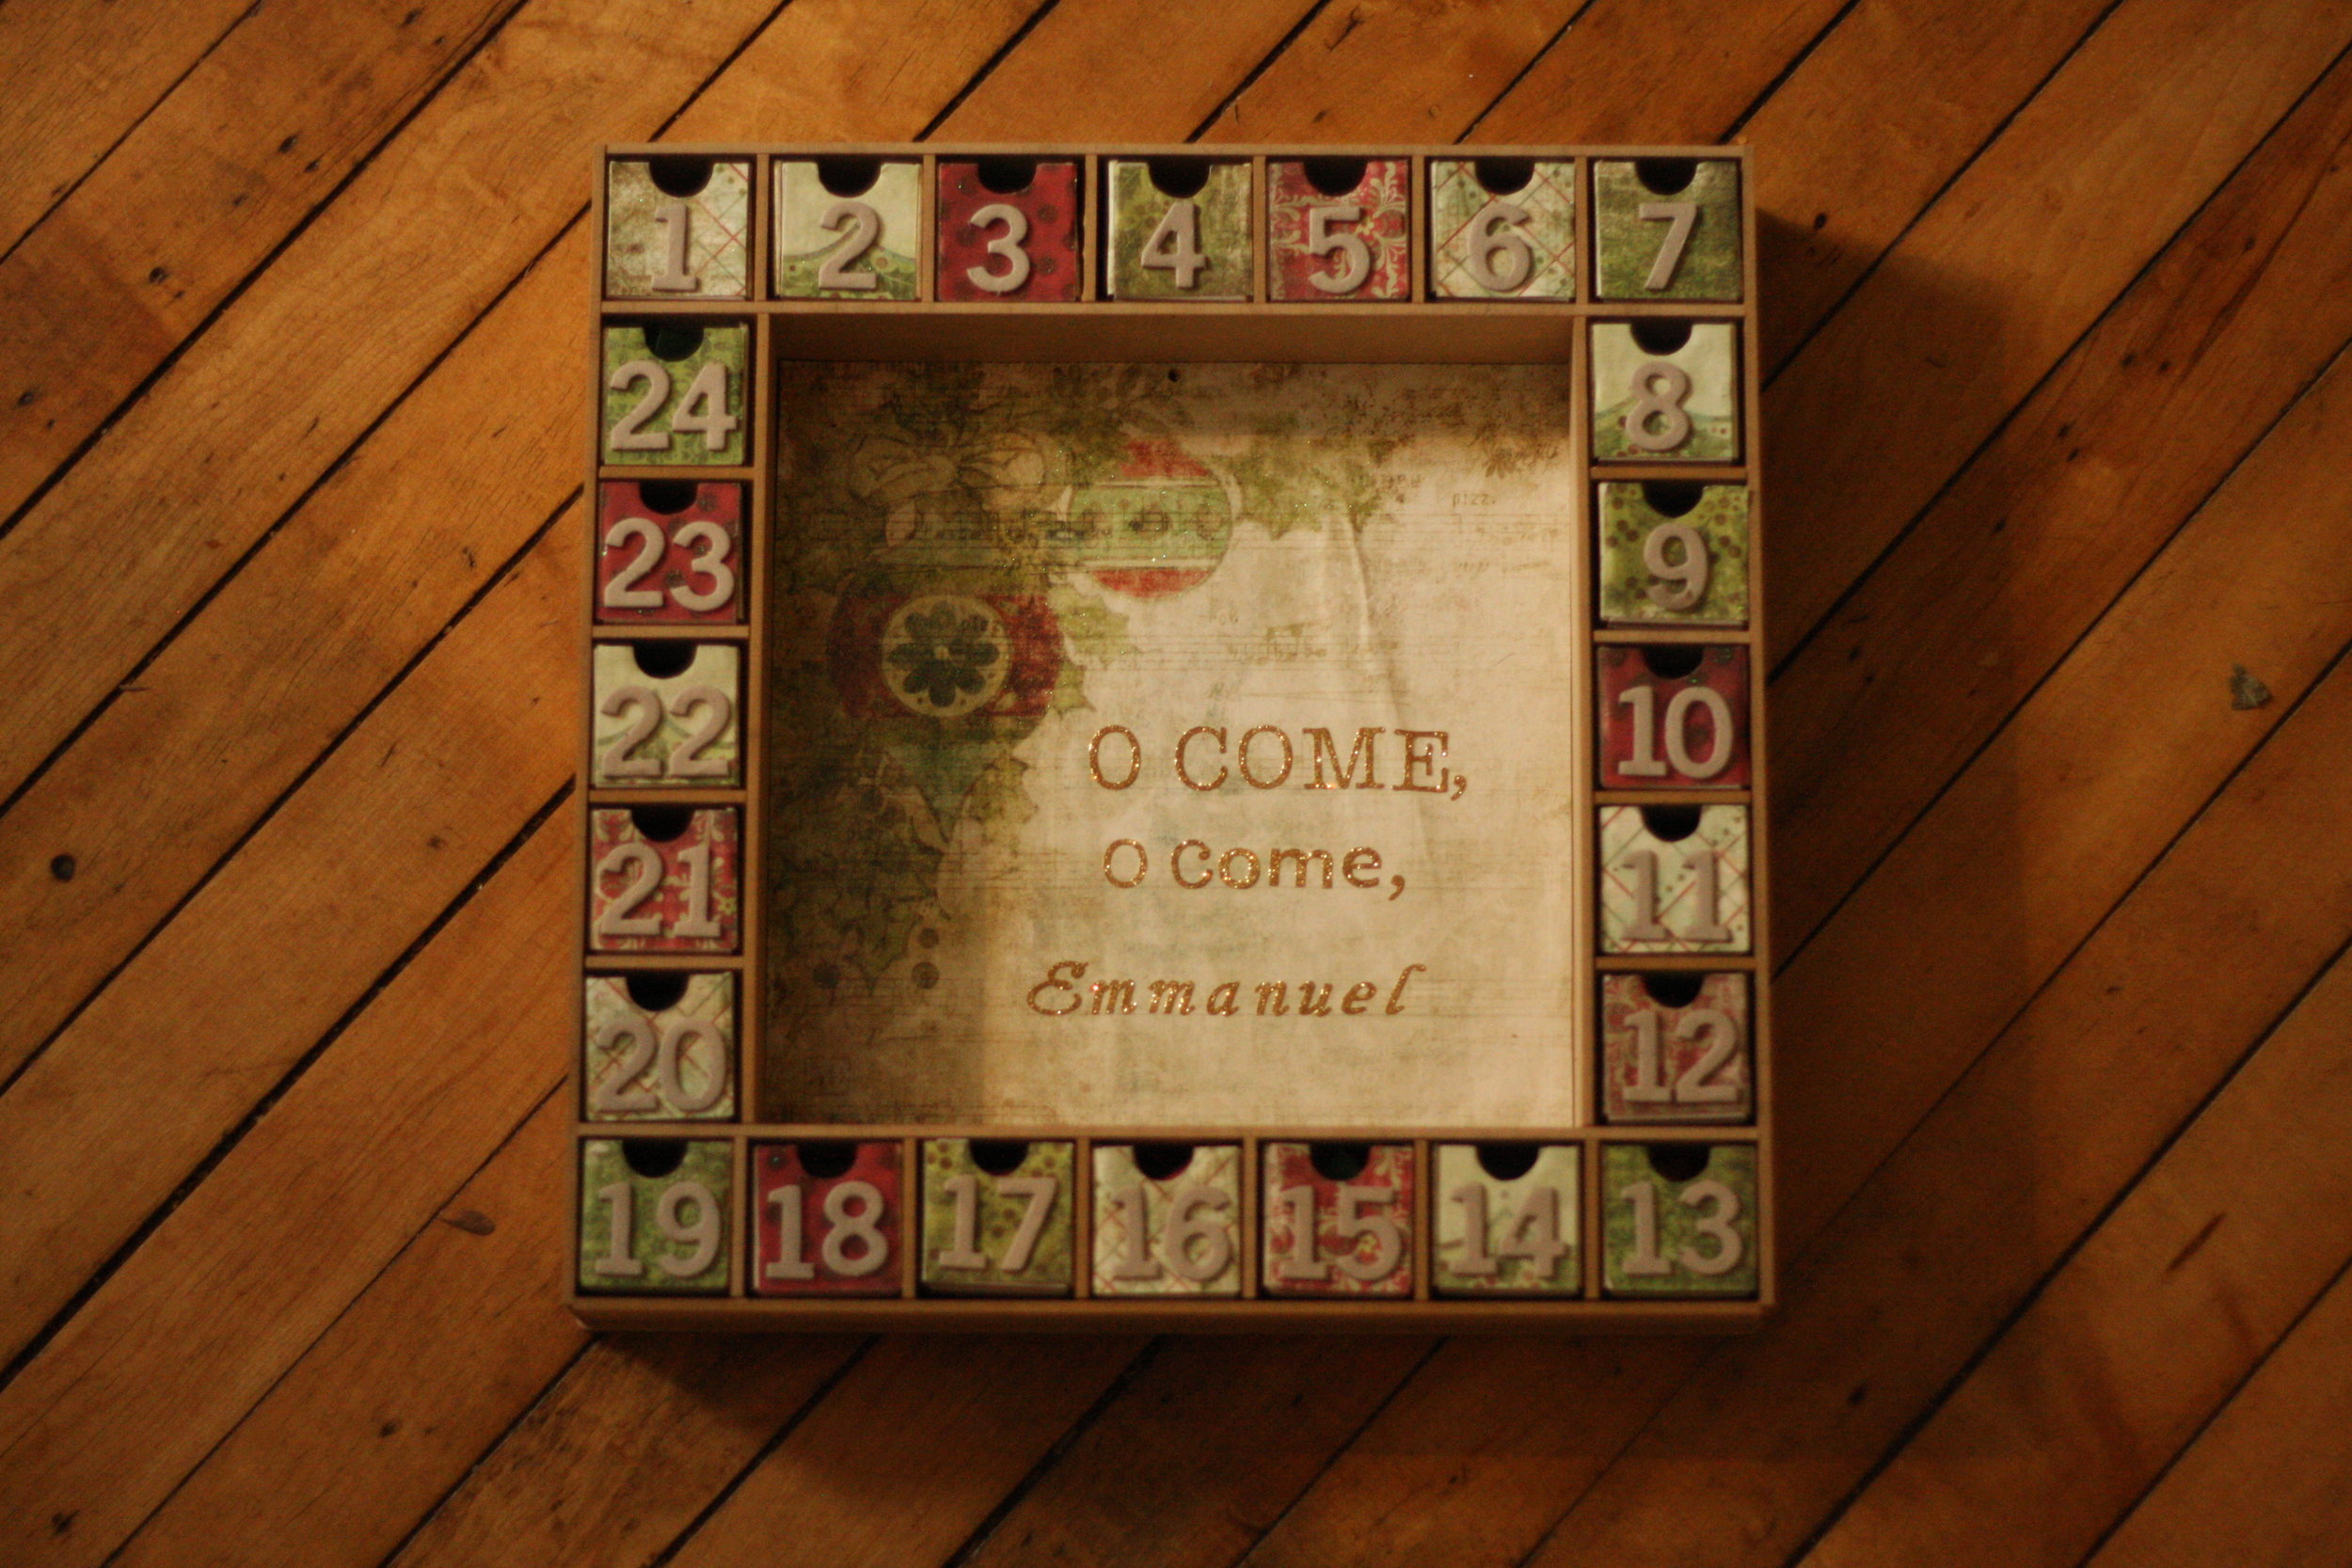
I decided to make an Advent Activity Calendar, a fun way for us to celebrate the season and take the focus off presents, and point us more to an attitude of gratitude and giving.
So many people ask me about our Calendar, so I thought it would easier to show you how I do it step-by-step!
A PEEK AT OUR ADVENT ACTIVITY CALENDAR
1. Find an Advent Calendar:
There are all sorts of Advent Calendar ideas out there, so look around. If you Google search “Advent Calender” or look for ideas on Pinterest, your head will explode in about 2 minutes. There are SO MANY WAYS to make an Advent Calendar. Be creative and use what you have!
Our calendar is made by Kaiser Craft (try searching Kaiser Craft Advent Calendar for all sorts of ideas and inspiration). It comes as plain MDF board that can be decorated or painted as you wish.
I purchased a pad of Christmas themed scrap-booking paper, some letter stickers and glue, and got to work.
2. Make a List of Ideas:
I came up with a list of Advent Activity Ideas that are age appropriate for our family. Each activity is written on a little slip of paper. It might be good to write down a few extra, in case you need to change your plans. I've shared 50 ideas with you below to get you started!
3. Look at Your Calendar
Next, I sit down and look at our calendar for the month (and any community event calendars/flyers I can get my hands on. Try contacting your local Chamber of Commerce!) and do my best to organize the activities on days that would work. I make sure to have back-up plans and allow myself to move the activities around if needed (for example, we can't "go sledding" if there is no snow!).
If you live in the West Michigan area, like we do, be sure to check out GRKids.com, where you can find a full list of all the action in West Michigan.

4. Go Shopping for the Needed Supplies
Make a list of supplies you will need for the activities you are planning. Of course, your "supply list" will vary depending on what activities you choose! A couple things that are usually on my list:
Spices
Smores Supplies and Candy Canes
Hot Cocoa Mix
Cranberries
Gingerbread House Kit
Birdseed
Pinecones
Window Paint
Holiday Themed Pasta
Nuts in Shells
Apple Cider
Bags/Tissue paper for gifts
5. Choose a Time to "Open" the Calendar
Each morning, my kids get to take turns "opening the box" and discovering what we will be doing that day. The anticipation is sometimes even better than the activity! Choose a time that works best for your family.

A WORD OF CAUTION
I know you are excited! I know you want to do ALL THE THINGS! But... I caution you.
Some days are going to be crazy busy and if you try to fit in ONE MORE THING the Advent Activity might become a chore instead of a way to prepare your heart for Christmas.
I can't tell you how many times this happened to us: My husband and I would make plans for a family outing, with visions of us smiling and laughing and having a great time. Unfortunately, reality sets in and on more than one occasion, we've said to each other through gritted teeth (over the noise of crying or bickering children) "We're having fun, dang it!" Ha!!!! Please tell me this has happened to you too!
Keep the activities SIMPLE.
For example, if your KNOW Wednesdays are insane, maybe you choose a simple activity like eating dinner by candlelight and listening to Christmas music while you eat. Or maybe you read a Christmas story before bedtime.
As my kids get older and life gets busier with homework, church and school commitments, we give ourselves TONS of grace. Some days we simply cannot fit in ANY Advent Activity. It's ok. Truly.
This is not about perfection. This is about being intentional.
50 FAMILY FRIENDLY ADVENT ACTIVITIES
Family outing to cut down a Christmas tree
Go sledding
Pick out Toys for Tots and deliver to dropbox
Choose gifts from World Vision/Heifer International/etc.
Go ice skating
Bring gifts/treats to the neighbors
Make the house smell like Christmas (put whole cloves and a cinnamon stick in a pot of simmer water on the stove)
Make and hang paper snowflakes
Make hot cocoa with candy canes for stir sticks
Paint winter designs on the windows with tempera paint
Visit a live nativity
Decorate a gingerbread house
Christmas movie night (with popcorn and candy canes)
Drive around town looking at Christmas lights
Make an ornament for the Christmas tree
Make a pinecone bird feeder (peanut butter and birdseed)
Make popcorn and cranberry garlands for the birds
Make a Christmas present for teachers/bus drivers/Sunday school leaders/etc.
Pick out a Poinsettia or Christmas cactus
Try a traditional Christmas treat from a different country (visit your ethnic food store or aisle)
Sing Christmas carols
Make tin can luminaries (fill tin cans with water and freeze. Then use a hammer and nail to create designs. Once water has melted, place a tea light in the can and watch the design glow!)
Roast marshmallows in the fireplace
Serve Christmas colored or shaped pasta for dinner
Send a Christmas letter to a relative
Go to a Christmas parade
Make Clove Oranges and scatter them around the house (Push whole cloves into an orange and use them as decorations)
Buy whole nuts and shell them for a special treat (or use a nutcracker!)
Watch funny Christmas carol videos on YouTube
Make snow cones, using real snow and fruit juice or maple syrup
Bring treats to your local librarians
Hang mistletoe
Fill a ShoeBox Gift for Operation Christmas Child
Make a special trip to a store just to put money in the Salvation Army bucket
Read the Christmas story
Make a wreath from foraged greens
Make paper garlands to hang in the doorways
Attend a tree lighting ceremony
Go to a holiday craft bazaar
Make glitter snow globes using mason jars
Create a winter diorama using small animal figurines from the store and cotton balls
Collect pine cones and use them to decorate the house
Put up outdoor Christmas lights/decorations
Make hot apple cider
Decorate the Christmas tree
Go to a candlelight church service
Make origami ornaments for the tree
Eat dinner by candlelight and play Christmas music
Make homemade play dough and color it red and green
Send a care package to a missionary family
SHARE YOUR IDEAS
I would LOVE to hear your Advent Activity ideas! I'm always adding more to my "master list".
Do you have any family traditions you are willing to share?
Please leave a comment below!

Seed Saving for Beginners
Not sure how to save your own seeds? It’s simple and easy! Find out how.
Seed Saving for Beginners
As our growing season comes to a close, I’m slowly beginning our Last Harvest of the season: Seed Saving.
After we shut down the farm for the season, we begin the slow process of pulling out all the plant. Yes, all of them, except the perennials. It has the potential to be depressing… but the act of gathering seeds as I pull out the plants is so exciting and inspiring!
A years ago, I led an informal “Seed Saving Garden Tour” for about 20 people. We had a great time wandering around the gardens, examining each plant and discussing how to save the seeds from that plant.
We had so much fun! I think it’s safe to say that there are LOTS of other people who are as interested in seed saving as I am!
In this post, we’re going to discuss:
-WHY to save your own seeds
-WHEN to save seeds
-HOW to save seeds
-WHAT to do with your saved seeds
Something to note BEFORE we discuss seed saving techniques….
HEIRLOOM SEEDS vs. HYBRID SEEDS
As the Seed Savers Exchanges says:
”Hybrids, which are created by crossing plants of two different varieties, generally do not produce offspring with the same traits as the parent plant.
Seeds saved from open-pollinated varieties [Heirloom or OP], on the other hand, will produce plants identical to the parent.
Heirloom seeds, which Seed Savers Exchange sells, are open-pollinated varieties with a history of being handed down from generation to generation.”
If you want to save seeds, it’s essential that you choose seeds that are Open Pollinated (look for the term “OP” in the seed catalog) or Heirloom.
AVOID any seeds that have the term “F1” behind their name - this indicates the seeds are Hybrid.
![IMG_20171021_084457_289[1].jpg](https://images.squarespace-cdn.com/content/v1/582b872529687fd6acb7423d/1539195511131-MQJC0PQDOJU7IVFLIB7W/IMG_20171021_084457_289%5B1%5D.jpg)
WHY SAVE SEEDS?
There are several reasons to save seeds, but I’ll just share a few here!
SAVE MONEY. Seeds costs can add up over time! Learning to save your own can be a real value.
PROMOTE DIVERSITY. In same way that animal breeders are always trying to promote genetic diversity, by saving your own seeds you can do the same.
SHARE WITH OTHERS. Passing on seeds to future generations is an incredible way to leave a legacy behind. It’s also a great way to build community and connection.
INCREASE INDEPENDENCE. Saving your own seed decreases your reliance on outside sources.
IT’S FUN!

Tomato seeds a friend sent me in the mail… from their farm!
WHEN TO SAVE SEEDS
Most seeds are collected in the fall, after the fruit or flower is “spent”.
Each plant has it’s own unique stage for seed harvest, but as a general rule allow the plant to get past the “pretty stage” so it can set seed. Yup, you’re going to have to look at some ugly veggies and plants in order to harvest seeds at the proper stage.
For vegetables, this means allowing the veggie to ripen beyond the point of harvest. So, this means you’ll let your beans get old, tough and brittle. You’ll allow a few cucumbers to grow huge and seedy. You’ll make sure your tomatoes are fully ripe.
For flowers, it means you abstain from “deadheading” (cutting off the spent blooms) and allow those dead/over ripe flowers to form seed heads.
Instead of tearing out the garden at the end of the summer, be sure to leave some plants behind to “go to seed”.
In this post, we’re going to explore saving “Annual” seeds - that is, plants that are grown from seed in the spring and set seed in the fall. Saving Biennial seeds requires more forethought and time investment.
Annual Seed Examples: Tomato, Pepper, Bean, Pea, Zinnia, Sunflower, Dill, Broccoli, Cosmos, Squash, Pumpkins, Basil, Cilantro, Cucumber, Lettuce, Radish, Spinach, Love-in-a-Mist, Marigold, Poppy,
Biennial plants require 2 years to harvest the seeds. The first season, they grow the plant. If allowed to remain in the garden over the winter, biennials will set seed their second summer.
Biennial Seed Examples: Onion, Carrots, Cabbage, Beets, Swiss Chard, Kale, Hollyhocks, Leeks, Celery
![20181009_185250[1].jpg](https://images.squarespace-cdn.com/content/v1/582b872529687fd6acb7423d/1539195820886-MXIBC5HX0Y47URGOLR8Z/20181009_185250%5B1%5D.jpg)
HOW TO SAVE SEEDS
There are 2 main seed saving techniques to master depending on the type of plant and seed:
”Dry Seeds vs. Wet Seeds”
DRY SEEDS: These include seeds from most flowers and some vegetables, such as beans, peas, onions, carrots, lettuce, etc.
Harvesting “dry seeds” is simple and straight forward. The easiest way is to go out into the garden on a sunny, dry day with paper lunch bags. Cut off the flower head/beans/peas/etc and place them in the paper bag. Place the bag in a well ventilated dry place for a few weeks to ensure the seeds are fully dry.
After that, you may need to “Thresh” or “Winnow” the seeds, to separate the seeds from the “chaff” (the excess plant material surrounding the seed).
”Threshing” involves rubbing, beating or trampling on the seed “pods” to release the seeds from their casing.
”Winnowing” is the process of removing the chaff using wind. I do this by first threshing my seeds, then pouring the resulting mixture into a bowl. I wait for a windy day, then head outside with another bowl. Slowly pour the seeds and chaff back and forth between the 2 bowls. The wind will blow away the lighter chaff, leaving the heavier seeds behind. Voila!
WET SEEDS: These include seeds from “fleshy” fruits and vegetables, such as tomatoes, pumpkins, cucumbers, squash, zucchini, etc.
Harvesting “wet seeds” is a little more work! You will need to allow the fruit/veggie to ripen fully before collecting (think baseball bat sized zucchini!).
Open up the fruit/veggie and scoop out the mature seeds with a spoon. You will need to wash/sieve them several times to remove the pulp.
Helpful hint: You can soak the seeds in a jar of water for a few minutes to help clean them as well. Viable seeds will sink to the bottom, while the “duds” will float at the top.
”Wet Seeds” tend to stick to surfaces, so place them on a non-stick surface, such as parchment paper and shuffle them around every day until they are fully dry.
Some “wet seeds”, such as tomatoes and cucumbers benefit from undergoing a “fermentation” process. Fermenting the seeds mimics what happens in nature and helps to reduce diseases that can be passed on.
Fermentation is simple. Simply place the seeds and pulp in a jar of water and leave it in a warm place (be sure to cover the jar to prevent fruit flies! I cover with a coffee filter secured with a rubber band). After about 3 days, you will notice things are starting to get a little “funky”. Allow things to get a little bubbly, then you can rinse and clean the seeds in a sieve. Allow to dry fully before storing.

WHAT TO DO WITH YOUR SAVED SEEDS
Once you have saved, cleaned, washed, threshed and winnowed your seeds, it’s time to store them!
There are several options for storage including baby food jars, mason jars, envelopes, seed packets, plastic bags and more.
Simply be sure that the seeds are FULLY DRY before storing them and check on them occasionally during the off season to be sure that they are still dry.
Be sure to properly label each seed variety, especially if you plan on sharing with others.
Seeds should be stored in a cool, DRY, dark place. Dampness is your enemy! Also, high temperatures decrease the shelf life of seeds, so the cooler the better. The refrigerator or freezer are great options, if you have the space! Be sure to enclose the seeds in an airtight container or bag before placing in the fridge/freezer.
When spring rolls around, it’s time to pull the seeds out of storage and get planting!
Now get out there and start saving your seeds! We’re planning on putting together a “Seed Swap” this winter and we’d love to see you!
Questions? Comments? Ask below or email me at: lori@threeacrefarm.net

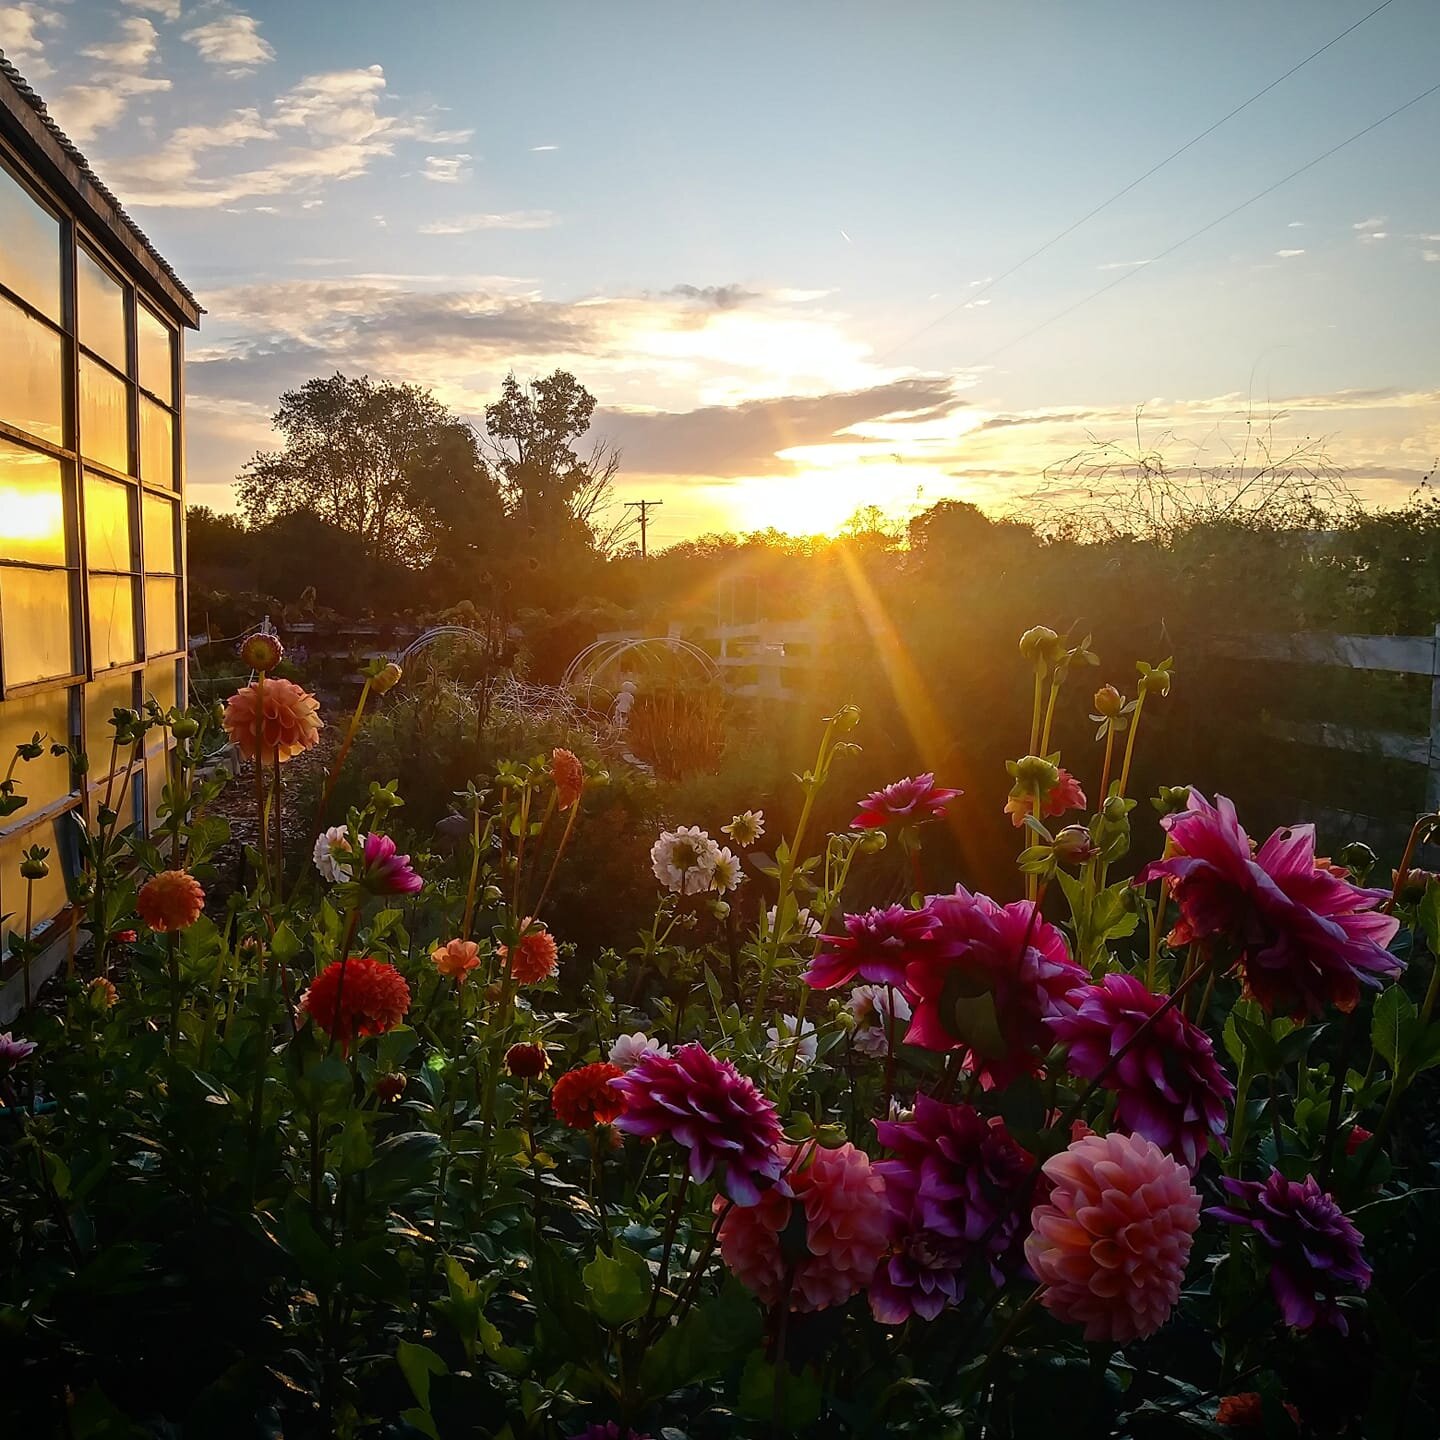
10 Tips for Longer Lasting Blooms
Get the most out of your cut flowers
10 Tips for Longer Lasting Blooms
People are constantly asking me “How do I make my flowers last longer?” This is such a great question, with multiple answers.
First of all, it’s good to have some realistic expectations regarding how long flowers should last.
Most flowers average a “vase life” of 5-7 days. That means if the flowers are cut, handled and displayed properly, you can expect them to look good for 5-7 days.
However, there is a huge range in vase life. Some flowers, such as Poppies, Sweet Peas and Dahlias have a short vase life, averaging about 3-4 days. Other flowers, such as Lisianthus, Snapdragons and Sweet William can look good for 14+ days in the vase!
Below, you will find my best tips for the longest lasting blooms. If you follow all of these tips, you should be able to extend your vase life by a couple days!
1. Cut Early or Late in the Day
I know it sounds dreamy to wander around in a field of flowers on a bright sunny summer afternoon, cutting a bouquet... but don't.
JUST DON'T. Afternoon is the worst time to cut flowers, so avoid it as much as possible. Flowers cut in the heat of the day will last half as long as those cut in the cool parts of the day.
Dawn and dusk are the best times to cut flowers (when the sun is low on the horizon).
If you are having problems with a certain flower wilting immediately and never recovering, or flowers that don't last long, I would suspect you are cutting at the wrong time of day.
Certain flowers/foliage need to be cut earlier than others. For example, if I try to cut Lemon Basil after the sun has risen over the horizon, it will immediately wilt. I know I need to get out there early and cut before sunrise.
You will need to do some trial and error to figure out what works.
Moral of the Story: Get your buns out of bed before the sun is up. ;) It's truly the VERY best way to start your day.
2. Keep it clean
Bacteria is often what causes cut flowers to wilt and wither prematurely. Your clippers/scissors/shears should be clean and sharp.
Wash or wipe down your clippers with rubbing alcohol periodically, ideally before every cutting session.
Your buckets and vases also need to be sparkling clean. If you wouldn't drink out of it, then it's not clean enough!
Yup, I’m going to say it again. Your bucket must be clean enough to drink out of. Trust me. It makes a big difference. If you put those freshly cut stems into dirty water in a dirty bucket, you’ve ruined them.
3. Cut at the correct stage
Unfortunately, there is no “one-size-fits-all” rule for the ideal stage of cutting. It varies with every single type of flower. Again, there is going to be some trial and error here!
With some flowers, such as poppies, sunflowers and cosmos, you want to cut them right when they are beginning to open/bloom, in order to have the longest vase life. Cut these flowers earlier than you think and enjoy watching the flowers open up in the vase!
On the opposite spectrum, dahlias and zinnias do NOT continue to open after being cut, so they must be allowed to bloom fully on the plant before being cut.
Most flowers are somewhere in between. Foxglove, snapdragons and delphinium, for example, are best harvested when the bottom 2-3 blooms on the stem have opened up.
For some flowers, especially Zinnias and Black-Eyed Susans, it's helpful to perform "The Wiggle Test". Grasp the stem about 8" below the flower and wiggle it. If the flower flops around, it's not ready to be cut. If the stem remains firm, cut away!

4. Make deep cuts and remove foliage
When you are out in the field, be sure to make "deep cuts" - that is, cut your stems at least 12" long or more. A good guideline is to measure the stem with your arm before cutting - the length from wrist to elbow is just about right. You can always cut them shorter later!
Cutting deeply will actually signal the plant to produce even MORE long stems, so don't be shy about cutting deeper than you think. As long as you leave 2-3 sets of leaves near the base of the plant, you should be good!
Immediately after cutting, gently strip or cut off all the foliage from the bottom 2/3 of the stem. Leaves/foliage will muck up the water quickly, so get rid of any leaves that will touch water!
I repeat - no leaves/foliage in the water!

5. Hydrate properly
After cutting and stripping off the foliage, immediately place the stems in cool, CLEAN water in a CLEAN bucket or vase. Don’t allow freshly cut stems to sit out of water for more than a few minutes or the stems ends will callus over and prevent water from flowing freely up the stem.
It's best to cut stems at an angle, so they don't sit flush with the bottom of the bucket. An angled cut also creates a larger surface area for the stem to draw up water.
If possible, it's best to allow the flowers to "rest" in a cool place out of the sun for a few hours (or overnight) before arranging. Some flowers need a few hours to "re-hydrate" and perk up.
For example, if I need some arrangements for Friday evening, here is what my timeline looks like:
Thursday - cut in the evening (or morning)
Thursday overnight - allow flowers to rest and rehydrate in CLEAN water in a cool location
Friday morning - arrange flowers and store in a cool location
Friday evening - display flowers

6. Avoid Sun and Heat
Do NOT set your bouquet in direct sun. While sun is necessary for flowers to grow, once they are cut, they need to be kept AWAY from the sun. A windowsill might not be the best location!
Heat also causes flowers to expire more quickly. Be aware that a bouquet picked and displayed in the heat of the summer will not last as long as a spring or fall bouquet... unless you keep your house very cold with air conditioning!
7. Keep Flowers Away from Fruit
Ripening fruit, like bananas, apples, avocados, peaches and pears, produce ethylene gas, which causes flowers to wilt prematurely. If you have fresh fruit on your kitchen counters, the kitchen is not an ideal location to display your flowers.
Some flowers, like Sweet Peas and Dahlias, are particularly sensitive and will expire quickly if subjected to ethylene gas.
We always have fruit sitting out in our kitchen, so the dining room or living room is where I display mine!

8. Change Water Daily and Re-cut Stems
Fresh, clean water and a sparkling clean vase will significantly extend the life of your bouquet. Dirty water breeds bacteria and clogs the stem end of the flower, reducing water intake.
Make sure there are no leaves/foliage in the water!
Re-cutting the stems every few days will also allow the flowers to keep "drinking" properly.
There are a few types of flowers that make the water mucky and nasty almost immediately. If any of these are in your arrangement, you’ll likely need to change the water every single day and possibly even add a drop of bleach to the water. Just a few drops! Not a teaspoon, unless you want to bleach the color out of your flowers. Ask me how I know this ;)
Flowers that muck up water:
Zinnias
Black-eyed Susan
Yarrow
Stock
Ornamental Kale/Cabbage
Oregano

9. Choose Water Wisely
Depending on where you live and what type of water you have, it might be helpful to use filtered water for your bouquets.
If you have softened well water, the salts in the water could cause your flowers to expire faster. Try filtered water instead (or water from your outdoor hoses).
10. Use Flower Food
Search the internet and you will find about a million different hacks for keeping your flowers fresh. Some work, some don't.
Flower food (I use FloraLife) is the best choice because it contains:
Sugar (to feed the flowers)
Acid (to maintain correct pH)
Bleach (to kill bacteria)
Soda comes in a close second to flower food. The sugar and acid in the soda mimic the effects of flower food. Choose a clear soda (like Sprite or Sierra Mist) to keep the water looking clean. Add a few tablespoons each time you change the water.

How to Create a Sensory Garden!
Learn how to create a delightful sensory experience in your own backyard!
How to Create a Sensory Garden
Have you ever heard of a “Sensory Garden”? A Sensory Garden is an area that allows visitors to enjoy a wide variety of sensory experiences. In other words, it’s a garden designed to delight ALL the senses!
Over the years, I unconsciously created my own Sensory Garden… before I even heard the term “Sensory Garden”!
I purchased some plants because of the way they tasted, some because of how they looked, some because of how they smelled, some because of how they felt, and some because of the pollinators they attracted (because I liked how the buzzing of bees sounded).
I’ve always felt deep in my soul that gardens should be a place a delight, a place where form (beauty) and function (practical output) work in harmony.
Gardens should be beautiful and engage all the senses!

“What can your eyes desire to see, your ears to hear, your mouth to taste or your nose to smell that is not to be had in the garden?” - William Lawson, 1618
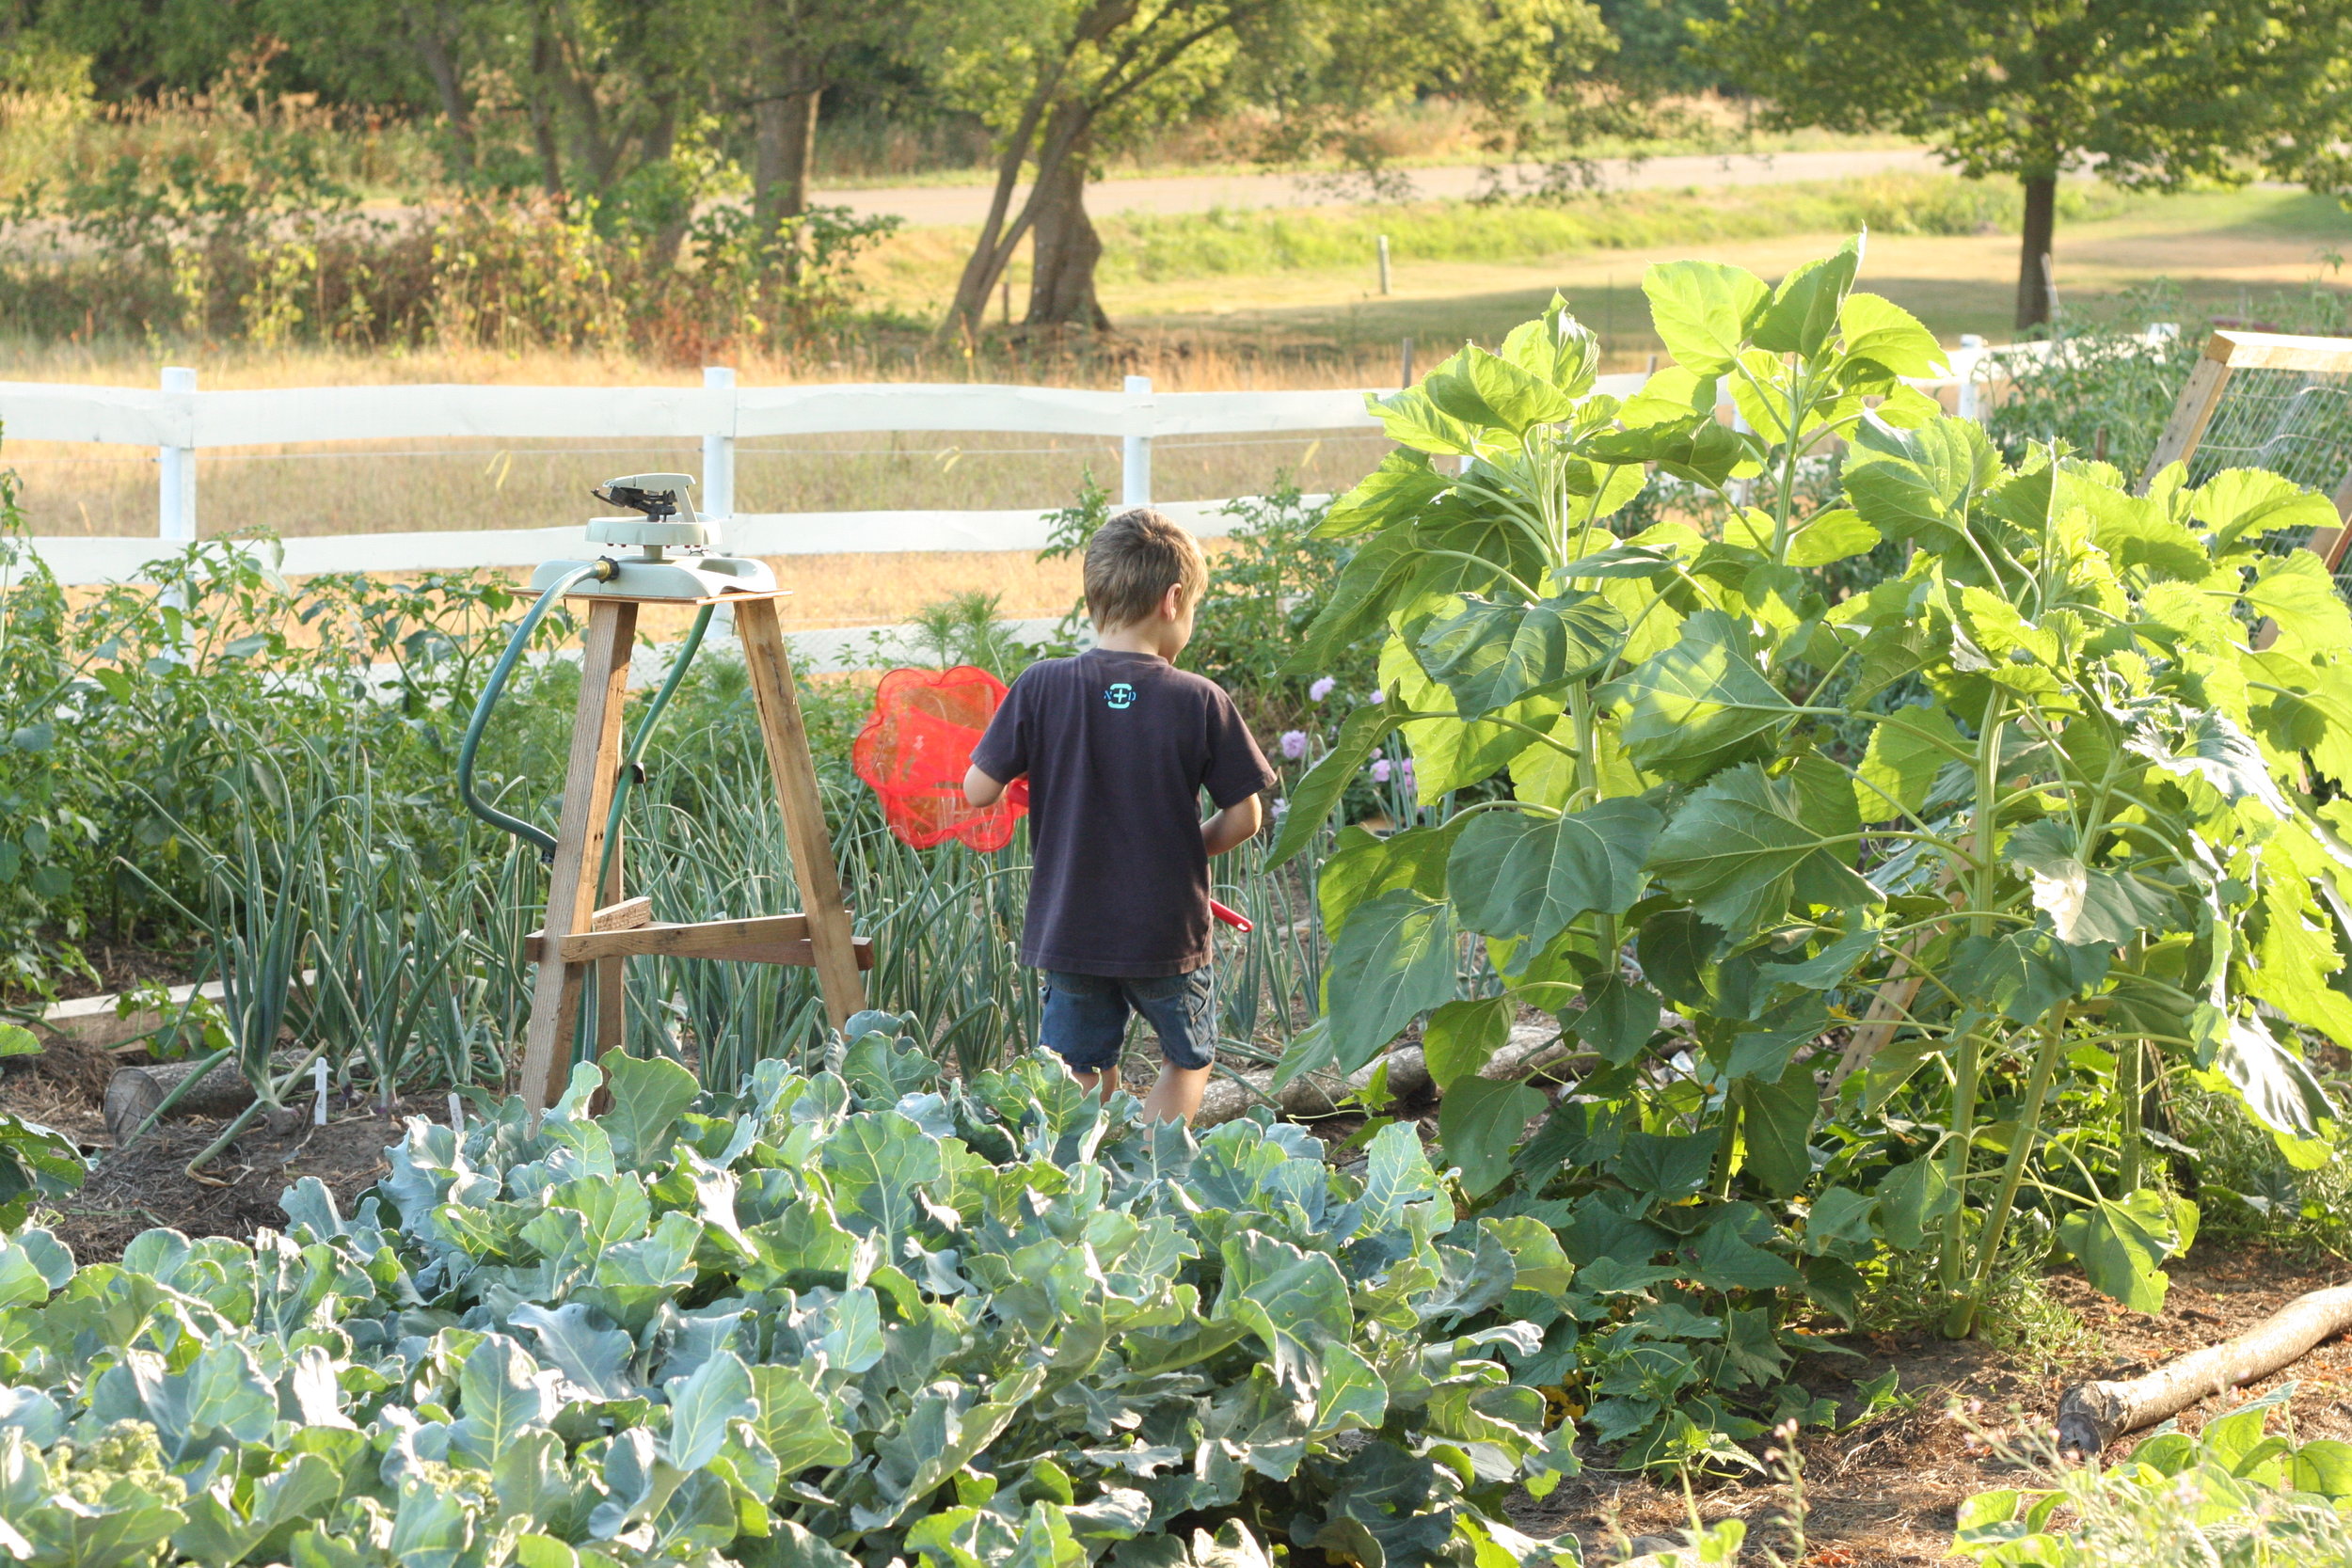
Both of my children quite literally grew up in the garden. When we moved to the farm, my kids were both under 5. The garden was the only enclosed area we had, so I would shut the gates and we’d spend hours out there together.
Their days consisted of exploring in the garden all day long, playing with worms, digging holes, making mud pies, chasing cabbage moths, eating berries and picking flowers.

Let’s explore the 5 senses and how we can incorporate them into our home gardens!
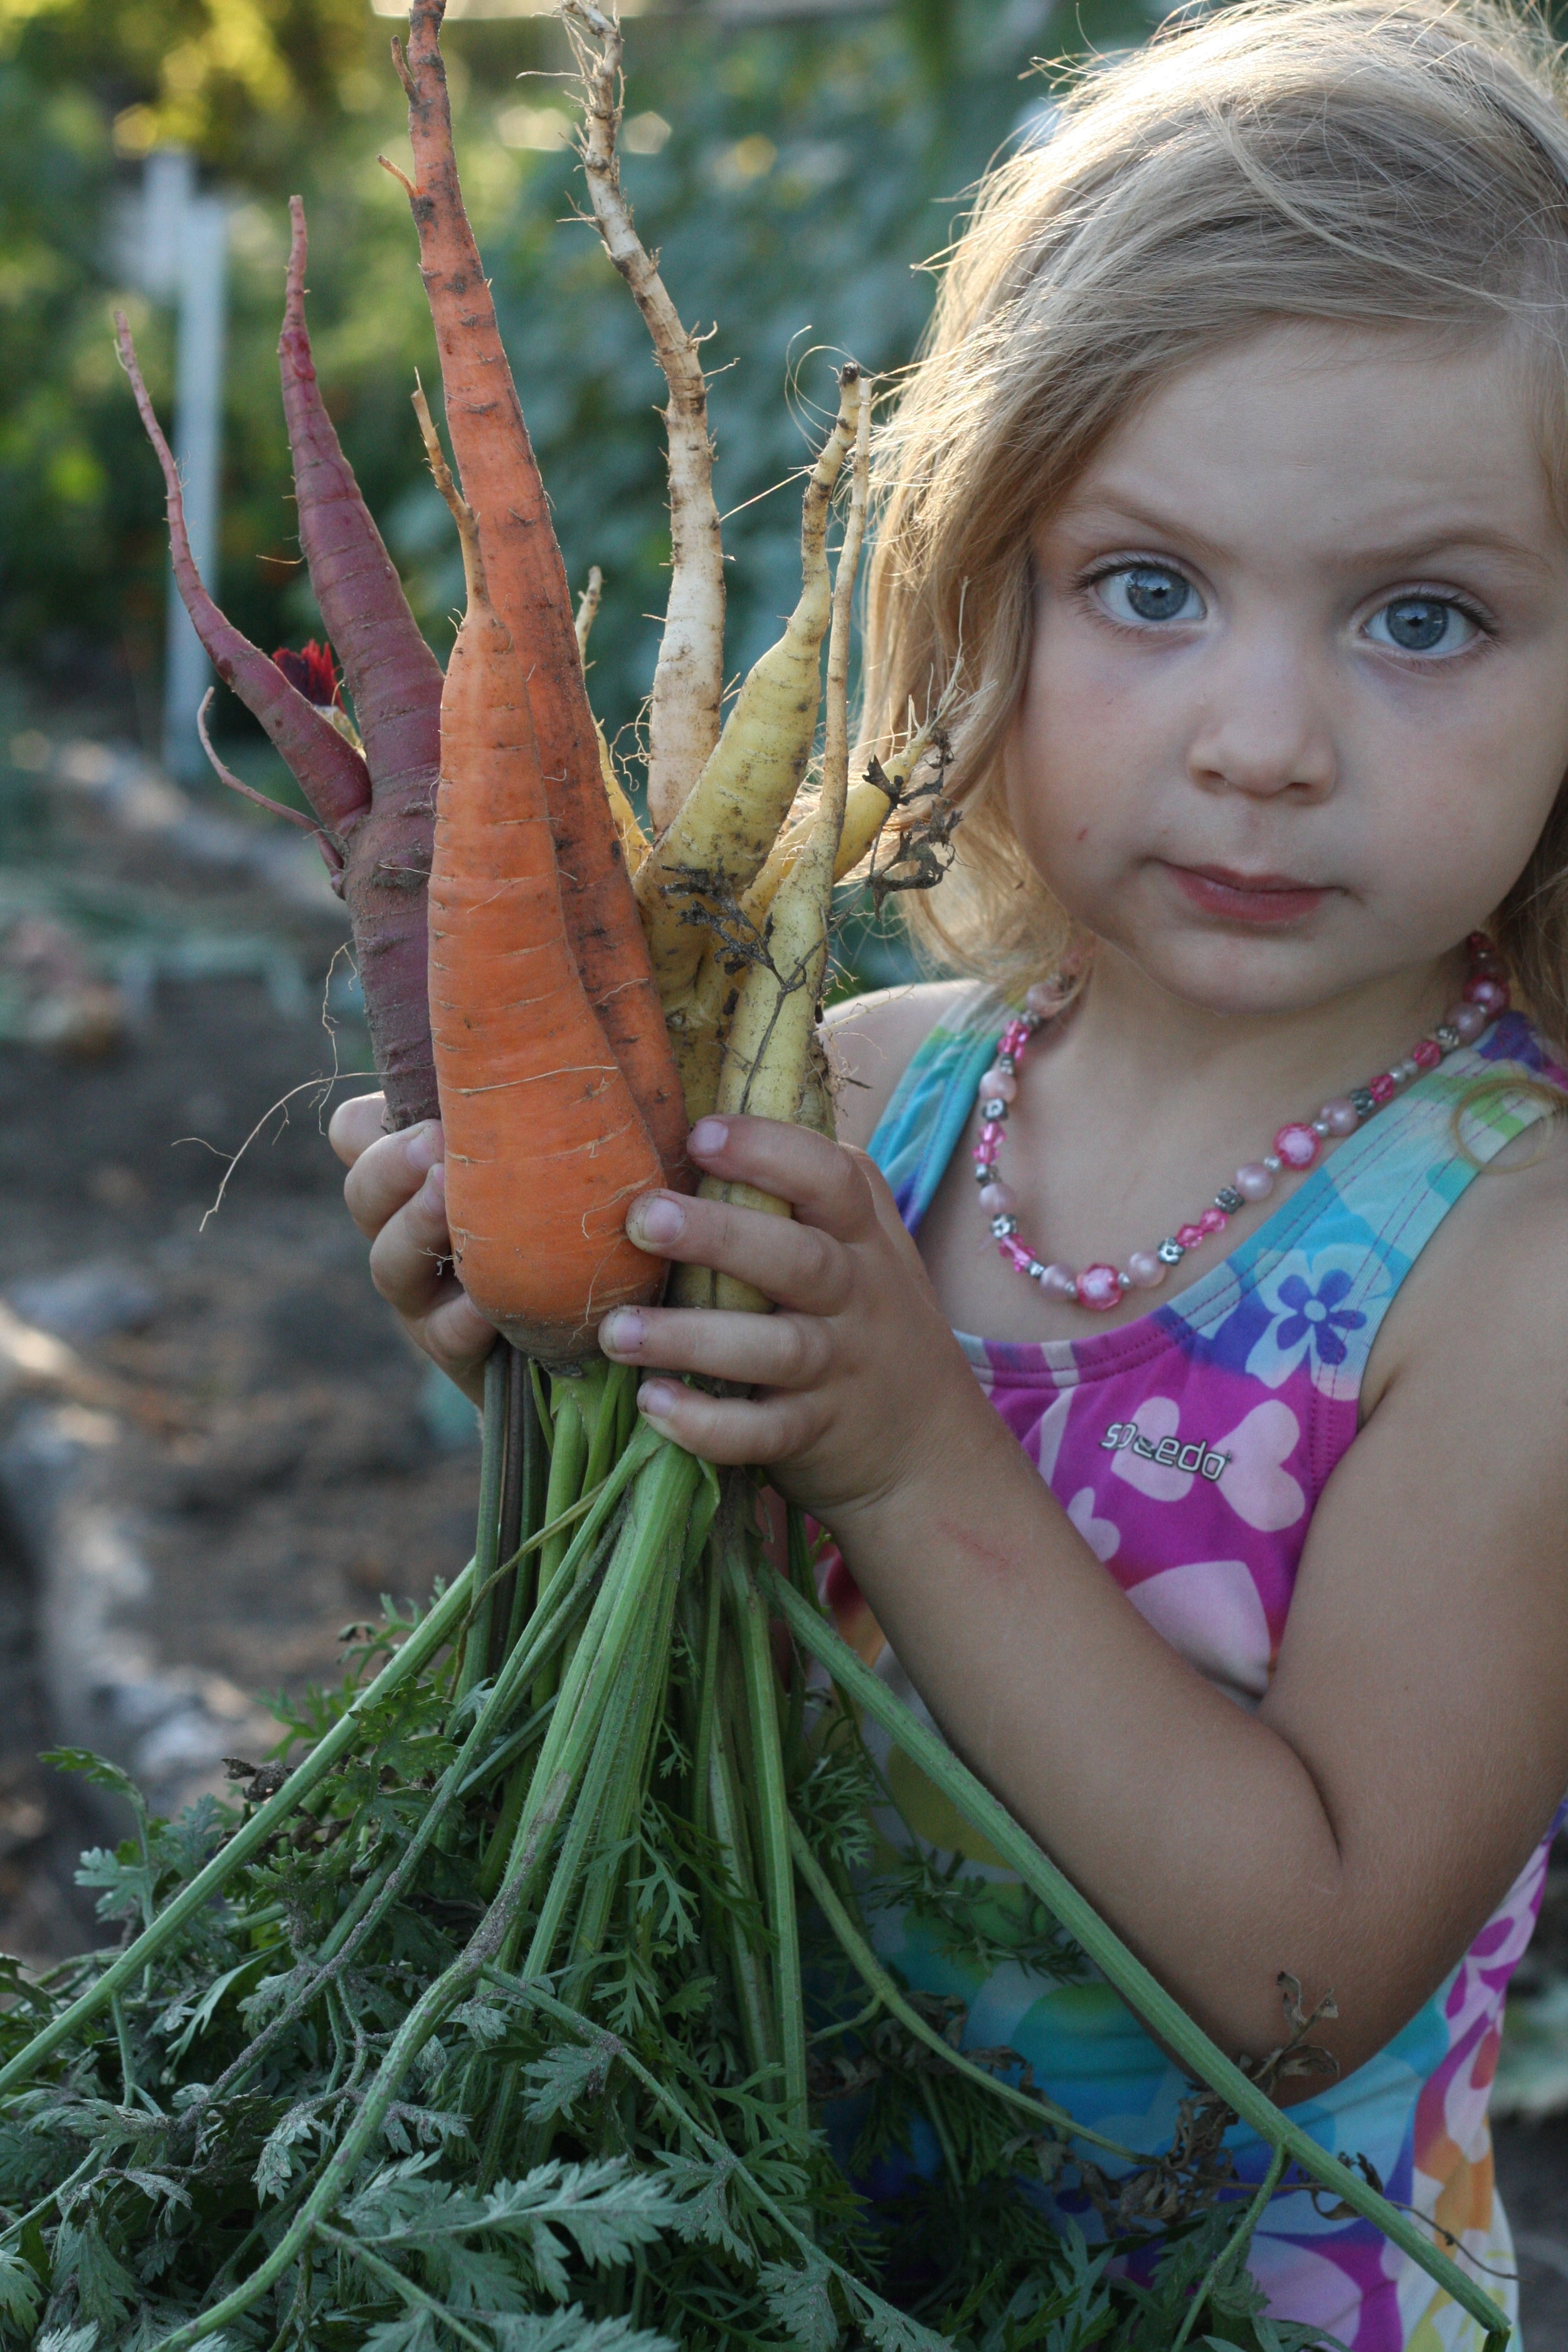
Taste
Plant a wide variety of veggies, herbs and even flowers, to sample with your kids.
When kids are involved in the growing process, they are much more likely to enjoy eating fresh, healthy foods!
Here are a few of my favorites!

Smell
It’s said that the sense of smell evokes the strongest memories. Tap into this sense and create lifelong “scent memories” for your children.
As they grow and age, the scent of these plants will remind them of the time they spent with you in the garden.
I bet you have a “favorite garden scent” that reminds you of someone you love.

Touch
Kids LOVE to get their hands dirty… and guess what? It’s really, REALLY good for them! Scientists have recently discovered that soil is teeming with microorganisms and bacteria that essentially mimic the effects of anti-depressant medications.
Yes, that’s right - DIRT MAKES YOU HAPPY.
When we get our hands dirty, our bodies absorb these beneficial microbes and they work to make us healthier and happier.
Also worth mentioning is the “Farm Effect”, a series of studies that show kids who grow up on farms (or have ready access to natural areas in which they play) are healthier than kids that spend most of their time indoors.
Let your kids touch the dirt, play with worms and maybe even eat some mud pies. ;)

Hear
There is nothing more soothing to me than listening to the “hum” of bees, butterflies and other pollinators in my gardens.
There are several ways you can attract more pollinators and birds to your gardens. It’s a win/win situation for everyone! Pollinators get what they need and your gardens will be more productive!

You can also work with your kids to create a welcoming habitat for pollinators.
Birds and pollinating insects need food, water and shelter, just like we do!
A small dish of water with sticks floating in it will be come a welcome “watering hole” for thirsty pollinators. Simply be sure to refresh the water regularly to avoid creating a breeding ground for mosquitoes.
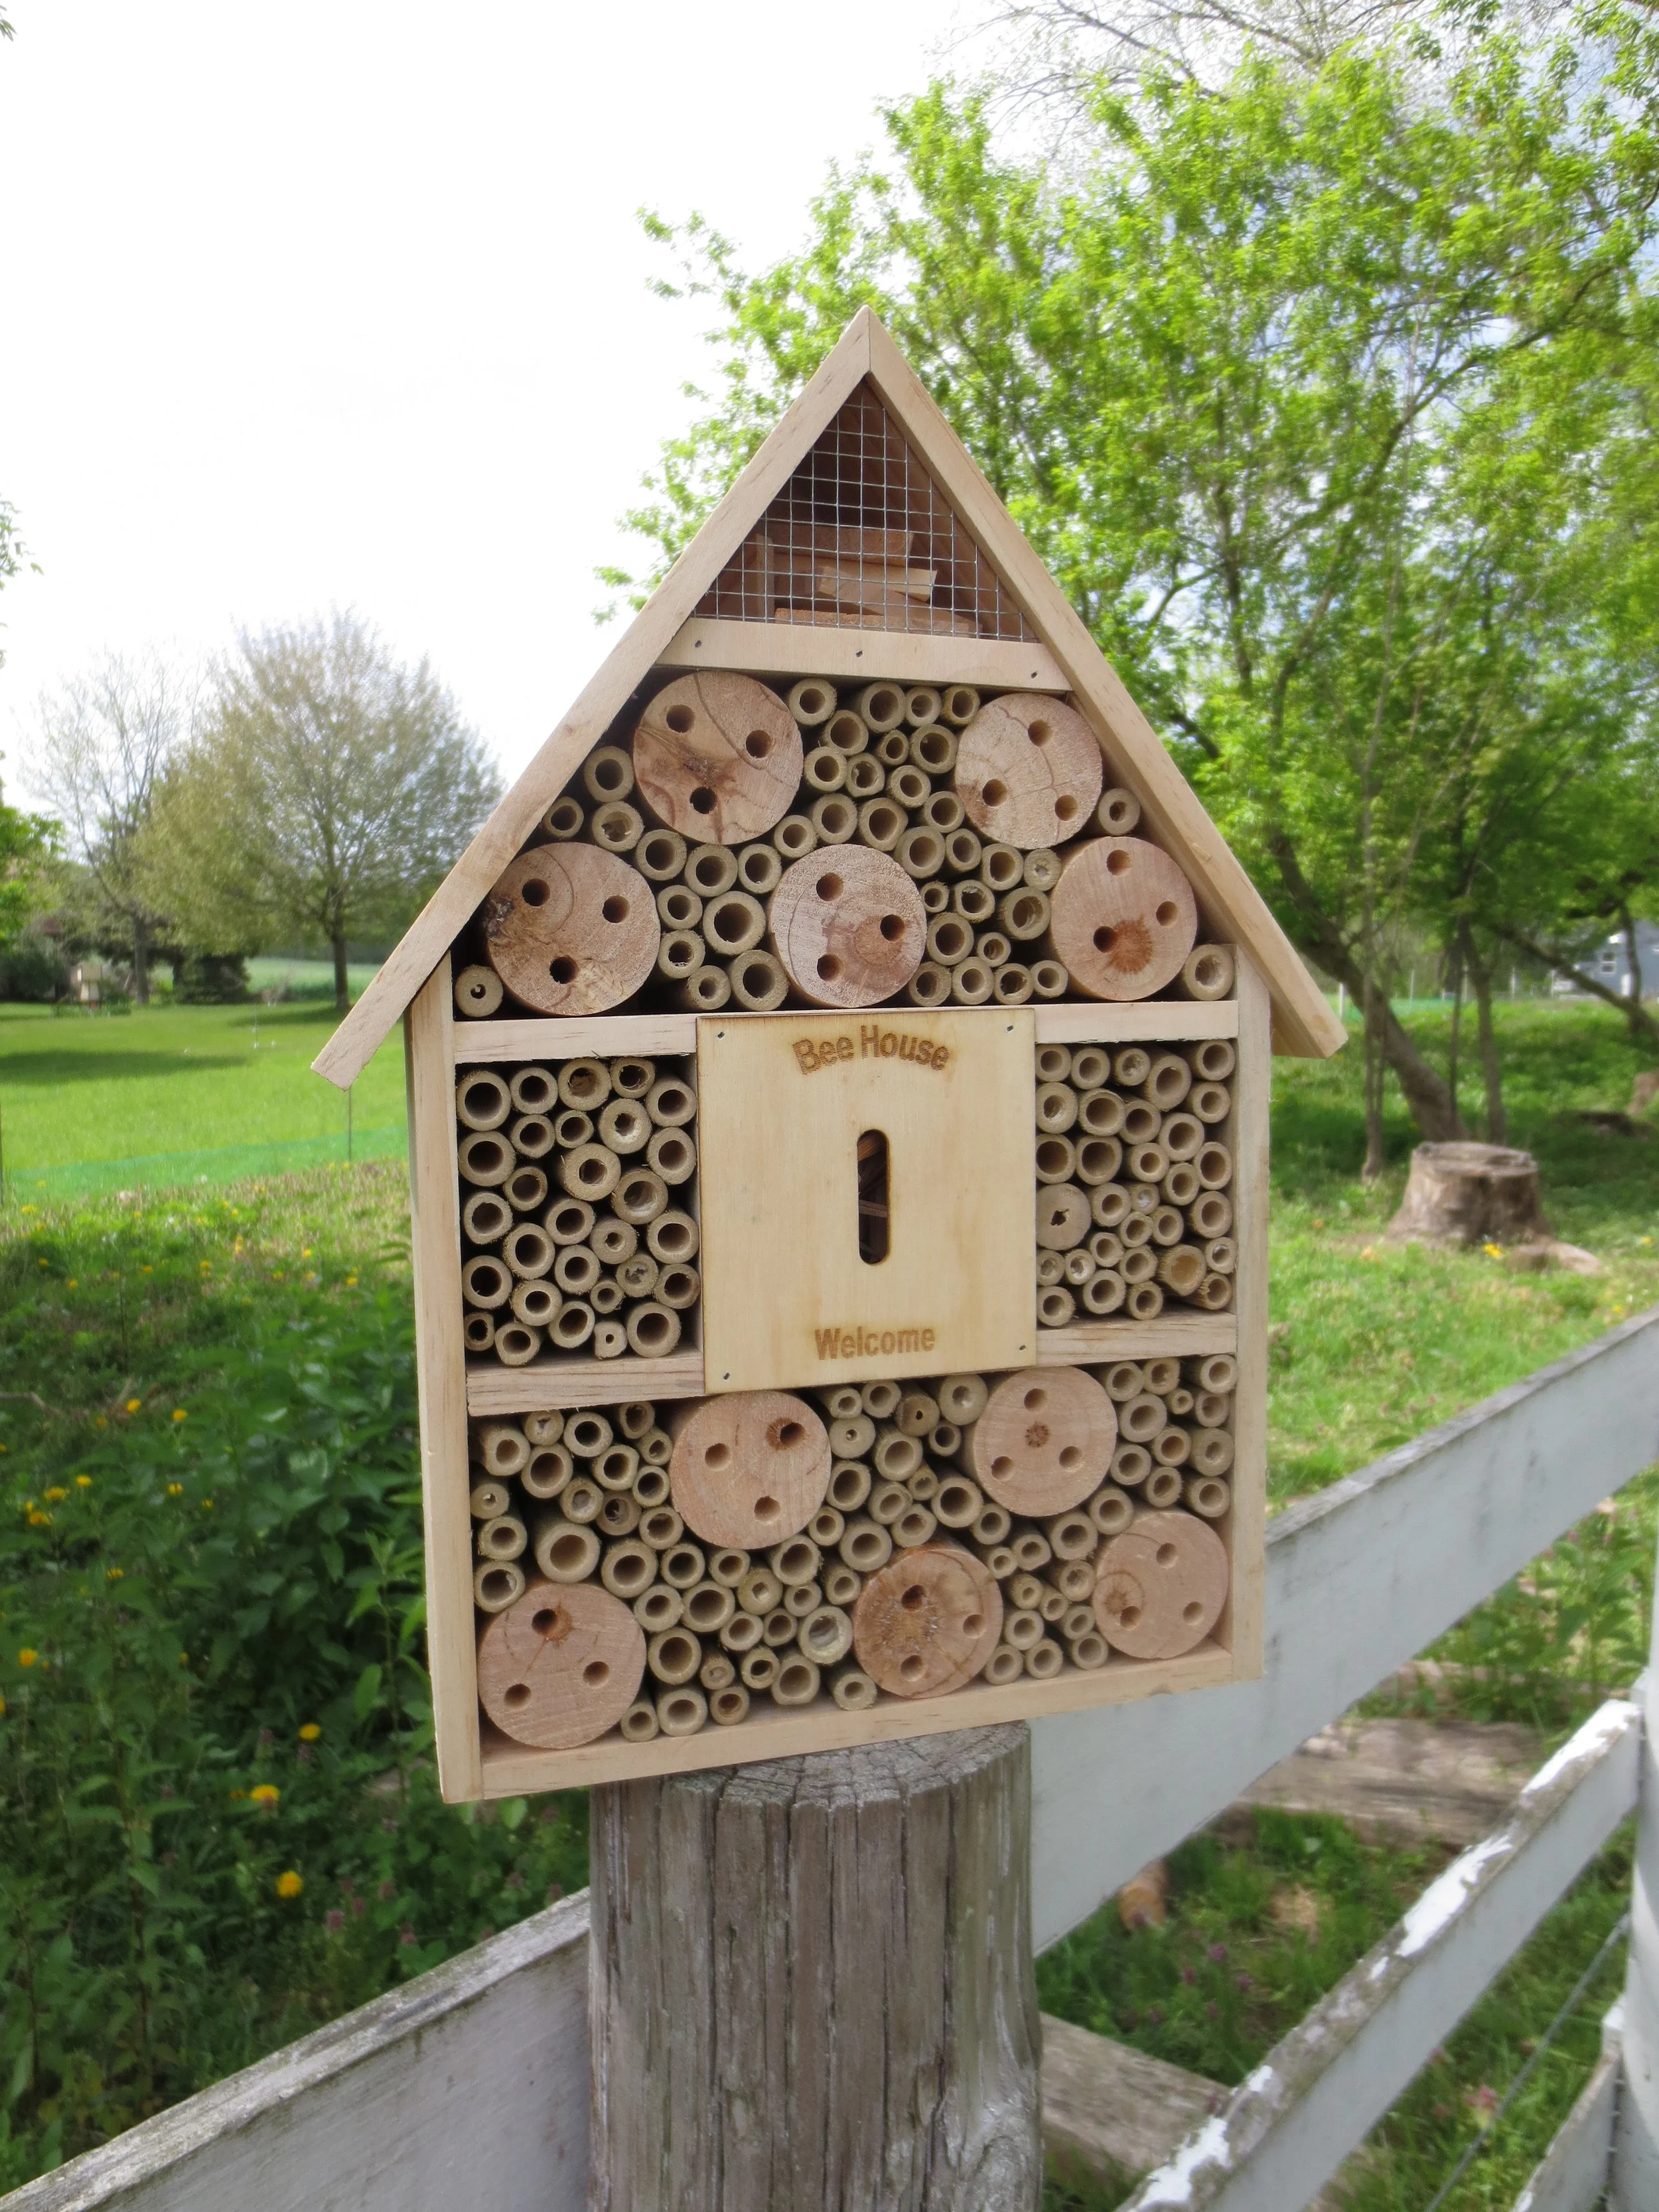
Mason bee houses can be found at many hardware stores or garden centers. Mason bees are small native bees (that don’t sting!!!) that are INCREDIBLY effective at pollination, vastly outperforming Honeybees! Welcome them to your garden and reap the benefits!

Another way to add sound to your garden is to purchase or make wind chimes! This could be a fun summer project for you and the kids!

See
Gardens change every. single. day.
Create a summer routine with your children - walk around the garden every day and point out what is new!
I walk my gardens almost every day, all year round. It’s a fun and engaging way to learn about the cycles of growth, the seasons, nature… and it’s an excellent way to teach children how to use their sense of sight and observation.
It’s also fun to fill the garden with decorations! Personally, I have a deep and abiding love for lawn ornaments (the tackier, the better. Yeah, that right - I have “frogs wearing bikinis” lawn ornaments. HA!), garden decor and fairy gardens.

Another fun project is making your own painted stones/rocks to decorate your gardens!
My daughter and I checked out a few books from the library, bought a set of paint markers, tracked down some smooth stones and she’s been having so much fun trying new designs. We’re going to have a garden full of pretty stones in no time. ;)
We found the paint pens on Amazon (Artistro Extra Fine Tip) and the stones at Home Depot (Mexican Beach Pebbles).

You could also:
Make a mosaic stepping stone
Make a DIY butterfly feeder (check Pinterest for ideas!)
Make a fruit feeding station to attract butterflies and birds
Put up bird houses
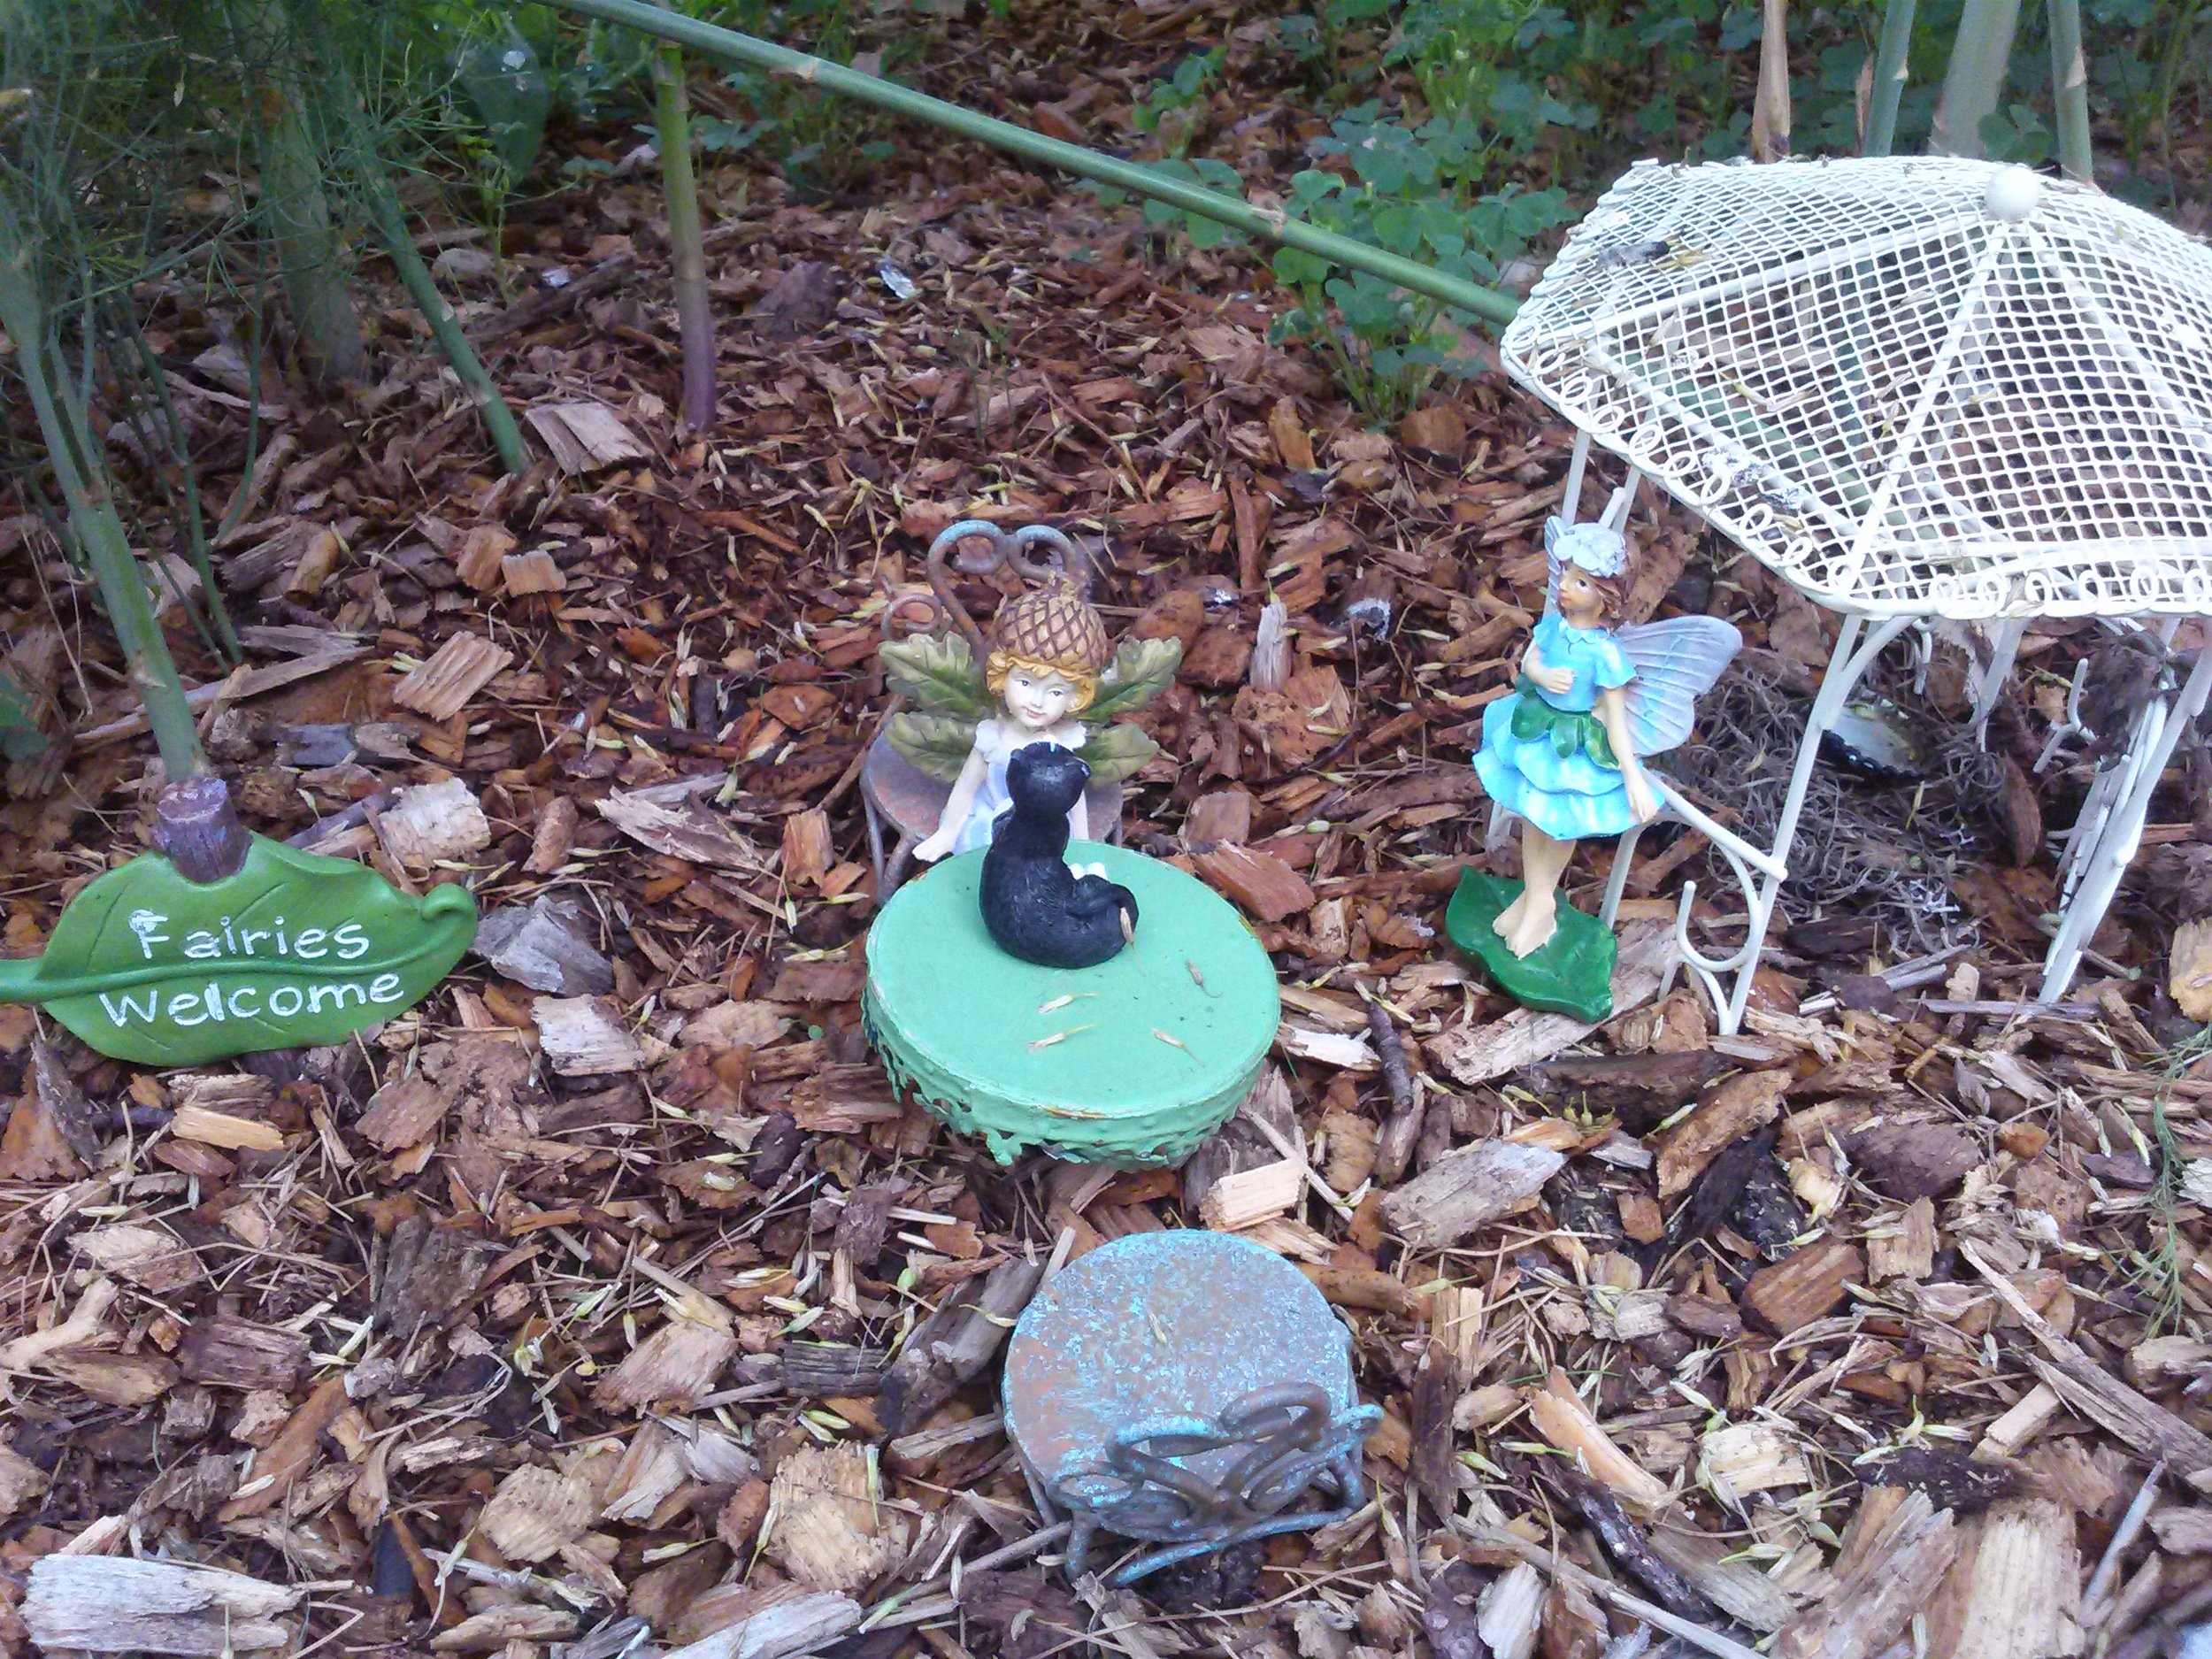
Make a fairy garden. My daughter would play in the garden for hours with her little fairies and their furniture! They lived in the “Asparagus Forest”. Ha!

There you have it! I bet your mind is overflowing with creative ideas and excitement!
Remember, you don’t have to do all of this at once. Pick one sense and figure how to incorporate that sense into your garden this season.
Let me know: What is your favorite “Garden Sense”? What will you add to your garden this season to celebrate that sense?
I can’t wait to hear your ideas!
-Lori

Beginner's Guide to Growing Dahlias
Want to try growing dahlias? We can help!
Beginner’s Guide to Growing Dahlias
It's hard for me to believe how much dahlias have changed our lives in the last few years...
You can read more about it here, but long story short, my husband came home from work one day and declared that he wanted to start growing dahlias.
As our love for dahlias grew, we read everything we could get our hands on... and my husband even joined the West Michigan Dahlia Association so he could soak up knowledge from dahlia experts and enthusiasts.
In the past few years, we have gained so much experience and currently, we grow about 1,800 dahlias on our small farm.
Below, I’ve compiled a list of some of the most common questions we receive about dahlias. Hopefully this helps you feel more clear and confident about growing dahlias yourself!
Dahlia FAQ's
1. I heard that dahlias are hard to grow. Is that true?
Yes. No. Maybe? While I would say they are NOT difficult to grow, they ARE one of the most labor intensive flowers grown for cutting. So, yes, they are "easy to grow" but require some special care.
They require careful planting, staking, pinching (more about that later) and the tubers must be dug up each fall.
If provided with proper growing conditions, they will perform beautifully and provide you with many blooms over the late summer and into the fall! Here in Michigan, September is “peak season” for Dahlias.

2. What is a "tuber"? Is that like a "bulb"?
Dahlia tubers are sometimes called a "bulb", but they are technically a tuber, similar to a potato. Similar to a potato, the tuber sends up a shoot that becomes the plant, which produces leaves and flowers. Underground, the tubers multiply each year (again, like a potato).
You only need one tuber with one "eye" to successfully grow a vigorous dahlia plant. Ever left a potato in the pantry too long and noticed "eyes" sprouting? Same thing with a dahlia tuber.
Watch the short video below to get an overview of dahlia tubers.
Tubers come in all sorts of shapes and sizes! Some are long and skinny, some are short and stubby, some are huge (up to 10” long!) and some are tiny (the size of your pinky).
Click HERE to read “All About Dahlia Tubers”.
It’s a common misconception that “Bigger Tuber = Bigger Plant”. This is not true.
The tuber is simply the food source for the plant until they have about 3-4 sets of leaves. After that, the root system growing from the tuber is responsible for the health of the plant.
According to Michael Genovese of Summer Dreams Dahlia Farm, a tuber the size of an AA battery or larger is considered usable. All three of the tubers pictured below are acceptable, but the two tubers on the right are considered ideal sized.

So if tuber size doesn’t matter, what DOES matter?
Two things are necessary for a viable tuber:
1. The tuber MUST have 1 eye. The eye is where the sprout will grow (similar to a potato left too long in the pantry).
2. The neck MUST be intact. If the neck is broken/snapped, the tuber is worthless.

3. Pinching? What does that mean?
If you want your plant to produce multiple blooms, you must "pinch" or cut back the plant early on, when it has reached 12-16" tall. Find the center stalk, count down about 1-2 sets of leaves and make a cut with clean clippers, removing the top inch or two of the center stalk. This signals the plant to "branch out" and put it's energy into creating more branches and more blooms.
If you want bigger blooms (but less flowers in total), then do nothing.
4. Do I need to stake dahlias?
Yes, most varieties will need to be staked, otherwise the wind may flatten and ruin the whole plant. Gently tie the plant to a sturdy wooden or metal stake. A tomato cage would also work!
You can also use netting stretched between posts, hovering about 12-18" from the ground. The plants grow right up into the netting, which keeps them in place.
You can learn more about staking and supporting methods in this THIS BLOG POST.

5. Wow! Some dahlia tubers cost over $20... for just one tuber! Why do they cost so much?
Remember in Question #1 when I said they are labor intensive? Dahlia tubers are not cold-hardy and will not survive over the winter in most climates. They must be dug up. By hand!
Dahlia tubers are quite fragile and break very easily. If they break, they are worthless! As of yet, no one has been able to successfully mechanize the dahlia tuber digging process without suffering major losses. Hand digging is the most gentle method resulting in MUCH less breakage... but it is HARD MANUAL LABOR... hence the high cost of tubers.
Once the tuber clumps have been dug up, they must be divided into individual tubers... yet another extremely labor-intensive job that cannot be mechanized. It's all done by hand!
Keep reading... Question #6 may ease your mind...
![20171101_125409[2].jpg](https://images.squarespace-cdn.com/content/v1/582b872529687fd6acb7423d/1522886249744-NZYXPE3O1SLK0NNJTI77/20171101_125409%5B2%5D.jpg)
6. You said in the video that the tubers multiply each year. Does that mean I'll be able to plant even MORE of them next year?
YES! If you dig up the tubers in the fall, properly store them and divide them, you can easily triple or quadruple your stock in 1 year. Once you factor that into the price of buying a tuber (I’ve paid up to $30 for a single tuber!), they don't seem so expensive anymore!
See the photo below? I planted ONE tuber in the spring... now I have more than I can count! Yes, all of those grew from one tuber.
I like to think of tubers as an “investment”. Even if I’m paying $30 for a tuber, it’s still a bargain! I’m getting AT LEAST $30 worth of blooms from the plant the first season (retail price for Dahlias is $3-6 per bloom), PLUS I’m likely going to harvest 3-10 more tubers at the end of the season.
![20180316_153256[1].jpg](https://images.squarespace-cdn.com/content/v1/582b872529687fd6acb7423d/1522885401599-H3SZO80TID2LLNZECGHB/20180316_153256%5B1%5D.jpg)
7. So... do I HAVE to dig up the tubers every fall? What do I do with them?
No, you don't HAVE to... but then you will have to by new tubers each spring, which gets expensive!
Wait to dig up your tubers until a few days AFTER a hard killing frost. This signals the tubers to go into “storage mode” and you’ll have better success storing the tubers over the winter.
After killing frost, tubers can stay in the ground for a while, so there is no huge rush… but do dig them up before the ground freezes!
Tubers are best stored in a cool, dark location - not too warm (they will rot) and not too cold (freezing will ruin them). A root cellar is perfect.
Want to know more about digging and storing your Dahlia tubers? CLICK HERE
8. Ummm... how do I divide them? That sounds hard.
I'll admit it takes practice and you will make a lot of mistakes at first, but it gets easier with time.
Want to see how to do it? Watch this short video!
9. Help! I divided my tubers and now they have blue mold where I cut them!
No worries! This type of mold is generally just a surface mold and does not penetrate the tuber. Double check to make sure the tuber is not mushy. If it’s still solid, simply wipe off the mold with damp towel or brush it off.
See the “Before” and “After” photos below:


10. My dahlia tubers arrived in the mail but it’s too early to plant them! What do I do with them while I’m waiting?
No worries, friend! You have 2 options:
1. Leave them right in the bag they arrived in. Be sure to open up the bag to let them “breath” a bit and regulate humidity. Store the bags of tubers in a cool, dark, dry location, such as a basement or garage. Do NOT store them in a place that dips below freezing.
2. Pot them up! You can fill a small pot with potting soil and pop the tuber in there. Be sure to “plant” it tail down, and head up (look for the “eye” or sprout on the head of the tuber). Water the pot sparingly (not too wet, not too dry) and place in a warm, sunny spot. The tuber will send up shoots and leave above the soil and roots into the soil. Simply transplant outside when the weather warms up, being sure to cover the crown of the tuber.
Ok, feeling a little more confident now? Read on for instructions on how to grow these beauties!
How to Grow Dahlias
1. Choose a location with at least 6 hours of direct sun (the more sun, the better!) and well drained, fertile soil. Compost and all-purpose fertilizer worked into the soil before planting will help.
2. Plant AFTER the threat of frost has passed (about May 15, here in West Michigan). The soil should be warm and well drained.
3. Space tubers about 18” apart. Dig a hole about 4-6" deep and wide enough to accommodate the tuber. Place tuber in the hole with the "eyes" at the top (or lay it on it’s side) and back-fill the hole gently, covering the tuber completely with a few inches of soil.
4. DO NOT WATER after planting, unless the soil is super dry. You want the soil to be just slightly damp. Too much water can cause the tuber to rot. REPEAT: DO NOT WATER. It's also wise to check the weather and avoid planting right before a huge rain storm.
5. Once the plants have sprouted, you may begin watering regularly. When plants reach about 8", begin fertilizing with all purpose liquid fertilizer about twice a month.
6. Pinch the plants when they reach about 12-16", to signal the plant to produce more branches (and more blooms).
7. Plants begin to bloom in late July and produce heavily until the first killing frost of the season.
![IMG_20171111_121012_638[1].jpg](https://images.squarespace-cdn.com/content/v1/582b872529687fd6acb7423d/1522885053209-L1EJTKY2QQ549ZIE6FU4/IMG_20171111_121012_638%5B1%5D.jpg)
Questions? Comments? Just let us know.
Happy planting!